Atelier Training is a way of learning how to draw and paint realistically. These articles teach you everything you need to know about what ateliers are and how they can help you.
If you just started atelier training and feel like you are going crazy, relax, that’s normal.
One of the most challenging aspects of atelier training for students is that their eye starts to see things better than their hand can manage their materials. Eventually your hand and materials handling will catch up, but only to where your eye was a few weeks earlier. Now your eye sees even better, and you are once again in the frustrating position of trying to make your materials do something more nuanced that your eye can now see, but your hand has not yet practiced enough to master.
When I first started atelier training, I would lay down a line going downward from left to right, only to have it corrected by my instructor as going upward. I was literally making the angle of the line as far away from correct that was possible! How could I not SEE that?
I found these instances so frustrating. I felt dumb, too, as it seemed so obvious once it was pointed out to me.
But it is important to keep in mind that by completing atelier exercises (such as Bargue Plate drawings) that are tried and true methods for improving artists’ vision, that you really will learn to see more. Through atelier training, you will discover how to see more nuance. More big ideas. More values. More colors. More of just about everything.
So, just because you can’t see as well as your atelier instructor this very minute, don’t despair. You will if you keep getting yourself in front of your easel to work every day. Some days are harder than others, but anyone who puts in the work will see better, and have more choices about their artwork because of it.
When atelier training, it’s hard to ever know where you stand in the grand scheme of seeing. The better your eye gets, the more dissatisfied you become with your current level of work. The eye always improves before the hand, and it takes courage to keep putting one foot in front of the other.
The truth is that you never really “arrive”. The work you admired your first year in the atelier, thinking that if only you could paint or draw like that you would be truly happy, looks very mediocre to you by the time you finish your studies. Your eye has improved its ability to see and now you want to achieve an even higher level of vision in your next painting.
This may be a depressing notion to some, but it is well-understood among trained artists. There is an anecdote from Leonardo Da Vinci that is often thrown around in atelier circles, but which may or may not be true as I have never found the original source. But it claims that when Leonardo was in his later years, that he lamented that if only he had 80 more years, then he could really learn how to draw. I imagine this is often repeated by instructors as it reflects the attitude of those who have worked in atelier methods for many, many years.
Learning to see is a never-ending journey to be enjoyed at every stage. Instead of feeding the frustration that your hand has not yet reached the level of your eye, rejoice in knowing that once again you have improved the ability of your eyes to see.
Save yourself frustration and hassle by setting up your painting studio space the right way.
Learning how to draw and paint at the highest levels is challenging enough – there is no need to make the task even harder with an inadequate painting studio setup. In order to make your painting studio space work for you, you need to set up your painting studio space in a way that allows you to set your easel properly, control your light, and place your still life setup in the right location in relation to your easel.
An extraordinarily common mistake I see students make is that they set up their easels so that they are tilting backwards quite a bit. This is bad! You want your canvas or drawing board to be in the most vertical position on your easel that you can make it. When your work surface is tilted away from you, it creates distortion in your work due to perspective. Having your drawing or painting surface vertical eliminates much of this distortion.
Another common mistake I see is students sitting at their easel in their painting studio. One of the greatest assets you have as an atelier student is to stand back far away from your work. It helps you see big, which is one of the most important skills to learn in atelier training. If you do not have room to stand back when you set up your painting studio, you are depriving yourself of a huge advantage for progressing in your realistic drawing and painting skills.
If you have physical limitations that prevent you from standing for long periods, I strongly encourage you to place a second chair further away from your easel so that you can see it from a distance in between painting sessions.
There are two approaches to lighting for a painting studio. One is to use natural light, and the other is to use artificial light. Both approaches have their pros and cons. Determine your preference in order to set up a painting studio for your needs.
Natural Light
Pros: Subtlety of light on the forms of your subjects, more nuance of color visible when painting, atmospheric with a wide range of edges visible.
Cons: You cannot work after sundown, the light can shift the colors of your subjects depending on how overcast it is, and ideally you need north-facing light in order to have the most consistent lighting which limits the potential locations of your studio space.
Pros: More defined lights and shadows which make it easier to draw and paint, you can work any time day or night, you can set up anywhere
Cons: Sometimes it is challenging to light your easel without polluting the lighting of your subject, working in a dark room with spots on your subject and easel can be hard on the eyes, there is less nuance of value and color on your subject when lit by a spotlight.
How to set up a painting studio – Natural Light Setup
If you want to work with natural light in your painting studio, you need to be able to control the light as much as possible. Ideally, you want to find a North-facing window.
The worst option is a South-facing window. This is because you don’t want any direct sunbeams hitting your subject, only indirect light.
You can make do with a West- or East-facing window as long as you understand what the limitations of them are.
You never want direct sunbeams on your subject. Instead, you want to make an oculus out of your window that allows only some of the indirect sunlight to hit your still-life setup. You can do this by blocking out the lower half of your window. This allows light to enter your studio from above and creates a nice angle of light for lighting your subject.
In the image below, notice how the lower half of the window is covered with a curtain. If you have other windows in your studio space, you want to block them out entirely. You want only one light source coming from one direction on your subject.
How to Set Up a Painting Studio – Artificial Light Setup
This is the recommended painting studio setup for anyone who is new to atelier training. Artificial light creates clearly-defined shadows, bed-bug lines and cast shadows, which are all very helpful when drawing and painting using atelier methods for the first time. Artificial light also makes values when shading more obvious.
The most important thing about setting up with artificial light is to make sure that the light on your easel does not pollute the subject which is lit by its own separate light. See the image below and notice how the light on the easel is raking from upper left to lower right across the easel board.
The easel light is placed in a way where light pollution from the light on the easel will not get into the still life setup. It also prevents your arm from casting a shadow on your canvas in the area you are working. If you are left handed, you will want to set up the lighting in reverse.
I recommend these lights for your painting studio setup:
Option 1: A small, easy to maneuver light. My favorite thing about this light is that it has both warm and cool lighting options. (Natural light is cool, light from interiors is often warm. So, depending on your subject you have more control over the entire mood of the setup.)
Option 2: This light has more stability than the first option because it does not have a bendy feature and instead uses solid arms to hold its position. It can be a but more bulky, but it is a solid option to use in the studio.
Where does your still life go?
Finally, to perfect your painting studio setup you want to be smart about where you place your still life setup.
If you are right handed, you want to place the still life to your left. This way, you do not have to look over your arm in order to get a clear view of your setup. Left-handed folks will want to place their subjects to their right.
If you are working sight-size, you will want to align the front edge of your shadow box with your drawing board.
Generally speaking, you do not want to have to look too far up or too far down in order to see your subject. This is why I recommend to set up your painting studio by placing both your drawing board and the center of your box at eye level. See the image below.
You may have a specific artistic purpose to place your still life higher or lower than this recommended location. But if you are new to atelier training, you can literally save yourself some neck aches by being smart about your still life placement in relationship to your easel.
I hope that this article helps you with how to set up a painting studio that works for you and propels you into a period of prolific art-making.
What do you think about this easel setup? Do you do something different at home? Let me know your thoughts on how to set up a painting studio in the comments below.
When starting out, having the right oil paint materials list is essential for creating successful artwork. So many students purchase inferior or unhelpful materials, sabotaging themselves and their artwork before they even start. Skip directly to the Oil Paint Materials List, or continue reading for contextual information about the materials. Introduction to Oil Painting Materials […]
Creating a stunning painting composition isn’t just about the rule of thirds or following mathematical formulas. In fact, those rules aren’t very helpful, and can even harm your compositions, if you don’t understand the big underlying concepts of pictorial design. A well-balanced composition draws viewers in, directs their eye through the piece, helps to tell […]
Realistic portrait drawing is one of the most rewarding yet challenging skills an artist can develop. Whether you are a beginner struggling with basic proportions, or an experienced artist looking to refine your technique, this article will help you to draw better realistic portraits. Capturing a likeness requires a solid understanding of structure, feature placement, […]
Black is an essential color in any oil painter’s palette, yet not all black oil paints are the same. Different black oil paints offer different drying times and mixing behaviors that can greatly impact your painting. In this guide, we’ll explore the most common black oil paints, including Ivory Black, Lamp Black, Mars Black, and […]
White is the most used color in oil painting, but not all white oil paints are created equal. Artists often struggle to choose the right white for their work, as different types have varying properties that affect color mixing, drying time, and durability. In this guide, we’ll explore the most common white oil paints and […]
Check out these articles featuring the School of Atelier Arts. Redfin This article draws on SAA Director Mandy Theis’ knowledge of setting up a studio. By intentionally controlling light the way we teach in our online Ateliyay! Painting Bootcamp, any content creator can have a more conducive place to work.
Learning how to draw realistically was a necessary skill taught in much formal education up until the dawn of the 20th century.
DRAWING ACCURATELY IS AN IMPORTANT SKILL
Being able to accurately draw ideas for a bridge was as necessary of a skill for engineers as calculating its structural integrity. It is rare indeed today to find a civil engineer in a drawing classroom, but historically it was necessary to teach engineers a visual language to accurately express their ideas .
At the turn of the last century, drawing training for artists, engineers, and the generally educated population drastically changed.
At the turn of the last century, a Modernist theory took root that training an artist would ruin an artist’s potential creativity.
As a result of this, many of the early Modernists who had classical training themselves, such as Mondrian and Picasso, chose to purposefully not train the next generation of artists in nuanced and complex visual literacy skills.
Multiply the application of this extreme theory over several generations and the result is that hundreds of years of inherited artistic knowledge and discoveries, tirelessly handed down from artist to artist for centuries, became almost entirely lost by the 1980s.
HOW LACK OF ART SKILLS LEAD TO MISCONCEPTIONS ABOUT LEARNING ART
As general education moved away from drawing training as a core school subject, many misconceptions have taken root in popular imagination about how drawing and art happen.
Today I often hear that one inherently “has” or “doesn’t have” artistic talent, or that so-and-so can’t even draw a stick figure, or that an otherwise literate person must not be capable of becoming an artist because he or she doesn’t have the indefinable and elusive “it”.
This is nonsense.
It is also an extreme disservice to anyone who wishes to learn how to draw and paint. Anyone can have “it” when they have access to teachers with visual literacy skills. And luckily today, these skills are accessible in places called “ateliers” and can be learned from anyone that has what is known in our contemporary world as “atelier training.”
ART SKILLS = SEEING BETTER
Learning to draw, paint, or sculpt realistically is about training your eye to see better. And the ability to see with nuance and sensitivity is a skill that can help all of humankind, not just artists.
Imagine a scientist who observes a barely perceptible color change in the petri dish that his eye was trained sensitively enough to see. Or the surgeon who can make a smaller incision in exactly the right place on the first try because she understands the subtle surface forms of the human figure.
ART SKILLS MATTER
Visual literacy is extremely important and is experiencing a renaissance due to the desire of people wishing to understand how they can glean more knowledge from a single glance. Now, more and more people are connecting with ateliers to pursue realistic drawing and painting skills, and even more importantly, improve how they literally see the world.
When starting out, having the right oil paint materials list is essential for creating successful artwork. So many students purchase inferior or unhelpful materials, sabotaging themselves and their artwork before they even start. Skip directly to the Oil Paint Materials List, or continue reading for contextual information about the materials. Introduction to Oil Painting Materials […]
Creating a stunning painting composition isn’t just about the rule of thirds or following mathematical formulas. In fact, those rules aren’t very helpful, and can even harm your compositions, if you don’t understand the big underlying concepts of pictorial design. A well-balanced composition draws viewers in, directs their eye through the piece, helps to tell […]
Realistic portrait drawing is one of the most rewarding yet challenging skills an artist can develop. Whether you are a beginner struggling with basic proportions, or an experienced artist looking to refine your technique, this article will help you to draw better realistic portraits. Capturing a likeness requires a solid understanding of structure, feature placement, […]
Black is an essential color in any oil painter’s palette, yet not all black oil paints are the same. Different black oil paints offer different drying times and mixing behaviors that can greatly impact your painting. In this guide, we’ll explore the most common black oil paints, including Ivory Black, Lamp Black, Mars Black, and […]
White is the most used color in oil painting, but not all white oil paints are created equal. Artists often struggle to choose the right white for their work, as different types have varying properties that affect color mixing, drying time, and durability. In this guide, we’ll explore the most common white oil paints and […]
Check out these articles featuring the School of Atelier Arts. Redfin This article draws on SAA Director Mandy Theis’ knowledge of setting up a studio. By intentionally controlling light the way we teach in our online Ateliyay! Painting Bootcamp, any content creator can have a more conducive place to work.
To be clear, ALL of Juliette’s books are worth reading, but this is my favorite for introducing art teachers to the concept of atelier training. This atelier book follows a series of approachable drawing exercises from simple lines all the way through to more complex tasks.
My favorite part? It was designed with the intention that you draw directly in the book! It is an instruction manual and atelier sketchbook combined into one fabulous package for learning how to draw realistically.
This book is so popular that it sold out the original print run very quickly. But fear not, the author assures me it will be back in stock soon!
This is one of the most recommended atelier books I know of. It is mandatory reading for first year students in many ateliers, and for a good reason. This atelier book gives a detailed overview of drawing techniques, atelier vocabulary, and applications of a wide variety of visual concepts.
If you are excited about atelier training and simply can’t wait to start practicing realism drawing skills, this book is an outstanding guide.
I also recommend this atelier book to art teachers looking for technical drawing exercises for students, as there are many great concepts within these pages that can be mined for lesson plans.
Although I have not had the pleasure of training with this artist personally, this atelier book on light was especially helpful to me as a new atelier student.
Learning how to turn form (shade) can be a confusing and challenging process. It becomes much easier, however, if you understand the underlying concepts of how light works and why, which is what this atelier book lays out in a clearly understandable way. If you are struggling with shading, this book will help you.
Once upon a time in France, one of the most highly regarded artists of his age, Gérôme, bemoaned the fact that students were coming into his atelier with drawing skills below what he thought they should have. So, he started putting together a national drawing curriculum made up of drawing plates that would be widely distributed throughout the country.
These lithographs became the bedrock of much 19th century drawing education and are still incredibly useful today for learning atelier drawing skills. In fact, these plates are so important that I made an entire free Bargue Drawing Course on YouTube teaching you how to copy them correctly and extract the most drawing knowledge out of them in the process.
This atelier book includes the full selection of Bargue plates and is a must-have for students pursuing atelier training, especially if you are trying to go it alone. I am often asked by students what they can do to learn realistic drawing skills if they can’t attend an atelier, and my answer is always to get this book and copy as many plates, correctly, as you can.
When starting out, having the right oil paint materials list is essential for creating successful artwork. So many students purchase inferior or unhelpful materials, sabotaging themselves and their artwork before they even start. Skip directly to the Oil Paint Materials List, or continue reading for contextual information about the materials. Introduction to Oil Painting Materials […]
Creating a stunning painting composition isn’t just about the rule of thirds or following mathematical formulas. In fact, those rules aren’t very helpful, and can even harm your compositions, if you don’t understand the big underlying concepts of pictorial design. A well-balanced composition draws viewers in, directs their eye through the piece, helps to tell […]
Realistic portrait drawing is one of the most rewarding yet challenging skills an artist can develop. Whether you are a beginner struggling with basic proportions, or an experienced artist looking to refine your technique, this article will help you to draw better realistic portraits. Capturing a likeness requires a solid understanding of structure, feature placement, […]
Black is an essential color in any oil painter’s palette, yet not all black oil paints are the same. Different black oil paints offer different drying times and mixing behaviors that can greatly impact your painting. In this guide, we’ll explore the most common black oil paints, including Ivory Black, Lamp Black, Mars Black, and […]
White is the most used color in oil painting, but not all white oil paints are created equal. Artists often struggle to choose the right white for their work, as different types have varying properties that affect color mixing, drying time, and durability. In this guide, we’ll explore the most common white oil paints and […]
Check out these articles featuring the School of Atelier Arts. Redfin This article draws on SAA Director Mandy Theis’ knowledge of setting up a studio. By intentionally controlling light the way we teach in our online Ateliyay! Painting Bootcamp, any content creator can have a more conducive place to work.
You can make a complete mess of your oil painting palette, or you can set it up the smart way.
Nothing is worse than being really into your painting only to discover your palette has left a trail of oil paint all over you, your space, and pretty much everything within a 5′ radius. But if you set up your oil painting palette the smart way, it minimizes mess while maximizing painting time.
If you are using a brand new palette, you need to prime it by adding thin coast of oil to both sides and allowing it to soak into the raw wood. Make sure you never leave an oil-soaked rag lying around as it can spontaneously combust!
If you add paint onto an unprepared palette, it will leave colored stains. When you build up a nice patina of oil on your palette, it creates a desirable mixing surface. Learn how to safely prep a palette.
Know Where the Paint Goes
First, make sure that when you place paint on your palette that you place it on the outside edge. This may seem counterintuitive because it feels safer when our paint is in the middle.
But to use a palette most effectively, you also need space to mix your colors. And the more space, the better when it comes to keeping you in a steady work flow. Without enough space to mix, you have to interrupt your painting session to make a clean mixing spot on your palette.
This is why artists place their paint on the outside edge of the palette, as it maximizes the amount of real estate for mixing their colors on the interior. See the illustration below.
The next most important step when setting up your palette is to make sure you place your paint on the outside edge in the correct order.
If you place light colors directly next to dark colors, you are more likely to pollute the colors. If instead, you keep your light colors as far away as possible from your dark colors, you are less prone to cross-contamination.
New to Oil Painting? Use These Colors.
If you aren’t sure which colors to put on your oil painting palette, fear not! Here is a handy guide for a basic color palette that can help you tackle most painting challenges.
Ivory Black
Ultramarine Blue
Viridian Green
Cadmium Red Light
Cadmium Yellow
Titanium White
I hope you now have confidence on how to set up an oil painting palette that minimizes mess and maximizes painting time.
Want to learn more about oil painting? Make sure to join our mailing list for tips, tricks, and lessons.
When starting out, having the right oil paint materials list is essential for creating successful artwork. So many students purchase inferior or unhelpful materials, sabotaging themselves and their artwork before they even start. Skip directly to the Oil Paint Materials List, or continue reading for contextual information about the materials. Introduction to Oil Painting Materials […]
Creating a stunning painting composition isn’t just about the rule of thirds or following mathematical formulas. In fact, those rules aren’t very helpful, and can even harm your compositions, if you don’t understand the big underlying concepts of pictorial design. A well-balanced composition draws viewers in, directs their eye through the piece, helps to tell […]
Realistic portrait drawing is one of the most rewarding yet challenging skills an artist can develop. Whether you are a beginner struggling with basic proportions, or an experienced artist looking to refine your technique, this article will help you to draw better realistic portraits. Capturing a likeness requires a solid understanding of structure, feature placement, […]
Black is an essential color in any oil painter’s palette, yet not all black oil paints are the same. Different black oil paints offer different drying times and mixing behaviors that can greatly impact your painting. In this guide, we’ll explore the most common black oil paints, including Ivory Black, Lamp Black, Mars Black, and […]
White is the most used color in oil painting, but not all white oil paints are created equal. Artists often struggle to choose the right white for their work, as different types have varying properties that affect color mixing, drying time, and durability. In this guide, we’ll explore the most common white oil paints and […]
Check out these articles featuring the School of Atelier Arts. Redfin This article draws on SAA Director Mandy Theis’ knowledge of setting up a studio. By intentionally controlling light the way we teach in our online Ateliyay! Painting Bootcamp, any content creator can have a more conducive place to work.
Bargue Plates are typically the first project ateliers have students complete. The idea is to copy plates (master copies) in a specific way in order to learn how artists observe and translate visual information.
The Barge Plates range from easy to difficult. They were created with the intention that students would copy many of them in order to establish solid drawing skills.
Bargue plates teach you how to find big shapes, use repeating lines, divide light from shadow, and more.
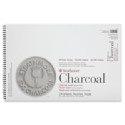
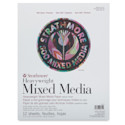
Strathmore 500 drawing paper is the paper used in the Bargue video series. The second pad has tinted paper which is also used in the Bargue Plate demonstration. White paper is also available if you prefer.
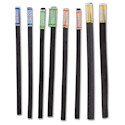
I suggest you get some each of the hard, medium, and soft charcoal to complete the online Bargue course as these are what is used in the demonstration.
You will need sandpaper to sharpen your charcoal to a fine point, and I have found these to be very useful for that purpose.
Different students tend to prefer different grits of sandpaper. These sandpaper blocks allow you to experiment with several different grits to figure out which you like best.
I often use a rougher grit in the beginning, and a finer grit to get a good point without accidentally snapping my charcoal.
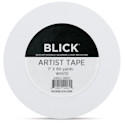
Artist tape is important to tape your papers but without ripping them up. The last thing you want is to ruin a perfect drawing trying to remove the tape.
Do not skip this one. Skewers are a deceptively simple art supply that will change your life. It is no hardship to have many on hand because they bend and warp over time, and you are bound to lose one or two. The 16″ size is especially useful for larger drawings, but you may not need something so long for a typical Bargue Plate.
A word of warning: If you plan on using these in the art classroom, I encourage you to sand down the points!
A kneaded eraser is a must. It is so cheap, please do not skip this art supply. Nothing is more infuriating than trying to erase pencil widths with a nasty pink bulky eraser that streaks your paper.
You do not HAVE to have a drawing board, but it makes your life a whole lot easier if you do. These are simple and light and easy to tuck away when not in use.
If you buy larger sizes, you can always cut them down to the proportion of your project. You can purchase just one foam core drawing board from your local craft store if you don’t think you will need this many.
Again, you do not HAVE to have an easel, but it will make your life a whole lot easier when drawing a Bargue Plate for the first time. Easels keep you from looking at your paper from a skewed angle which creates distortion in your drawing.
This particular easel folds down to a very small portable size, but is pretty sturdy and solid when upright. It is the one I use in my studio and in my art classroom.
If you are looking to purchase a set of easels for your art room, check out this article on best classroom easels.
You definitely want to make sure to keep your charcoal safe after taking all the trouble to sharpen it correctly. I found that this paintbrush box does a beautiful job of keeping my charcoal tucked safely away when not in use. It will save you a few tears the first time you accidentally drop your box of freshly sharpened charcoal.
This book gives a detailed background on the history of Bargue Plates as well as beautiful reproductions of every plate. If you are serious about pursuing atelier training, working your way through drawing the plates in this book will get you far, especially if you use the method in this free online Bargue drawing course.
So, this is my must-have supply list for drawing Bargue plates. I hope this makes it easier for you to jump in and get started on your atelier journey today!
Discover the techniques that are congruent with you artistic soul.
“How should I draw?” is likely a question students have asked since ateliers were invented. Although I teach my students many of the same techniques at the same time, I have found that the answer to the question “How should I draw?” is different for each and every student.
As artists develop their skills, certain techniques call out to some more than others. For one student, a specific technique yields superb results. To another student, the same technique inspires abhorrence.
My advice to all students of atelier training: do not torture yourself long term with drawing techniques you detest. Find the ones that match your personality and desired outcomes for your art.
This is not to say that art is not hard work, however. Often you have to learn how to draw at a certain level before you have enough information to know if certain techniques are useful to you. Only then can you discard the ones which are not. But eventually your pursuit of technical skills in art will force choices.
The Lightbulb Problem
For example, an electric lightbulb is brighter than the whitest paint. Additionally, it is often a yellow hue. If you add yellow to your white to show the correct hue, you will darken the value of the color. If you leave out the yellow to ensure that the white is the lightest your paints can achieve, you have to sacrifice the yellow hue.
So what kind of artist are you? Do you prefer to have the lighter value and sacrifice the yellow? Or do you keep the yellow and sacrifice the lighter value?
There is no right or wrong answer here, only artistic preference. An argument can be made for either choice. But an artist who is fascinated by color is likely to vote for adding the yellow. An artist that is delighted by value contrasts is likely to choose the white.
Your Preferred Techniques Are As Unique As Handwriting
I cannot emphasize enough that every student’s internal artist is as unique as their handwriting. Many students want their work to look like [insert any famous artist here]. But one artist cannot draw like another, even if they so wish. A Reubens copy of a Leonardo Da Vinci painting will always scream, “REUBENS!!!!”
What students can do is properly identify the qualities that they admire in an artist’s work, and dedicate time and focus in order to study them.
Depth of technical art knowledge allows students to create the artwork that is congruent with their artistic souls. Work hard to learn everything you can. Then, nurture the skills that fit your artistic personality the closest.
When starting out, having the right oil paint materials list is essential for creating successful artwork. So many students purchase inferior or unhelpful materials, sabotaging themselves and their artwork before they even start. Skip directly to the Oil Paint Materials List, or continue reading for contextual information about the materials. Introduction to Oil Painting Materials […]
Creating a stunning painting composition isn’t just about the rule of thirds or following mathematical formulas. In fact, those rules aren’t very helpful, and can even harm your compositions, if you don’t understand the big underlying concepts of pictorial design. A well-balanced composition draws viewers in, directs their eye through the piece, helps to tell […]
Realistic portrait drawing is one of the most rewarding yet challenging skills an artist can develop. Whether you are a beginner struggling with basic proportions, or an experienced artist looking to refine your technique, this article will help you to draw better realistic portraits. Capturing a likeness requires a solid understanding of structure, feature placement, […]
Black is an essential color in any oil painter’s palette, yet not all black oil paints are the same. Different black oil paints offer different drying times and mixing behaviors that can greatly impact your painting. In this guide, we’ll explore the most common black oil paints, including Ivory Black, Lamp Black, Mars Black, and […]
White is the most used color in oil painting, but not all white oil paints are created equal. Artists often struggle to choose the right white for their work, as different types have varying properties that affect color mixing, drying time, and durability. In this guide, we’ll explore the most common white oil paints and […]
Check out these articles featuring the School of Atelier Arts. Redfin This article draws on SAA Director Mandy Theis’ knowledge of setting up a studio. By intentionally controlling light the way we teach in our online Ateliyay! Painting Bootcamp, any content creator can have a more conducive place to work.
Fret not my friend, this is your go-to artist dictionary for all those wonky terms people who draw and paint realistically like to throw around. This is an ever expanding project, so check back regularly for the newest definitions!
Atelier: The French word for “studio”. A place where artists learn realistic drawing, painting, and sculpting skills.
BedBug Line: Also known as a core shadow, it is a line that is slightly darker on the edge of a shadow that is the exact place where a form turns from light towards shadow. This term is rarely defined in other artist dictionaries.
Chroma: The intensity of a color. The opposite of neutral. A very chromatic color is often described as “bright”. A stop sign is a very chromatic red. Bricks are also often red, but not as intense as a stop sign. Bricks are less chromatic than a stop sign.
Color Wheel: A circle that shows colors. Some color wheels show just the hue. Some show hue + chroma, or hue + value.
Contour Line: A line that is used to describe the shape of something.
Envelope: A small number of straight lines that represent the overall biggest shape of your subject.
Ferrule: The part of a paintbrush that attaches the bristles to the handle.
Hue: The location of a color on the outermost circle of the color wheel. Red, orange, yellow, green, blue, and purple are all hues. If a blue hue leans green, the hue is a blue-green. Hues are sometimes confused with color intensity. Hues are the most pure form of every color. So a brown color would be described as having an orange hue that has been neutralized.
Local Color: The base color of a subject. For example, the base color of an apple might be red, even if it has bright yellow highlights are dark blue shadows. Local color is an important word for any artist dictionary
Neutral: The opposite of “chroma”. Every color has its most intense version, and also a version that is so close to a greyish neutral that it is hard to tell there is any color to it at all. There is a scale from chroma to neutral that every hue has, from most intense to least intense. When colors are less intense, they are described as neutrals. A bright orange fruit would be described as a chromatic orange. A wood floor is still orange in hue but is more neutralized than an orange. Then there is a wall that seems almost grey but has the barest hint of orange to it, which would be described as a very neutralized orange.
Notional Space: The proportions of your subject if you were to imagine a box going around it and touching it on all sides.
Outer Contour: Similar to a contour but describes specifically the outer most shape of a subject.
Proportion Box: Another term for Notional Space.The proportion box represents the amount of space your subject takes up if you were to imagine a box going around it and touching it on all sides.
Value Scale: The standard atelier value scale has 9 increments of value from darkest to lightest. 1 represents the lightest and 9 represents the darkest.
Are there words you would like to see added to this dictionary? Let me know in the comments below.
When starting out, having the right oil paint materials list is essential for creating successful artwork. So many students purchase inferior or unhelpful materials, sabotaging themselves and their artwork before they even start. Skip directly to the Oil Paint Materials List, or continue reading for contextual information about the materials. Introduction to Oil Painting Materials […]
Creating a stunning painting composition isn’t just about the rule of thirds or following mathematical formulas. In fact, those rules aren’t very helpful, and can even harm your compositions, if you don’t understand the big underlying concepts of pictorial design. A well-balanced composition draws viewers in, directs their eye through the piece, helps to tell […]
Realistic portrait drawing is one of the most rewarding yet challenging skills an artist can develop. Whether you are a beginner struggling with basic proportions, or an experienced artist looking to refine your technique, this article will help you to draw better realistic portraits. Capturing a likeness requires a solid understanding of structure, feature placement, […]
Black is an essential color in any oil painter’s palette, yet not all black oil paints are the same. Different black oil paints offer different drying times and mixing behaviors that can greatly impact your painting. In this guide, we’ll explore the most common black oil paints, including Ivory Black, Lamp Black, Mars Black, and […]
White is the most used color in oil painting, but not all white oil paints are created equal. Artists often struggle to choose the right white for their work, as different types have varying properties that affect color mixing, drying time, and durability. In this guide, we’ll explore the most common white oil paints and […]
Check out these articles featuring the School of Atelier Arts. Redfin This article draws on SAA Director Mandy Theis’ knowledge of setting up a studio. By intentionally controlling light the way we teach in our online Ateliyay! Painting Bootcamp, any content creator can have a more conducive place to work.
Discover the man who helped change the course of art education and become a founding instructor of the Rhode Island School of Design.
“Landscape” by Edward Mitchell Bannister from the Smithsonian American Art Museum
Edward Mitchell Bannister’s Artistic Journey
You can download our FREE PowerPoint Lesson on this artist here.
Edward Mitchell Bannister (1828 – 1901) made significant contributions to art and art education, and yet he is largely unknown today.
As a Black artist, Bannister often faced extraordinary obstacles to obtain high quality instruction, exhibition spaces, and other career opportunities due to widespread discriminatory policies.
In 1867, the New York Herald ran an especially atrocious article about Black artists, and one phrase particularly caught artist Edward Mitchel Bannister’s attention: “[…] the negro has an appreciation for art while being manifestly unable to produce it.” – New York Herald, 1867
This article inspired Bannister to pursue art at the highest levels. He aggressively studied drawing and painting in private studios in Boston at the famous Boston Studio Building, as well as the Lowell Institute, an outreach education program run by Harvard.
Bannister’s sketch for the now lost painting, Under the Oaks
In 1876 Bannister entered one of the most prestigious competitions in the world for artists in the 1870’s – the Philadelphia Centennial Exhibition. He won 1st prize for his now-lost painting Under the Oaks. When the prize committee discovered Bannister was Black, there was talk of revoking the 1st place prize. However, the other artists insisted that the committee keep to its selection and the exhibit became a powerful rebuke of the New York Herald article’s assumptions about the abilities of Black artists.
Despite Bannister’s incredible success, he was originally blocked from entering the art exhibit where his 1st place painting was displayed. According to historian David C. Driskill, it was
“not until [Bannister] identified himself as the painter of Under the Oaks was he admitted [into the exhibition].” Bannister continued forging a successful pathway as an artist throughout his life, and eventually became a founding member of the Rhode Island School of Design (RISD). RISD was widely regarded as one of the most prestigious art schools in the country during his lifetime, and is still well-known to this day. The university a lasting testament to Bannister’s vision and educational legacy.
Mandy Theis is a licensed art teacher and Director of the School of Atelier Arts. You can follow her on Instagram @mandyfineartist.
When starting out, having the right oil paint materials list is essential for creating successful artwork. So many students purchase inferior or unhelpful materials, sabotaging themselves and their artwork before they even start. Skip directly to the Oil Paint Materials List, or continue reading for contextual information about the materials. Introduction to Oil Painting Materials […]
Creating a stunning painting composition isn’t just about the rule of thirds or following mathematical formulas. In fact, those rules aren’t very helpful, and can even harm your compositions, if you don’t understand the big underlying concepts of pictorial design. A well-balanced composition draws viewers in, directs their eye through the piece, helps to tell […]
Realistic portrait drawing is one of the most rewarding yet challenging skills an artist can develop. Whether you are a beginner struggling with basic proportions, or an experienced artist looking to refine your technique, this article will help you to draw better realistic portraits. Capturing a likeness requires a solid understanding of structure, feature placement, […]
Black is an essential color in any oil painter’s palette, yet not all black oil paints are the same. Different black oil paints offer different drying times and mixing behaviors that can greatly impact your painting. In this guide, we’ll explore the most common black oil paints, including Ivory Black, Lamp Black, Mars Black, and […]
White is the most used color in oil painting, but not all white oil paints are created equal. Artists often struggle to choose the right white for their work, as different types have varying properties that affect color mixing, drying time, and durability. In this guide, we’ll explore the most common white oil paints and […]
Check out these articles featuring the School of Atelier Arts. Redfin This article draws on SAA Director Mandy Theis’ knowledge of setting up a studio. By intentionally controlling light the way we teach in our online Ateliyay! Painting Bootcamp, any content creator can have a more conducive place to work.