Scientific progress is not always recognized in art, but it plays a significant role in aesthetic developments.
Cadmiums
The discovery of cadmiums as a use for pigment had an enormous effect on the trajectory of art. Cadmium reds, yellows, oranges, and greens suddenly and drastically altered the range of colors artists had access to in their palettes.
This art knowledge, in turn, changed the way artists painted.
Having brighter and more chromatic colors on their palettes inspired artists to paint subjects that were previously disappointing to attempt, such as brightly colored landscapes, because they could now come closer to painting their subjects with the colors they observed in nature.
Before artists had access to brighter colors, many focused on using the value of the colors – how light or dark they are – to recreate their scenes on canvas.
With an expanded color range, artists could shift colors instead of values to show three dimensional effects. It was an additional tool now available to painters to use when making artwork.
Not only did artists suddenly have access to many bright colors that are useful for landscape painting, but they had access to another invention in short order: the tube of paint.
Traditionally, artists used pigment powder to grind with oil to create their own paints. This process was time consuming and equipment-heavy, which made it largely impractical for transporting. If artists wanted to paint a landscape, this was most often done by creating sketches in charcoal or watercolor on site, and then completing oil paintings of the landscape in a studio interior.
But when tubes were discovered it made a huge impact on painting practice. Now artists could store their paint for very long periods of time. They could also take large or small amounts with them into the field. This change lead to landscape painting being created on site, and it revolutionized the genre.
When painting on site, artists had more opportunities to closely investigate colors, forms, and other aspects of painting without having to rely on sketches and memory. They could take in more information this way, and landscape painting as a genre exploded. What was previously considered a lesser subject of art became an admired one, and a necessary aspect of studying art at the turn of the last century.
Art Knowledge Builds
When cadmiums and tubes for paint were invented to create new colors and store oil paint, it freed up concepts of painting that could not have been explored without them. These discoveries combined allowed painters to travel outside to paint, as they no longer were tied to their studios to grind their pigments, and to paint with colors that better represented the colors they saw in nature.
These scientific discoveries lead to the ability for painters to expand their palettes and paint outside, and an explosion of landscape painting was the result.
These are just some of the many overlooked scientific advancements in art that shape artwork being made even today.
What other scientific advancements happened throughout the history of art-making? Let me know in the comments below.
Discover how to make your wood painting palettes last years and even get better with age.
Please note that this post contains affiliate links. Additionally, our programs for art teachers are supported by generous donations of paint and Gamsol from Gamblin.
Welcome to the wonderful world of wood painting palettes. Once you adapt to how to care for them, you will never revert back to the white, plastic, impossible-to-clean kind.
Please Note
This how-to article is for using oil paint only. These procedures are not appropriate for acrylic painting.
How to Prep a Wood Palette
The first thing you need to know about wood painting palettes is that they need a little time and attention before you use them for the first time in your classroom. Most wood painting palettes are delivered raw, meaning they have not yet been properly treated for use.
You will need oil (preferably linseed) and a cloth/paper towel.
***WARNING*** Do not EVER leave an oil-soaked rag or paper towel crumpled. It can spontaneously combust. After use, immediately lay flat to dry outside, and always dispose in an outside garbage can. *Disclaimer* SAA is in no way responsible for damage caused by using information provided in this article.
Because oil-soaked rags can spontaneously combust if left crumpled and abandoned, I NEVER let my students prep new painting palettes. I always do these in batches on my own to make sure that there is never an oil-soaked rag lying around where I don’t know about it. The good news is that if you do it correctly, you only have to do it once and your palettes will last years.
So, if I haven’t scared you away from the magic of wood palettes, let’s discover how to prep them.
Rub them down with oil and a cloth. Dab a few drops of oil on the palette, then rub vigorously with a cloth until the wood changes to a slightly darker color.
Use the right amount of oil. The oil should not be dripping off of the palette. If it is, you have used too much. Rather, you should use just enough oil that it quickly absorbs into the wood when moved around by the cloth.
Make sure to cover all the wood on BOTH sides of the palette. If you only oil one side of the palette, it will warp, especially if the palette is made of thinner wood like I prefer to use in the classroom.
Let the oil absorb and dry for several hours, and then repeat this process several times for new palettes.
You only have to do this prepping process for brand new palettes. Once they start being used regularly, your students will maintain the palettes by using proper cleanup procedures.
Proper Clean-Up Procedures for Palettes
Remove all excess oil paint on palette by scraping it with a palette knife. Any useable paint from the class set of palettes can be moved to a central palette and stored in the freezer. The unusable paint should be wiped into a paper towel and discarded. There should be a small amount of paint remaining on the palette. This is good.
Add a few drops of Gamblin Gamsol to the palette and rub over the front of the palette. (This will thin out and pick up the remaining oil paint and distribute it around the palette. Gamsol is the only thinner I would ever use in my classroom as it has almost no smell. It is formulated to evaporate at a slower rate than other options and is by far the least obnoxious choice to use in a classroom setting. You can read more about Gamsol and its safety properties here: https://gamblincolors.com/studio-safety/studio-safety-create-without-compromise/)
Make sure to use the same rag to rub the back side of the palette. It is important to always apply oil (or in this case diluted oil paint which contains oil) to the front AND back of the palette in order to keep it from warping. Do not skip this step! (In this case, the small amount of remnant oil paint is being used to patina the palette. Because the oil is diluted with pigment, the rag/paper towel is not in danger of spontaneously combusting like pure oil on a rag. It should, however, be disposed of in a fire safe trash can or an outside garbage can.)
Never let paint dry on the palettes. Depending on how hardened the paint is when you discover it still on the palette, it may need to be sanded off and the palette re-oiled.
If you follow these procedures for prepping and maintaining your palettes, you will discover that your palettes actually get better with use. Every time they are wiped down, it helps build a nice patina that makes the surface easier for mixing on. You can get years and years out of a class set of palettes when cared for correctly.
Wood Palette RecoMmendationS
I personally prefer to use thin wood palettes in my classroom because they are light, and when you are handling 25+ palettes at a time this makes a big difference. The downside is that they are more prone to warping if you are not very careful about always rubbing down both sides after every use. These palettes are 3mm thick:
If you prefer slightly more robust painting palettes that are less likely to crack or break over time, a standard thickness palette will work quite well in the classroom, even if it is a little heavier. These palettes are 4 mm thick:
What do you think? Are you ready to attempt wood painting palettes in the classroom? Let me know in the comments below.
“What should I draw?” is a common refrain from students in my art classroom. After years of answering this question, I have found that the answer is different for each student.
What calls to your art heart?
As artists develop their skills, certain drawing subjects are more attractive to them than others. For some students, painting people is their JAM. There is gesture, and movement, and anatomy!
To others, the same subject tortures them because people as subjects are constantly moving. I have had students ask the model not to breathe before! These students want to be able to capture the figure perfectly in exactly one position. This is not really possible when drawing from life because, as it turns out, people need to breath.
My advice to all atelier students: do not torture yourself with drawing subjects you detest. Find the subjects that are the best match for your artistic personality and gifts.
That is not to say that you shouldn’t learn how to draw a wide variety of subjects, especially as you are developing your skillset. It is extremely important to seriously attempt drawing a broad variety of subjects before making any binding decisions about what your artistic calling is.
Bargue plates, for example, may not always be the most interesting to new atelier students, but they are extremely efficient at helping students develop a strong drawing base.
Once techniques are mastered, however, there comes a time to decide on what exactly it is that you want to draw and paint.
Learn from Chardin
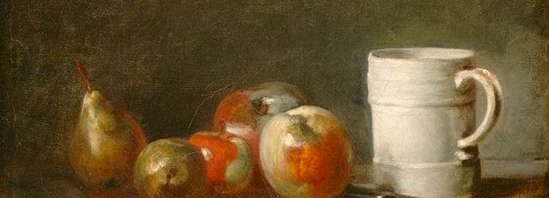
The well-known French artist, Chardin, was frequently admonished by his peers to paint more serious subjects than his beloved still lifes of humble dinnerware and fruits. It was believed by the ruling art elite that truly great artists must be history painters who create multi-figure grand canvasses.
Still Life with a White Mug, oil on canvas by Jean-Baptiste-Siméon Chardin, c. 1764; in the National Gallery of Art, Washington, D.C. 33.1 × 41.2 cm.
But Chardin always painted what he found most admirable, and what suited the techniques that he loved most. And if that subject was a handful of pears, so be it.
Chardin’s clear affinity for chromatic color notes, scumbled layering, and dissolved edges creates a charm that delights viewers to this day and has secured his place in the art history canon. Those “grand” and “serious” and “real artist” history painters? Do you know many of them on a last-name-only basis?
I believe much can be learned from Chardin’s persistence of still life painting at the height of its unfashionableness. Most importantly, how to be true to your individual artistic spirit.
I know a wonderfully talented contemporary painter that makes the most delightful still life paintings. They are imbued with all kinds of nuanced story-telling, and no detail is ever overlooked. This type of painting requires a thorough and patient mindset. The technique requires many passes with a tiny brush. What might appear to be a tedious way of working to me, brings delight to my friend.
I, on the other hand, am a very impatient and brash artist. In fact, I prefer to capture the gesture of something in an exact moment, and there is no time to spare before the magic of the gesture might fade away. I like to paint flowers as they are constantly moving and following the light. I want to paint the whole bouquet at once, as the bouquet as a whole encompasses its own unique gesture.
Painting of daisies in progress by author Mandy Theis
If I want to paint at the level of meticulousness of my friend, I would either have to paint one flower at a time, replacing the flowers in the bouquet as they fade, or replace the bouquet all together with silk flowers.
I can’t stand the thought of painting from fake flowers, whose gestures are never genuine, but whose presence would be required for careful, detailed painting. I adore the gesture of a bouquet as a whole too much to isolate all the parts by painting flowers one by one. Therefore, my technique has evolved in a way that allows me to paint an entire bouquet at a non-meticulous level over the course of the life of that bouquet.
It should be noted, however, that I had to learn how to draw and paint meticulously in order to acquire the skillset I needed to draw and paint more freely. It is very important to me to have the “meticulous painting” tool in my tool box for the times that I do need it, like putting a fine finish on the vase of the flowers.
When studying atelier skills, learn everything you can at a meaningful level. Try drawing everything you can in order to discover what you, as the unique individual you are, actually like.
Be true to yourself. If you find you are drawing something because it is what you are supposed to draw to be a “serious artist” (multi-figure work come to mind), channel your inner Chardin and pursue drawing what resonates with your artistic soul. Maybe you are a master of creatures. Or waves. Or hands.
As long as you draw what calls to you, your audience will always sense it. They will appreciate your chosen subject more deeply by seeing it through your eyes. After all, sharing your inspiration with others is the true gift of great artists.
Do you want to expand your skillset? Check out our Ateliyay! Curriculum that helps students learn technical drawing skills.
What are your favorite subjects to draw? Let me know in the comments below.
Learning how to draw realistically was a necessary skill taught in much formal education up until the dawn of the 20th century.
DRAWING ACCURATELY IS AN IMPORTANT SKILL
Being able to accurately draw ideas for a bridge was as necessary of a skill for engineers as calculating its structural integrity. It is rare indeed today to find a civil engineer in a drawing classroom, but historically it was necessary to teach engineers a visual language to accurately express their ideas .
At the turn of the last century, drawing training for artists, engineers, and the generally educated population drastically changed.
At the turn of the last century, a Modernist theory took root that training an artist would ruin an artist’s potential creativity.
As a result of this, many of the early Modernists who had classical training themselves, such as Mondrian and Picasso, chose to purposefully not train the next generation of artists in nuanced and complex visual literacy skills.
Multiply the application of this extreme theory over several generations and the result is that hundreds of years of inherited artistic knowledge and discoveries, tirelessly handed down from artist to artist for centuries, became almost entirely lost by the 1980s.
HOW LACK OF ART SKILLS LEAD TO MISCONCEPTIONS ABOUT LEARNING ART
As general education moved away from drawing training as a core school subject, many misconceptions have taken root in popular imagination about how drawing and art happen.
Today I often hear that one inherently “has” or “doesn’t have” artistic talent, or that so-and-so can’t even draw a stick figure, or that an otherwise literate person must not be capable of becoming an artist because he or she doesn’t have the indefinable and elusive “it”.
This is nonsense.
It is also an extreme disservice to anyone who wishes to learn how to draw and paint. Anyone can have “it” when they have access to teachers with visual literacy skills. And luckily today, these skills are accessible in places called “ateliers” and can be learned from anyone that has what is known in our contemporary world as “atelier training.”
ART SKILLS = SEEING BETTER
Learning to draw, paint, or sculpt realistically is about training your eye to see better. And the ability to see with nuance and sensitivity is a skill that can help all of humankind, not just artists.
Imagine a scientist who observes a barely perceptible color change in the petri dish that his eye was trained sensitively enough to see. Or the surgeon who can make a smaller incision in exactly the right place on the first try because she understands the subtle surface forms of the human figure.
ART SKILLS MATTER
Visual literacy is extremely important and is experiencing a renaissance due to the desire of people wishing to understand how they can glean more knowledge from a single glance. Now, more and more people are connecting with ateliers to pursue realistic drawing and painting skills, and even more importantly, improve how they literally see the world.
When starting out, having the right oil paint materials list is essential for creating successful artwork. So many students purchase inferior or unhelpful materials, sabotaging themselves and their artwork before they even start. Skip directly to the Oil Paint Materials List, or continue reading for contextual information about the materials. Introduction to Oil Painting Materials […]
Creating a stunning painting composition isn’t just about the rule of thirds or following mathematical formulas. In fact, those rules aren’t very helpful, and can even harm your compositions, if you don’t understand the big underlying concepts of pictorial design. A well-balanced composition draws viewers in, directs their eye through the piece, helps to tell […]
Realistic portrait drawing is one of the most rewarding yet challenging skills an artist can develop. Whether you are a beginner struggling with basic proportions, or an experienced artist looking to refine your technique, this article will help you to draw better realistic portraits. Capturing a likeness requires a solid understanding of structure, feature placement, […]
Black is an essential color in any oil painter’s palette, yet not all black oil paints are the same. Different black oil paints offer different drying times and mixing behaviors that can greatly impact your painting. In this guide, we’ll explore the most common black oil paints, including Ivory Black, Lamp Black, Mars Black, and […]
White is the most used color in oil painting, but not all white oil paints are created equal. Artists often struggle to choose the right white for their work, as different types have varying properties that affect color mixing, drying time, and durability. In this guide, we’ll explore the most common white oil paints and […]
Check out these articles featuring the School of Atelier Arts. Redfin This article draws on SAA Director Mandy Theis’ knowledge of setting up a studio. By intentionally controlling light the way we teach in our online Ateliyay! Painting Bootcamp, any content creator can have a more conducive place to work.
To be clear, ALL of Juliette’s books are worth reading, but this is my favorite for introducing art teachers to the concept of atelier training. This atelier book follows a series of approachable drawing exercises from simple lines all the way through to more complex tasks.
My favorite part? It was designed with the intention that you draw directly in the book! It is an instruction manual and atelier sketchbook combined into one fabulous package for learning how to draw realistically.
This book is so popular that it sold out the original print run very quickly. But fear not, the author assures me it will be back in stock soon!
This is one of the most recommended atelier books I know of. It is mandatory reading for first year students in many ateliers, and for a good reason. This atelier book gives a detailed overview of drawing techniques, atelier vocabulary, and applications of a wide variety of visual concepts.
If you are excited about atelier training and simply can’t wait to start practicing realism drawing skills, this book is an outstanding guide.
I also recommend this atelier book to art teachers looking for technical drawing exercises for students, as there are many great concepts within these pages that can be mined for lesson plans.
Although I have not had the pleasure of training with this artist personally, this atelier book on light was especially helpful to me as a new atelier student.
Learning how to turn form (shade) can be a confusing and challenging process. It becomes much easier, however, if you understand the underlying concepts of how light works and why, which is what this atelier book lays out in a clearly understandable way. If you are struggling with shading, this book will help you.
Once upon a time in France, one of the most highly regarded artists of his age, Gérôme, bemoaned the fact that students were coming into his atelier with drawing skills below what he thought they should have. So, he started putting together a national drawing curriculum made up of drawing plates that would be widely distributed throughout the country.
These lithographs became the bedrock of much 19th century drawing education and are still incredibly useful today for learning atelier drawing skills. In fact, these plates are so important that I made an entire free Bargue Drawing Course on YouTube teaching you how to copy them correctly and extract the most drawing knowledge out of them in the process.
This atelier book includes the full selection of Bargue plates and is a must-have for students pursuing atelier training, especially if you are trying to go it alone. I am often asked by students what they can do to learn realistic drawing skills if they can’t attend an atelier, and my answer is always to get this book and copy as many plates, correctly, as you can.
When starting out, having the right oil paint materials list is essential for creating successful artwork. So many students purchase inferior or unhelpful materials, sabotaging themselves and their artwork before they even start. Skip directly to the Oil Paint Materials List, or continue reading for contextual information about the materials. Introduction to Oil Painting Materials […]
Creating a stunning painting composition isn’t just about the rule of thirds or following mathematical formulas. In fact, those rules aren’t very helpful, and can even harm your compositions, if you don’t understand the big underlying concepts of pictorial design. A well-balanced composition draws viewers in, directs their eye through the piece, helps to tell […]
Realistic portrait drawing is one of the most rewarding yet challenging skills an artist can develop. Whether you are a beginner struggling with basic proportions, or an experienced artist looking to refine your technique, this article will help you to draw better realistic portraits. Capturing a likeness requires a solid understanding of structure, feature placement, […]
Black is an essential color in any oil painter’s palette, yet not all black oil paints are the same. Different black oil paints offer different drying times and mixing behaviors that can greatly impact your painting. In this guide, we’ll explore the most common black oil paints, including Ivory Black, Lamp Black, Mars Black, and […]
White is the most used color in oil painting, but not all white oil paints are created equal. Artists often struggle to choose the right white for their work, as different types have varying properties that affect color mixing, drying time, and durability. In this guide, we’ll explore the most common white oil paints and […]
Check out these articles featuring the School of Atelier Arts. Redfin This article draws on SAA Director Mandy Theis’ knowledge of setting up a studio. By intentionally controlling light the way we teach in our online Ateliyay! Painting Bootcamp, any content creator can have a more conducive place to work.
This guide reviews the pros and cons of 3 different pencil styles as seen through the lens of classroom use.
Before we begin, you should know that I have a controversial stance when it comes to drawing pencils. I do not believe in getting a wide range of pencil hardnesses and softnesses for my students. In fact, I don’t believe in giving them any range. My students get one pencil with one type of lead, that’s it, end of story.
Why? I have found that when first learning how to draw, my students do not know how to extract the full range of lights and darks from one pencil, leading to very grey drawings with very few value steps represented. This problem is compounded when given the choice of multiple different lead hardnesses and softnesses.
Therefore, I give my students a medium lead and teach them to extract its fullest value range – the lightest and darkest values that that particular pencil will yield.
This pencil philosophy has additional benefits. It keeps the art supply costs down as only one pencil per student is needed, and it keeps your teaching from getting derailed by an endless stream of students asking which pencil they should use for which part of their drawing. Most importantly, it teaches students a deftness of touch and mastery of their material by having them focus on only one pencil.
So, if you agree to offer only one pencil to your students, which pencil should it be? Keep reading to discover the pros and cons of 3 different types of pencils for use in the art classroom.
(Please note that this post contains affiliate links. You can read our affiliate policy here.)
PENCIL #1: Refillable Lead Pencils
Refillable lead pencils are the choice of many professional atelier-trained artists.
PROS
Flexibility. The lead is easily changed out for different hardnesses and softnesses so you can experiment to see which lead works the best for your students and the specific drawing projects you are teaching.
Durability. These pencils can take a lot of abuse and still hold up well.
Environmentally Friendly. These pencils are endlessly reusable, so if you are one of those magical art teachers who is super good at keeping your art supplies from walking off, they can be used for many years in the classroom.
Weight. I have found that when students are first learning how to manipulate their pencil in a nuanced way, that weight can help them control their lines better.
Sharpener. Although it won’t give you a perfectly stabby point, there is a sharpener in the cap that will help your students keep points on their pencils.
Lead Extends. The lead extends so that students can get full sweeping movements without the lead losing contact with the paper.
CONS
No attached eraser. As art teachers know, it can be super annoying to have to hand out erasers in addition to pencils.
Expense. This choice is prohibitively expensive for most art teachers, especially those of us who have high rate of art supply atrophy in our classrooms.
I am obsessed with these pencils. These are by far my favorite choice for teaching drawing to students.
PROS:
Affordable. You can get 36 of these for the comparable cost of a single refillable lead pencil.
Eraser. Even though these have a pink eraser that typically makes art teachers cringe, this eraser is actually very, very good. This eraser leaves no colored streaks behind, and has very good pickup of unwanted lines.
Lead Extends. You can extend the lead on these pencils quite far without it breaking off, which allows for sweeping movements of the hand without the lead losing contact with the paper. To me, this is its most important feature for teaching atelier-style drawing skills.
Thin Lead. Are you tired of admonishing your students to please, please, please sharpen their pencils? This lead is thin enough that even when placed in the hands of a “I-will-never-sharpen-my-pencil-and-you-cannot-make-me” student, it stays sharp enough to maintain line clarity.
No Pencil Shavings on Floor. The pencil lead continuously extends. No sharpening is needed – ever – leading to a shaving-free classroom floor.
Recognizable. These pencils are unusual to see in day-to-day use in the school so it is easy to recognize if someone swiped one from the art classroom.
CONS:
Disposable. Unfortunately, there is no way to refill the lead on these pencils. That means once the pencil lead is used up, the entire pencil becomes useless.
Too Good. Other teachers steal these pencils from me constantly. You will see them innocently weild them in staff meetings where you will think about awkwardly confronting them about it but will probably just silently simmer over your impounded goods.
Sometimes, simple can be better. However, to really take advantage of a basic pencil for atelier-style drawing purposes, you need to know how to sharpen them properly with a knife and sandpaper in order to get a longer, exposed section of lead. This tutorial by atelier artist Sadie Valerie will teach you how to properly sharpen a pencil for atelier drawings.
PROS:
Fun. It can be fun to sharpen a lead pencil like they did back in the day. It always makes me feel like a “serious” artist.
Hex Shape. These pencils don’t roll off of surfaces and break. This is an important feature when you spend a lot of time sharpening your pencils as it helps protect your handiwork from the conniving floor.
CONS:
Knives. Probably not a good choice for students to have knives.
Mess. Sharpening traditional pencils with an elongated lead makes a big mess. It is best done over a trash can, so you would need a class set of trash cans. Which means your school’s janitor probably won’t like you very much either.
Breakage. These pencils are easy to break when the lead is extended. This can cause frustration for students. It also means you go through pencils faster.
Time. It takes a lot of time to sharpen pencils this way. If you have 45 minute class times, this probably isn’t the right solution for you as sharpening a pencil can easily take up half of that time.
That completes our review of the 3 major types of pencils for classroom use. What do you think of these reviews? Which pencils do YOU prefer to use in your classroom? Let me know in the comments below.
When starting out, having the right oil paint materials list is essential for creating successful artwork. So many students purchase inferior or unhelpful materials, sabotaging themselves and their artwork before they even start. Skip directly to the Oil Paint Materials List, or continue reading for contextual information about the materials. Introduction to Oil Painting Materials […]
Creating a stunning painting composition isn’t just about the rule of thirds or following mathematical formulas. In fact, those rules aren’t very helpful, and can even harm your compositions, if you don’t understand the big underlying concepts of pictorial design. A well-balanced composition draws viewers in, directs their eye through the piece, helps to tell […]
Realistic portrait drawing is one of the most rewarding yet challenging skills an artist can develop. Whether you are a beginner struggling with basic proportions, or an experienced artist looking to refine your technique, this article will help you to draw better realistic portraits. Capturing a likeness requires a solid understanding of structure, feature placement, […]
Black is an essential color in any oil painter’s palette, yet not all black oil paints are the same. Different black oil paints offer different drying times and mixing behaviors that can greatly impact your painting. In this guide, we’ll explore the most common black oil paints, including Ivory Black, Lamp Black, Mars Black, and […]
White is the most used color in oil painting, but not all white oil paints are created equal. Artists often struggle to choose the right white for their work, as different types have varying properties that affect color mixing, drying time, and durability. In this guide, we’ll explore the most common white oil paints and […]
Check out these articles featuring the School of Atelier Arts. Redfin This article draws on SAA Director Mandy Theis’ knowledge of setting up a studio. By intentionally controlling light the way we teach in our online Ateliyay! Painting Bootcamp, any content creator can have a more conducive place to work.
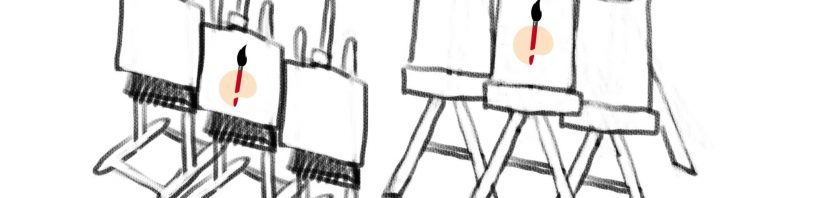
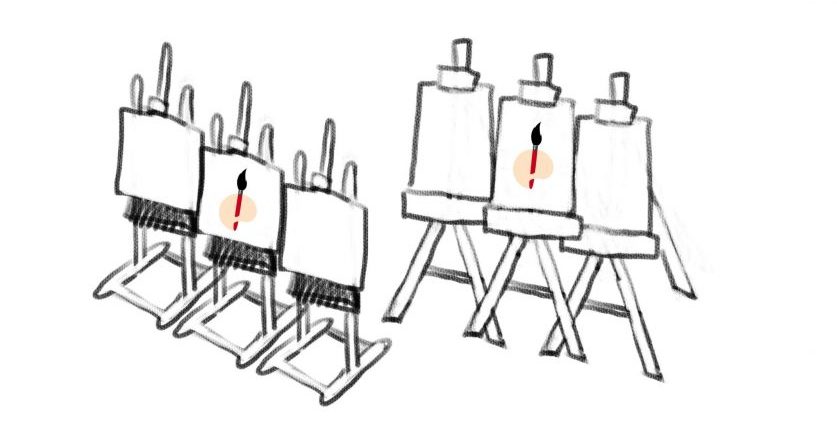
Discover the best art easel style for your teaching needs.
There are 2 major easel types that are useful for teaching art to large groups of students. There are pros and cons of each kind of art easel, and these reviews will help you find the right match for your art classroom needs.
Easel Type #1: H-Frame
This is the most sturdy and least tippy easel style. These qualities make it a good choice for middle school classrooms where students might not have a good understanding of how much space their growing bodies take up and consequently run into things frequently.
Although they can collapse, it is a cumbersome process so it is best to use this art easel style if you intend to keep them up most of the time. They also have a larger floor footprint because the bases cannot be staggered like they can with A-frame easels. H-frame easels also take up a fair amount of space when collapsed, so this easel type is best for spacious classrooms.
Although not always true, H-frame easels tend to be more expensive than other styles. If you are committed to using art easels as your primary art-making tool in you classroom and your budget is generous, this could be the right easel style for you.
• You are committed to using easels and will leave them up most of the time
• You have a fair amount of space in your classroom
• You work in a school that financially supports their arts programs
H-Frame Easels are probably not a good choice for you if
• You want to use easels only part of the time and intend to set them up and take them down often
• You have an overcrowded classroom or very little space
• You have a miserly budget from a Scroogey school board
Recommended H-Frame Easel
This H-Frame Easel does the basics very well, like holding a drawing board vertical. It isn’t encumbered by lots of extras that you don’t want or need in your classroom (such as extra shelves at the bottom that make it difficult to fold and store).
This H-frame easel does come with the choice between “tray” or “tray and storage”. I recommend getting the “tray and storage” option. It is slightly more expensive but gives a landing place for pencils, brushes, and other art room accoutrement that might otherwise be rolling around on your floor.
A-frame easels are my personal favorite choice for classroom use, but with the caveat that you have to get the right A-frame easel. A-frame easels tend to be the most economical option, and this attribute seems to spawn a fair amount of very low quality, practically useless easels that you definitely don’t want to get stuck with.
A good A-frame art easel is fairly sturdy, has some weight to it, and has a fully adjustable slant and fully adjustable board-holders.
Avoid any A-frame art easel that has only one setting for a slant, or a small number of notches to choose from to set the slant, as these are completely pointless. (This is because the most important advantage of using an easel is to eliminate distortion when drawing. If the only setting the easel has is on a slant, most of the benefits of using easels disappear. You want to be able to place drawing boards in a vertical position to eliminate distortion when drawing.)
A-frame easels tend to be easier to collapse than other models, and take up less space when collapsed. The three “feet” of the easel allow you to stagger the easels in a way where you can pack them tightly together in a smaller classroom space.
They tend not to be as heavy as H-frame art easels which makes them easier to move around but slightly more prone to tipping. Investing in high quality A-frame easels helps with potential tipping problems.
A-Frame Easels are a good choice for you if
• You have a small or crowded classroom
• You need to collapse easels and store them often
• Your students are only a little bit clumsy and not super likely to bump the easels often
A-frame Easels are probably not a good choice for you if
• Your budget is so tight that you are tempted to get the cheap worthless ones on a permaslant. Don’t do it, you are better off with no easels.
• Your students are prone to knocking things over
Recommended A-Frame Easel
The Stanrite 500 art easel is absolutely the best easel I have ever used in a classroom setting. It is metal instead of wood, which makes it super durable. I have seen students drop, tip, crash, knock, and otherwise create acts of violence against these easels and there is nary a ding on them.
Metal also solves an easel maintenance problem, as wood easels will eventually strip screws over long periods of use. These use a screw and wing nut system, which are easily replaced with basic supplies from your local hardware store if they wear out.
They fold up easily and relatively flat for easy storage in the classroom. They can collapse partially by pulling up the back leg and stacking them 5-10 deep against a wall. Or they can collapse fully, where the bottom legs fold upward and they are small enough to carry on a subway train if need be.
These easels can handle super small to quite large artworks. You can even purchase an extension that will allow you to hold very large works.
They also have a decent amount of weight to them that keeps them upright. However, occasionally students will trip over one of the two front legs. This can be largely avoided by placing the easels evenly in a row instead of a mish-mash orientation.
A word of warning: because these easels are cut from metal, they can occasionally arrive with somewhat sharp edges. It is important to sand down any sharp edges on these easels before using in the art classroom.
Pro Tip: If you are an art teacher working in a public school, I encourage you to reach out to the manufacturer directly for a price quote on a class set of easels. This company has been super generous towards the art teachers I work with who are seeking to create atelier setups in their classrooms.
There are many other styles and configurations of easels, including travel easels, that may be useful to you personally. However, they are not reviewed in this article because they are not particularly useful for classroom purposes.
What kind of easels do you use in your classroom? Let me know in the comments below.
Drawing boards are an essential tool for helping students level up their drawing skillset. But they also pose unique classroom management challenges. So, which drawing boards are the best for teaching art in classrooms?
(Please note that this post contains affiliate links. You can read our affiliate link policy here.)
There are three types of drawing boards that are commonly used in the classroom, and each has its own strengths and weaknesses.
Masonite is a very sturdy drawing surface. This quality makes it an excellent support for both easel drawings and working from tables. When working from tables, these boards make excellent surfaces for students as they can place them on their laps and lean them against the table. Due to their stiff nature, masonite boards make pretty unbendable drawing surfaces for this type of lap work.
Please note that the following pros and cons are for Masonite board purchased from the hardware store and cut down into the teachers’ preferred sizes. For pre-made drawing boards, please see option #3.
PROS of Masonite Boards
• Resilient. Compared to other drawing board surfaces, these boards can hold up to a lot of abuse. They are less likely to be punctured, ripped, bent, or broken. This is a highly desirable trait for classroom drawing boards.
• Easy to Acquire. It’s pretty easy to go to your local hardware store and have large sheets of Masonite cut down to any size you like.
• Doesn’t Bend Easily. Students aren’t faced with a surface that moves or gives.
CONS of Masonite Boards
• Weight. Masonite is heavy. You can only carry a few boards at a time which makes setup and cleanup routines less efficient.
• Space. Masonite boards take up more floor space. Because they are heavy, they cannot be stacked easily on shelves or in other raised storage areas.
• Price. Although not terribly expensive (a few dollars per board), it is more expensive than other options available to art teachers. However, the durability of Masonite boards often make it a wise investment as they will last many years under careful classroom curation.
• Single-Sided. Depending on which Masonite you purchase, it may have only one side with a smooth surface. It is best to get Masonite boards that are smooth on both sides to maximize their usefulness in the classroom.
• Sharing. If you have students sharing boards because they are heavy and take up too much space to assign every student their own board, it takes additional prep time at the beginning and end of each class to mount their drawings on the boards and take them down.
Mandy Recommends:
Go to your local hardware store and get double-sided masonite boards cut to 16″x20″ if you are using easels, or 11″x14″ if you are having your students lean them against the edge of tables or chairs. I am not placing an Amazon link here because it is silly expensive to have these shipped to you due to the weight. Your best price and option is to have the hardware store cut down large sheets to your desired size.
Foam core boards are my personal favorite choice for art classrooms. They are light and easy to pack up and put away. They are inexpensive and somewhat easily replaced. And my favorite part is being able to assign every single student their own board to take care of and use. This helps make sure they treat their drawing boards with the kindness and respect their drawing boards deserve :)
PROS of Foam Core Boards
• Light. They are super light. You can collect an entire class’ worth of drawing boards and gracefully lift them up to place on your highest shelf.
• Inexpensive. For $1 or less per student, they are the most affordable drawing board option. For those students who are good at taking care of their supplies, you can get another semester or more out of the same boards.
• 1 Board per Student. With heavier drawing boards, you might only have one class set that needs to be shared. Students have to remove and add drawings at the beginning of each class when this is the case. When every student has their own board, this unnecessary shifting of drawings saves your students time. When every student has their own board, they are almost instantly ready to get to drawing when entering class without much prep work before they can start.
CONS of Foam Core Boards
Tape sticks. Sometimes the tape is challenging to get off of the foam core drawing boards causing small rips on the surface.
Kids ruin. Depending on the age and maturity of your students, there is an inexplicable temptation to puncture these boards with pencils. I have found the best antidote to this is to assign every student their own board. If they fill it with holes, it is their problem to figure out how to draw around them.
Mandy Recommends:
You can either buy larger drawing boards and cut them down to your desired size, or buy boards pre-cut to the size you want. Cutting them down will save you some money if you are on a tight budget. However, if you are planning on getting hundreds of drawing boards for your students to each have their own, the precut option might be worth the additional money.
Pro Tip! Sometimes if you are lucky you can purchase large sheets of foam core at your local dollar store and cut them into 4 pieces each. At about 25 cents a board, this is one of the most economical options.
I recommend using ~11″x14″ boards for drawing at tables, and larger boards if using on easels. If this is your first time using drawing boards in your classroom, you might want to try a few different sizes and see what works best for you. Remember, the point of the drawing board is to keep the drawing surface as parallel to your students’ eyes as possible, so your boards need to be big enough to lean on a table or chair edge.
The only reason I am writing about pre-made drawing boards is to warn you against using them. They are terrible for classroom use. But first, the one PRO I could think of…
PRO of Pre-Made Drawing Boards
• “Oh, look at me!” They make you feel like a “real” artist
CONS of Pre-Made Drawing Boards
• Expensive. They are multiple times more expensive then going to the hardware store and asking them to cut down large sheets of masonite for you.
• Bad Design. When drawing, it is best to tape your paper to the edge of a drawing board so there is the least amount of visual cluter between your drawing and the subject at which you are looking. But because of the silly handle holes on pre-made drawing boards, you can’t tape drawings on the edges.
• Rubber band. These silly rubber bands smear drawings. There’s no reason for it when taping paper to your board is so much more effective and doesn’t ruin your students’ hard work.
• Clips bite. No, literally, they do. They bite into your paper leaving scars. Why ruin an otherwise pleasant drawing with unwanted marks?
• Space. The clips on these boards make the boards take up way too much space when stored. They do not easily stack together and they often get caught on each other. They are inconvenient compared to just a simple plain board cut down form sheets of masonite at the hardware store.
Mandy Recommends:
DO NOT PURCHASE PRE-MADE DRAWING BOARDS WITH A CUTOUT HANDLES, CLIPS AND RUBBER BANDS. These drawing boards are unnecessarily expensive and the cutout for the handle is always inconveniently placed. It is so much better to get double sided Masonite from your local hardware store that you can have them cut down into any size pieces that you prefer. You will get better quality Masonite at a cheaper price than any pre-made drawing board on the market.
Make sure to join our newsletter for more tips and tricks for teaching art in the classroom.
Drawing boards provide a huge advantage for students who wish to work realistically. They reduce visual distortions when drawing and provide quality work surfaces when rendering.
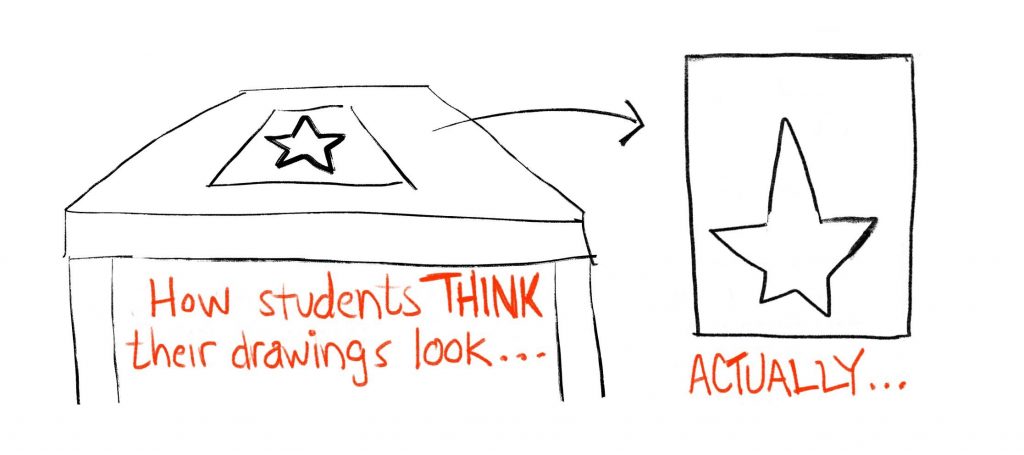
Drawing on flat table surfaces skews the perspective of a drawing. When working on a flat table, the top of the paper seems smaller because it is farther away from the student, and the bottom of the drawing appears bigger because it is closer to the student.
Students are often tricked by this visual effect and will make the drawing bigger than is accurate at the top, and smaller than is accurate on the bottom.
Drawing boards eliminate this visual trick by allowing students to work on drawings in a more vertical position. Whether propped on student laps or on easels, the verticality of the drawing surface makes a huge difference for drawing accurately.
Another important reason to teach with drawing boards is to eliminate potential pitfalls for students when drawing. If students work on pockmarked or otherwise uneven surfaces, it is challenging for them to draw well as the drawing surface itself becomes a distraction. As learning to draw is already a very challenging skill, any added difficulties (like uneven drawing surfaces) create unnecessary frustration that can derail your students.
Providing students with drawing boards ensures that they are working on a good surface and eliminates unnecessary challenges that imperfect surfaces may throw in your students’ way.
Drawing boards MAKE SHADING EASIER
Drawing boards also provide an ideal work surface for achieving nuanced effects when shading drawings. In order to get especially beautiful effects in their shading, students need to be able to control the pencil pressure on their work surface in a refined way.
Foam core drawing boards naturally have some give to it which helps prevent students from scarring their paper with a heavy hand. Masonite drawing boards can achieve a similar level of cushion by prepped them with a piece of folded newsprint taped underneath the drawing paper.
When teaching challenging technical drawing skills, providing the most opportunities for student success (good drawing surface) and eliminating potential obstacles (distortion) is an important part of guiding students. Drawing boards achieve both of these desired outcomes and are strongly recommended for classroom use.
Discover the techniques that are congruent with you artistic soul.
“How should I draw?” is likely a question students have asked since ateliers were invented. Although I teach my students many of the same techniques at the same time, I have found that the answer to the question “How should I draw?” is different for each and every student.
As artists develop their skills, certain techniques call out to some more than others. For one student, a specific technique yields superb results. To another student, the same technique inspires abhorrence.
My advice to all students of atelier training: do not torture yourself long term with drawing techniques you detest. Find the ones that match your personality and desired outcomes for your art.
This is not to say that art is not hard work, however. Often you have to learn how to draw at a certain level before you have enough information to know if certain techniques are useful to you. Only then can you discard the ones which are not. But eventually your pursuit of technical skills in art will force choices.
The Lightbulb Problem
For example, an electric lightbulb is brighter than the whitest paint. Additionally, it is often a yellow hue. If you add yellow to your white to show the correct hue, you will darken the value of the color. If you leave out the yellow to ensure that the white is the lightest your paints can achieve, you have to sacrifice the yellow hue.
So what kind of artist are you? Do you prefer to have the lighter value and sacrifice the yellow? Or do you keep the yellow and sacrifice the lighter value?
There is no right or wrong answer here, only artistic preference. An argument can be made for either choice. But an artist who is fascinated by color is likely to vote for adding the yellow. An artist that is delighted by value contrasts is likely to choose the white.
Your Preferred Techniques Are As Unique As Handwriting
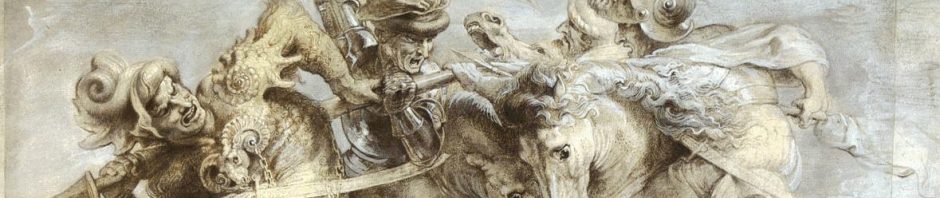
I cannot emphasize enough that every student’s internal artist is as unique as their handwriting. Many students want their work to look like [insert any famous artist here]. But one artist cannot draw like another, even if they so wish. A Reubens copy of a Leonardo Da Vinci painting will always scream, “REUBENS!!!!”
What students can do is properly identify the qualities that they admire in an artist’s work, and dedicate time and focus in order to study them.
Depth of technical art knowledge allows students to create the artwork that is congruent with their artistic souls. Work hard to learn everything you can. Then, nurture the skills that fit your artistic personality the closest.
When starting out, having the right oil paint materials list is essential for creating successful artwork. So many students purchase inferior or unhelpful materials, sabotaging themselves and their artwork before they even start. Skip directly to the Oil Paint Materials List, or continue reading for contextual information about the materials. Introduction to Oil Painting Materials […]
Creating a stunning painting composition isn’t just about the rule of thirds or following mathematical formulas. In fact, those rules aren’t very helpful, and can even harm your compositions, if you don’t understand the big underlying concepts of pictorial design. A well-balanced composition draws viewers in, directs their eye through the piece, helps to tell […]
Realistic portrait drawing is one of the most rewarding yet challenging skills an artist can develop. Whether you are a beginner struggling with basic proportions, or an experienced artist looking to refine your technique, this article will help you to draw better realistic portraits. Capturing a likeness requires a solid understanding of structure, feature placement, […]
Black is an essential color in any oil painter’s palette, yet not all black oil paints are the same. Different black oil paints offer different drying times and mixing behaviors that can greatly impact your painting. In this guide, we’ll explore the most common black oil paints, including Ivory Black, Lamp Black, Mars Black, and […]
White is the most used color in oil painting, but not all white oil paints are created equal. Artists often struggle to choose the right white for their work, as different types have varying properties that affect color mixing, drying time, and durability. In this guide, we’ll explore the most common white oil paints and […]
Check out these articles featuring the School of Atelier Arts. Redfin This article draws on SAA Director Mandy Theis’ knowledge of setting up a studio. By intentionally controlling light the way we teach in our online Ateliyay! Painting Bootcamp, any content creator can have a more conducive place to work.
This slide art lesson plan helps high school students discover how to create shiny effects with pencil. It takes them through the process of drawing a spoon from observation by starting from the biggest ideas and refining the shape. It then leads students through the value scale to help demonstrate how shiny effects can be created by manipulating light and dark values and placing them next to each other. By the end of this lesson, students will create a realistic drawing of a spoon from observation that is shaded.
When starting out, having the right oil paint materials list is essential for creating successful artwork. So many students purchase inferior or unhelpful materials, sabotaging themselves and their artwork before they even start. Skip directly to the Oil Paint Materials List, or continue reading for contextual information about the materials. Introduction to Oil Painting Materials […]
Creating a stunning painting composition isn’t just about the rule of thirds or following mathematical formulas. In fact, those rules aren’t very helpful, and can even harm your compositions, if you don’t understand the big underlying concepts of pictorial design. A well-balanced composition draws viewers in, directs their eye through the piece, helps to tell […]
Realistic portrait drawing is one of the most rewarding yet challenging skills an artist can develop. Whether you are a beginner struggling with basic proportions, or an experienced artist looking to refine your technique, this article will help you to draw better realistic portraits. Capturing a likeness requires a solid understanding of structure, feature placement, […]
Black is an essential color in any oil painter’s palette, yet not all black oil paints are the same. Different black oil paints offer different drying times and mixing behaviors that can greatly impact your painting. In this guide, we’ll explore the most common black oil paints, including Ivory Black, Lamp Black, Mars Black, and […]
White is the most used color in oil painting, but not all white oil paints are created equal. Artists often struggle to choose the right white for their work, as different types have varying properties that affect color mixing, drying time, and durability. In this guide, we’ll explore the most common white oil paints and […]
Check out these articles featuring the School of Atelier Arts. Redfin This article draws on SAA Director Mandy Theis’ knowledge of setting up a studio. By intentionally controlling light the way we teach in our online Ateliyay! Painting Bootcamp, any content creator can have a more conducive place to work.
Fret not my friend, this is your go-to artist dictionary for all those wonky terms people who draw and paint realistically like to throw around. This is an ever expanding project, so check back regularly for the newest definitions!
Atelier: The French word for “studio”. A place where artists learn realistic drawing, painting, and sculpting skills.
BedBug Line: Also known as a core shadow, it is a line that is slightly darker on the edge of a shadow that is the exact place where a form turns from light towards shadow. This term is rarely defined in other artist dictionaries.
Chroma: The intensity of a color. The opposite of neutral. A very chromatic color is often described as “bright”. A stop sign is a very chromatic red. Bricks are also often red, but not as intense as a stop sign. Bricks are less chromatic than a stop sign.
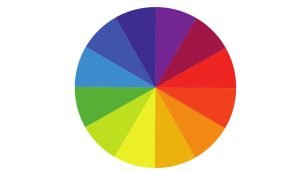
Color Wheel: A circle that shows colors. Some color wheels show just the hue. Some show hue + chroma, or hue + value.
Contour Line: A line that is used to describe the shape of something.
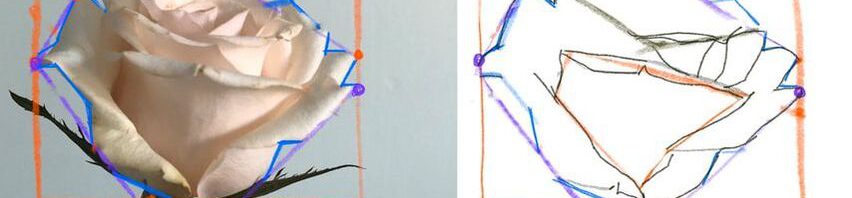
Envelope: A small number of straight lines that represent the overall biggest shape of your subject.
Ferrule: The part of a paintbrush that attaches the bristles to the handle.
Hue: The location of a color on the outermost circle of the color wheel. Red, orange, yellow, green, blue, and purple are all hues. If a blue hue leans green, the hue is a blue-green. Hues are sometimes confused with color intensity. Hues are the most pure form of every color. So a brown color would be described as having an orange hue that has been neutralized.
Local Color: The base color of a subject. For example, the base color of an apple might be red, even if it has bright yellow highlights are dark blue shadows. Local color is an important word for any artist dictionary
Neutral: The opposite of “chroma”. Every color has its most intense version, and also a version that is so close to a greyish neutral that it is hard to tell there is any color to it at all. There is a scale from chroma to neutral that every hue has, from most intense to least intense. When colors are less intense, they are described as neutrals. A bright orange fruit would be described as a chromatic orange. A wood floor is still orange in hue but is more neutralized than an orange. Then there is a wall that seems almost grey but has the barest hint of orange to it, which would be described as a very neutralized orange.
Notional Space: The proportions of your subject if you were to imagine a box going around it and touching it on all sides.
Outer Contour: Similar to a contour but describes specifically the outer most shape of a subject.
Proportion Box: Another term for Notional Space.The proportion box represents the amount of space your subject takes up if you were to imagine a box going around it and touching it on all sides.
Value Scale: The standard atelier value scale has 9 increments of value from darkest to lightest. 1 represents the lightest and 9 represents the darkest.
Are there words you would like to see added to this dictionary? Let me know in the comments below.
When starting out, having the right oil paint materials list is essential for creating successful artwork. So many students purchase inferior or unhelpful materials, sabotaging themselves and their artwork before they even start. Skip directly to the Oil Paint Materials List, or continue reading for contextual information about the materials. Introduction to Oil Painting Materials […]
Creating a stunning painting composition isn’t just about the rule of thirds or following mathematical formulas. In fact, those rules aren’t very helpful, and can even harm your compositions, if you don’t understand the big underlying concepts of pictorial design. A well-balanced composition draws viewers in, directs their eye through the piece, helps to tell […]
Realistic portrait drawing is one of the most rewarding yet challenging skills an artist can develop. Whether you are a beginner struggling with basic proportions, or an experienced artist looking to refine your technique, this article will help you to draw better realistic portraits. Capturing a likeness requires a solid understanding of structure, feature placement, […]
Black is an essential color in any oil painter’s palette, yet not all black oil paints are the same. Different black oil paints offer different drying times and mixing behaviors that can greatly impact your painting. In this guide, we’ll explore the most common black oil paints, including Ivory Black, Lamp Black, Mars Black, and […]
White is the most used color in oil painting, but not all white oil paints are created equal. Artists often struggle to choose the right white for their work, as different types have varying properties that affect color mixing, drying time, and durability. In this guide, we’ll explore the most common white oil paints and […]
Check out these articles featuring the School of Atelier Arts. Redfin This article draws on SAA Director Mandy Theis’ knowledge of setting up a studio. By intentionally controlling light the way we teach in our online Ateliyay! Painting Bootcamp, any content creator can have a more conducive place to work.













 Discover the best art easel style for your teaching needs.