Most Popular Posts Archives - School of Atelier Arts

Category: Most Popular Posts

  • Painting Composition: The Key to Making Better Art

    Painting Composition: The Key to Making Better Art

    Creating a stunning painting composition isn’t just about the rule of thirds or following mathematical formulas. In fact, those rules aren’t very helpful, and can even harm your compositions, if you don’t understand the big underlying concepts of pictorial design.

    A well-balanced composition draws viewers in, directs their eye through the piece, helps to tell a visual story, and makes the overall artwork much more compelling.

    Yet, many artists struggle with composition. They tend to bumble about placing things on their canvasses awkwardly, and inevitably end up with paintings that feel like something is always “off”.

    If this sounds familiar, you’re not alone. I’ve been teaching students realistic drawing and painting skills for more than a decade, and composition continues to be the most difficult aspect of painting for students to grasp.

    Fortunately, mastering composition is possible with guidance from a knowledgeable atelier-trained instructor. So, let me be your guide today through the world of pictorial composition and let’s discover what good painting composition is, what it isn’t, and how to practice your composition skills effectively and elevate your art.

    The Yay! Composition Worksheets from The School of Atelier Arts are designed to teach you our foolproof system for creating powerful, dynamic compositions—without frustration or guesswork… Get yours today!


    Mastering Painting Composition

    Creating a strong composition is the foundation of compelling artwork. Whether you’re drawing a portrait, designing an outdoor plein air painting, or even arranging abstract forms, understanding composition helps guide the viewer’s eye and enhance visual impact.

    The following key composition techniques offer a structured approach to building complex and visually engaging artworks. By practicing these methods, artists can develop a deeper understanding of how visual elements work together to create harmonious compositions. Mastering these principles allows for greater artistic confidence and the ability to communicate ideas more effectively – and intentionally – through art.


    painting composition s curve

    Sweeps & S-Curves

    Sweeps and S-curves are powerful compositional tools that create movement and unity within a piece. By learning to recognize how flowing these implied curves lead the viewer’s eye through a composition, you can make your painting feel dynamic and cohesive.

    Learn how to harness the natural elegance of curves to create rhythm and harmony in your artwork. Whether used subtly in a portrait, or prominently in a landscape, sweeps and S-curves are a useful tool for achieving a visually engaging composition.

    painting composition big shapes

    Big Shapes & Spots

    One of the most effective ways to simplify composition is by focusing on the big ideas, such as big shapes and spots. These concepts help students to identify dominant forms that establish structure and balance within an artwork.

    By organizing a composition around major shapes before diving into details, artists can create a solid compositional foundation that delivers clarity for the viewer. Learning to place key shapes and focal spots strategically helps create compelling visual hierarchies, guiding the viewer’s attention carefully through the piece.
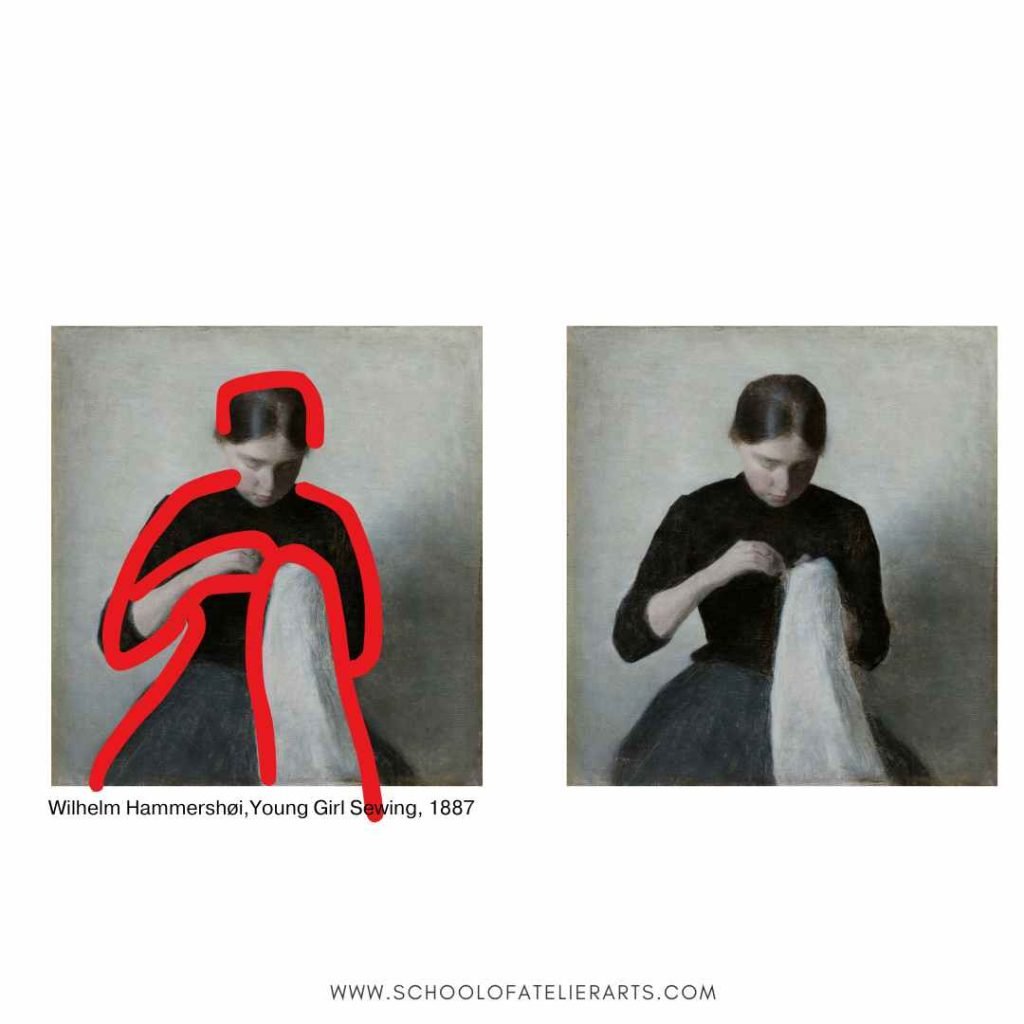
    Designing with Edges & Silhouettes

    Edges and silhouettes play a crucial role in how we read the big ideas of a composition. Edges and silhouettes can work to your benefit, or detriment if you are not careful.

    If you want something to read cleanly and clearly, strong contrasts of light on dark or dark on light create clear edges.

    If you want your subject to read calmly and mysteriously, low contrasts of light on dark or dark on light create subtlety and nuance in a painting composition.

    Carefully placed edges and silhouettes create visual statements. By studying how two different colors meet (Softly? Harshly?), students can gain mastery and use edges and silhouettes to control the visual feeling of their compositions.
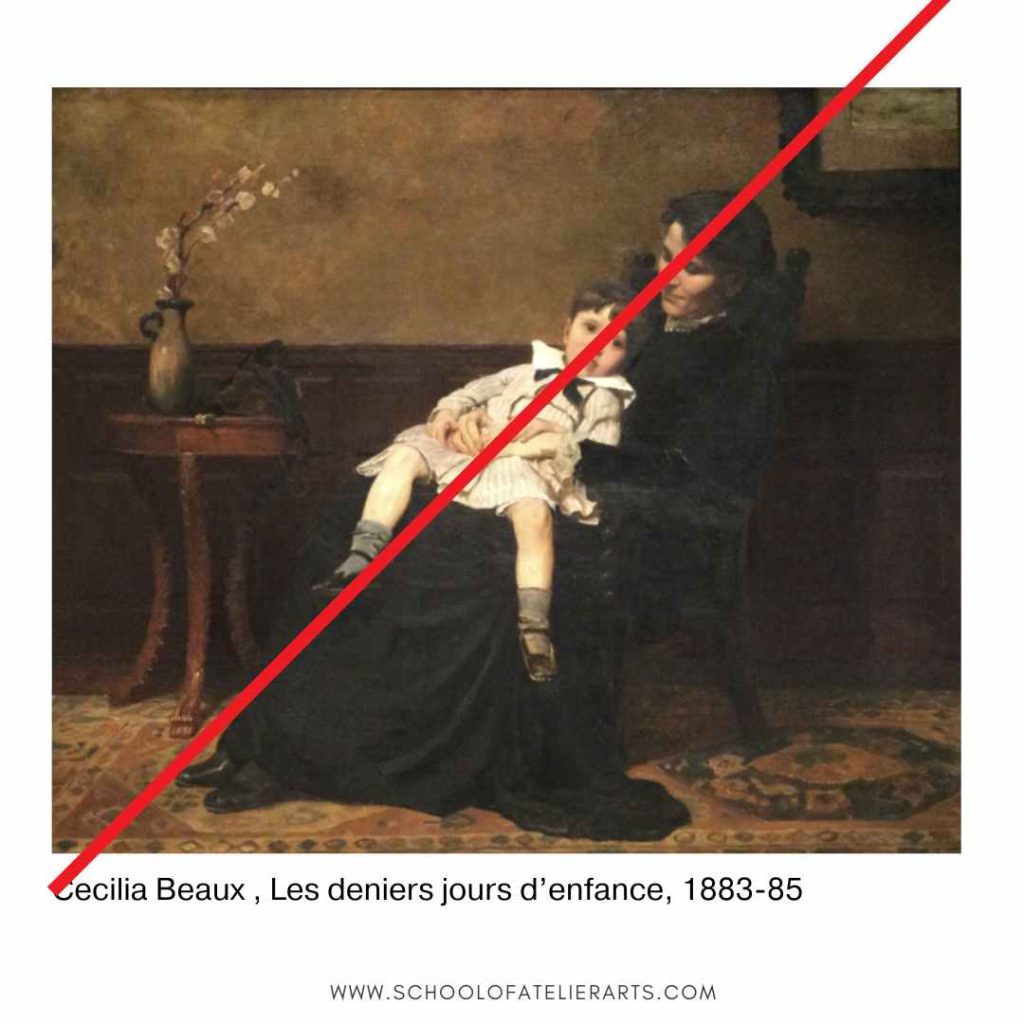
    Linear Ideas in Painting Compositions

    Understanding the power of lines in composition is fundamental to creating visually engaging artwork.

    Sometimes the more subtle applications of this concept are difficult for students to see at first. Identifying and utilizing diagonal, vertical, horizontal, and converging lines in a composition creates visually effective structures in paintings.

    Lines not only guide the viewer’s eye, but also establish guidelines for placing other elements in the composition.

    Designing your painting composition around lines also contributes to the mood of your painting. Diagonal lines create energy and movement, verticals evoke strength and stability, while horizontals hint at calmness.
    The best way to learn how to effectively learn these concepts is to practice seeing how other artists used them. This is exactly what our Yay! Composition Worksheets teach students how to do. Through deliberate worksheet practice, students learn how to use these linear elements to create balanced and dynamic compositions.

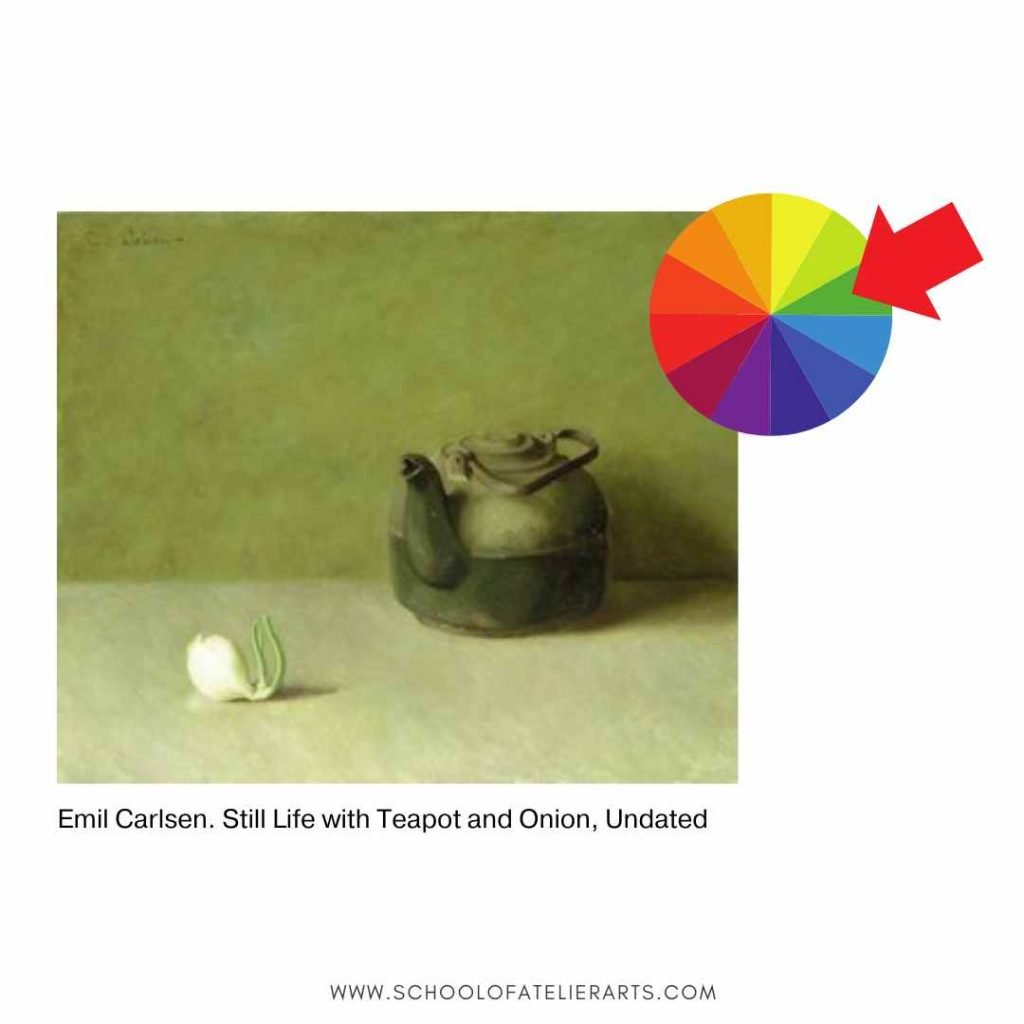
    Color/Value of a Picture

    Color and value are essential compositional tools that impact the overall feel and readability of an artwork. Students need to learn how to recognize and apply dominant color schemes and value structures to strengthen their compositions.

    By understanding how a picture can be light, medium, or dark, artists can control the mood of their painting compositions.

    By practicing identifying the overall color of a picture, students can manipulate their hues to evoke specific feelings from their viewing audience.

    Mastering seeing a picture holistically, including its overall value and hue, allows artists to control the emotional and visual impact of their compositions with confidence.

    Painting Composition: Putting It All Together

    Mastering composition involves the ability to integrate multiple elements seamlessly. That’s why our popular Yay! Composition Worksheets have students practice each element individually, and then combine them together. By practicing the ideas presented in this article, artists can create compositions that are visually captivating.

    Deliberate composition training ensures that students can apply their knowledge in real-world artistic scenarios, leading to more confident and effective artwork.
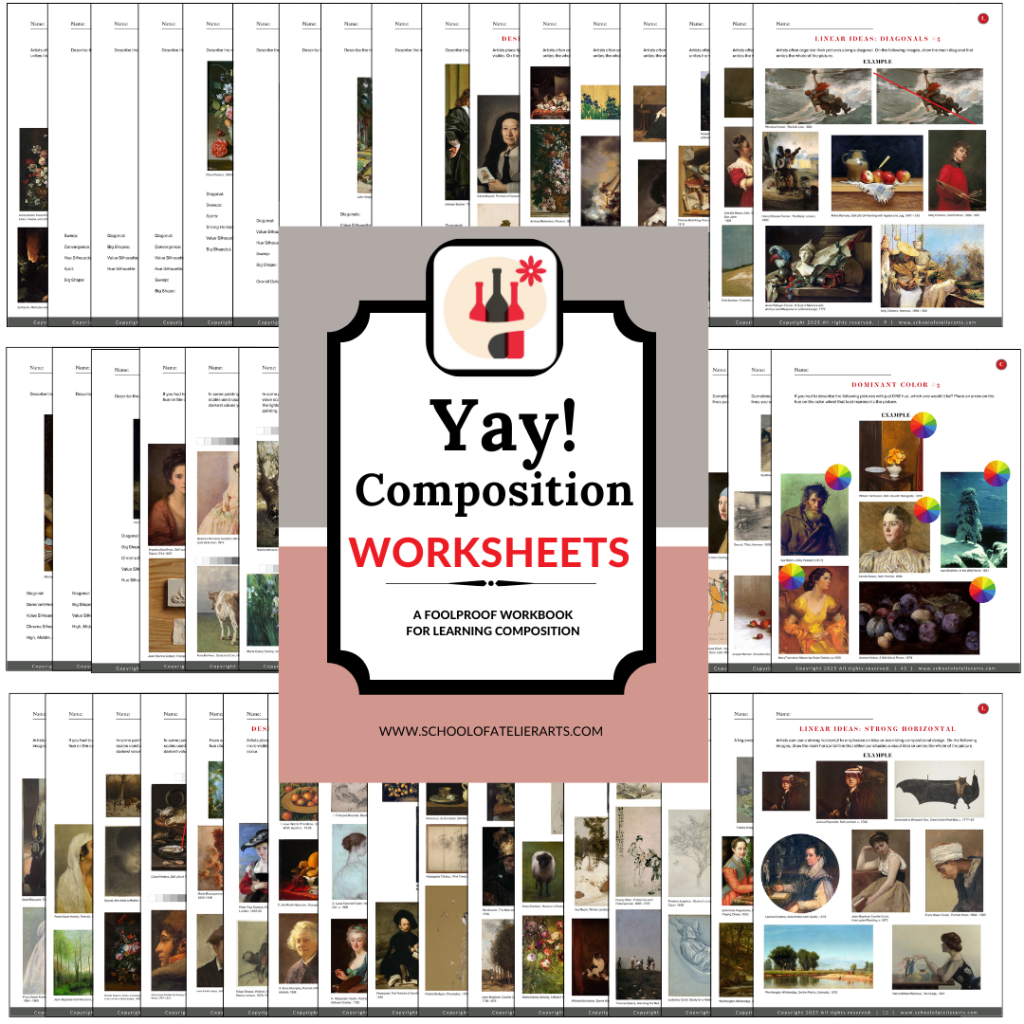

    Why Artists Love our Yay! Composition Worksheets for Learning Painting Composition

    Artists and educators alike have seen immediate improvements in their work using our popular worksheets. Here’s what some have said:

    “My students were always intimidated to try and draw realistically. With the help of the School of Atelier Arts resources, I now know how to help them experience success with their drawings every time! Their confidence is through the roof!”
    Nina Dirienzo, High School Art Teacher

    “I am extremely thankful for these resources because they offer skill-based lessons that give my students a strong foundation for their artworks.”
    Kelsea Fischer, Elementary Art Teacher


    What’s Included in the Yay! Composition Worksheets?

    When you purchase the Yay! Composition Worksheets, you get:

    • 50+ digital worksheets that guide you through the composition process step by step.
    • A Spanish translation for educators teaching bilingual students.
    • A structured approach that makes learning composition easy and practical.

    These worksheets are designed for artists of all skill levels, whether you’re a beginner struggling with composition or an experienced artist looking to refine your skills.


    Start Creating Stronger Painting Compositions Today

    If you’ve been struggling with composition, it’s time to stop guessing and start mastering it. The Yay! Composition Worksheets provide a clear, repeatable method that works every time. No more frustration. No more uncertainty. Just strong, confident compositions in every painting you create.

    Get instant access to your digital worksheets:
    ➡️ BUY NOW

    30-Day Money-Back Guarantee – If you don’t love the worksheets, we’ll give you a full refund. Simply write to help@schoolofatelierarts.com with your refund request, no questions asked.

  • Art Podcasts

    Art Podcasts

    Are you a fan of audio learning and searching for some new great art podcasts? You’re in luck – here is a collection of art podcasts from a wide range of content creators.

    Art School Live

    Although technically more of a free online class/video format, this show makes for great listening if you are wanting to learn more about art. The host, Eric Rhoads, is a prolific content producer and creates fantastic art podcasts. Here are several episodes of Art School Live that feature School of Atelier Arts Director Mandy Theis.

    Never Use White in Paintings with Mandy Theis

    In this art podcast, you will discover why there is no such thing as white. Guest Mandy Theis will take you through a process for figuring out how to detect which color your white actually is, and how to use whites well in your painting process.

    How to Paint Like a Master with Mandy Theis

    Learn how to create a small study of a master painting in this art podcast with Mandy Theis. Mandy will teach you how to find the big ideas of a painting, and how to create an effective study.

    Do you want to learn how to paint with Mandy? Join our Ateliyay! Painting Bootcamp today.

    Conspiracy Clearinghouse

    This art-themed podcast goes into the shadowy subject CIA involvement in the visual arts during the cold war. It is a well-researched podcast with cited sources. And, it is a highly entertaining episode that features atelier-trained painter and educator Mandy Theis.

    EPISODE 107 | Traces of Reality: Abstract Art and the CIA (World Is Weird 13)

    Don’t miss our latest art podcasts, join our popular art newsletter today.

    Rebel Rebel Podcast

    This a fabulous art podcast hosted by Michael Dargie. The tagline for the podcast is “Think Audaciously. Act Courageously.” In this episode, Michael interviews School of Atelier Arts Director Mandy Theis about atelier-style art education.

    This art podcast episode is a delightful romp through arteducationland and covers some of the history of art education, and why learning how to draw and paint realistically requires finding the right teachers.

    Rebel Rebel Podcast: Creators of the Lost Art

    Are you ready to take your painting to the next level? Join our online Ateliyay! Painting Bootcamp today.

    The Light Inside Podcast

    This is a neuroscience podcast that looks at mental health through many different lenses, including art. In this art podcast episode, discover how to use your art thinking to actually change what and how you see the world.

    The Illusion of Reality: How Art Shapes Our View of the World

    Looking for more great art podcasts? Check out our post on Unexpected Podcasts for Art Teachers here.

  • Is Atelier Training Right for You? Quiz

    Is Atelier Training Right for You? Quiz

    New to atelier training? Curious if atelier training is right for you? This free diagnostic quiz will help you figure out if atelier training is a good next step for you in your artistic career.

    Simply answer the questions as honestly as possible. Don’t overthink your answers – this diagnostic quiz will help guide you on whether or not you are ready to pursue atelier training.

    Don’t worry – the quiz is completely free and doesn’t even ask for your email address!

    It WILL help you determine whether atelier training is a good fit for you and your artistic goals.

    [quiz-cat id=”5767″]

  • How to Draw a Person

    How to Draw a Person

    Have you always want to learn how to draw a person, but didn’t know where to start? This article will show you everything you need to know to draw people well.

    How to Draw People
    How to Draw People Worksheets

    How to Start

    The temptation for many people when they are drawing people is to first make the eyes, or nose, or something that is relatively small.

    But this is a mistake.

    When drawing people, you always want to start with the biggest ideas first, and then work your way to the smaller ideas.

    And the biggest idea you need to capture first, before even THINKING about drawing eyes, is the overall proportion of your figure. How tall compared to how wide is your figure?

    Artists often indicate the height of the figure by marking the bottom of the feet and the top of the head.

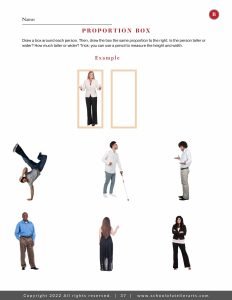
    For the width, artist sometimes use what is called a “Proportion Box”. It is a box that represents the height and width of the person.

    proportion box figure drawing
    Proportion Box Figure Drawing

    Do you want fool-proof, step-by-step guidance on how to draw a figure? Our Yay! People Worksheets will teach you everything you need to know to draw believable figures.

    Envelope Method

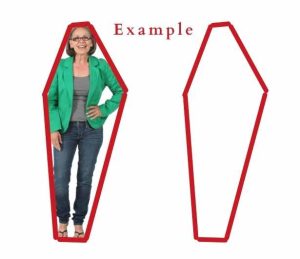
    Once you have determined the height and width of your figure, you can get a little more specific with the shape. To do this, use a technique called an envelope.

    An envelope contains a small number of straight lines that incapsulate the overall shape of the person you are trying to draw.

    Envelopes are advantageous because they help you find the bigggest overall shape before getting distracted by details.

    The envelope also helps you start to organize how one major point, say the elbow, relates to another major point like the head.

    Look at the image below, and notice how this relatively simple envelope shape helps describe the entire person that is being drawn.

    envelope how to draw a person

    Major Anatomical Landmarks

    When learning how to draw people, it is important that you know how to identify important anatomical landmarks. This takes both knowledge and practice.

    Our Yay! People Worksheets help students learn how to identify important anatomical landmarks and practice finding them in a variety of poses.

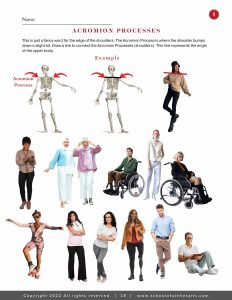
    Key landmarks to learn include the greater trochanter, symphysis pubis, sternal notch, and acromian processes.

    It is important that you not only know what these landmarks are, but how to find them on the human figure. Students often mistake the greater trochanter for the hip, for example. That is why it is important to practice finding key landmarks over and over again so that you can internalize them.

    (Need help learning anatomical landmarks? Our Yay! People Worksheets include dozens of examples to help you learn and practice how to find key landmarks on the human figure.)

    anatomical landmarks of the figure
    Learn key landmarks when drawing figures.

    Refine Your Drawing of a Person

    Once you have your major proportions and shape set, and your key anatomical landmarks identified, you can start to refine your drawing.

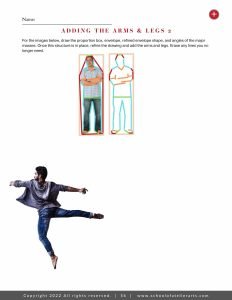
    Again, it is best to always work from the biggest ideas to the smallest. The shapes of the arms and legs, for example, are much bigger than an eyelash. Be mindful of what is physically the next biggest idea when learning how to draw a person and it will help you.

    how to draw a person in stages

    Next Steps for Drawing People

    By starting with a proportion box and envelope and then working to smaller ideas such as the individual arms and legs, you are well on your way to drawing believable people.

    It can be challenging to learn how to draw people, which is why the School of Atelier Arts created these extensive worksheets to help people learn. ANYONE can make believable people that has access to good knowledge and quality practice, and that is what these people drawing worksheets provide.

    Once you master drawing people, you might want to learn more about portraits in order to bring your drawing of people to the next level. Check out our articles on portraiture:

    Teaching Portraits

    5 Mistakes Art Teachers Make When Teaching Portraits

    Yay! Portraits Worksheets

    How do you draw people? Let me know in the comments below.

  • Colour Theory

    Colour Theory

    Colour theory can be intimidating, but it is simpler than you might think. This article will teach you everything you need to know in order to master colour theory.

    Value, Chroma & Hue

    Every colour is made up of three different components: value, chroma, and hue. By discovering how to isolate each of these three variables, you can learn to identify the nuances of colours.

    Colour Theory: Value

    Value represents how light or dark a colour is.

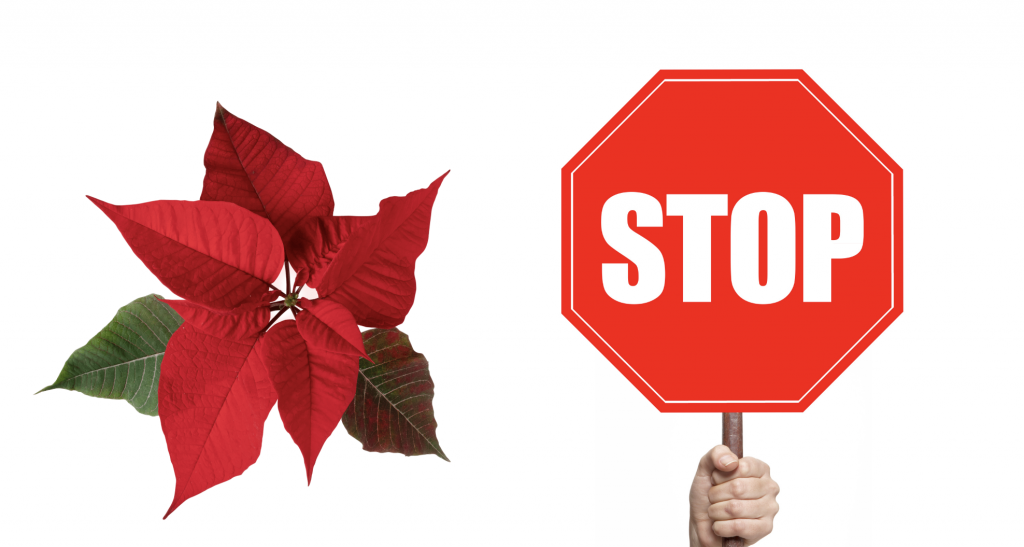
    A stop sign is red, and poinsettias are also red.

    But even though they are both red, the red stop sign is a lighter value of red than the darker red of a poinsettia. The poinsettia is a darker value of red than that of the stop sign.

    If you were to take a black-and-white photo of the poinsettia next to the stop sign, the stop sign would appear lighter in the photograph.

    Artists often use a value scale to evaluate how light or dark a colour is. There are many different value scales available, but the one I use in my teaching and lessons is a 9 step scale, where 9 is the darkest and 1 is the lightest.

    So, on a scale of 1-9 with 9 being the darkest and 1 being the lightest, what number would you give the stop sign? What about the poinsettia?

    The poinsettia is darker than the stop sign, so it should have a higher number.

    The poinsettia is close to a value 7, and the stop sign is close to a value 6.

    Pro tip: colours that have a lot of chroma tend to trick our eyes into feeling like they are brighter. Red is usually darker than we think because it tricks us by being so chromatic.

    Colour Theory – Red Stop Sign vs. Red Poinsettia

    Do you like learning how to draw and paint? Check out our Ateliyay! Curriculum for worksheets that will teach you art skills.

    Colour Theory: Chroma

    Chroma is how intense a colour is.

    The Caribbean Ocean is often described as having “azure” water. This water is appealing to us because it is a very intense colour of blue.

    New England, on the other hand, boasts water that is much murkier. These greyer New England seas are less chromatic. By comparison, the Caribbean waters the appear to be a more intense colour of blue.

    So although New England waves are blue, and Caribbean waves are blue, the Caribbean water is more chromatic – it is a more intense color of blue.

    What is the opposite of chroma?

    The opposite of chroma is neutral. The New England water is a bluish grey and the blue is not very intense – it’s a neutralized blue colour.

    What is a true neutral?

    It is possible for a color to be so neutralized that it isn’t any color at all. It simply looks like a grey that is not a green-grey, or a blue-grey, or a red-grey – not even a little bit. This is called a “true neutral”.

    Do you prefer learning with videos? Check out our video colour theory lessons here.

    Colour Theory – Hue

    Hue is a colour theory word that describes which overall colour – from the choices of red, orange yellow, green, blue or purple – the colour you are looking at belongs to.

    Hues are also known by the acronym ROYGBP for short. (Sometimes they are also abbreviated as ROYGBIV, ROYGBV, etc.) ROYGBP stands for red, orange, yellow, green, blue, purple.

    Hues are basically any color on the outside of the colour wheel. Red-orange, yellow-orange, yellow-green, blue-green, and red-blue are also hues.

    You can take it one step further and add yellow-yellow-green, yellow-yellow-orange, etc. to the list of hues.

    In the picture below, there are three colours that are considered to be the hue “blue”, even though they are all different shades of blue.

    Learn more about our Ateliyay! Painting Bootcamp, our online class that teaches you how to paint realistically.

    The Extra Colour Element: Warm & Cool

    Some colour theorists prefer to think of “warm” and “cool” colours as the 4th element of colour.

    However, using the terms “warm colours” and “cool colours” is actually just a different way of describing a colour’s hue.

    Green, for example, can be considered either a “cold” yellow or a “warm” blue.

    The terms “warm” and “cool” describe a colour’s relationship to other colours. In the image above, there are three different kinds of blues. The blue closest to red is warm compared to the blue closest to the yellow.

    Did you know we have extensive worksheets in our store that teach realistic drawing and painting skills?

    Give it a try

    Now that you know about the three elements of colour, try evaluating a colour just one element at a time.

    Colour Theory
    Identify the value, chroma, and hue of these colours.

    For example, on the image above, let’s evaluate together the top right colour.

    What is its hue? (Red, orange, yellow, green, blue, or purple?)

    The hue is green.

    What is its value on a scale of 1-9, with 9 being the darkest and 1 being the lights?

    The value is probably a number 6. It is not super light and leans slightly towards darker.

    What is its chroma? Is it a very greeny green, the greeniest green you ever did see? Or is it a little muddied, or neutralized?

    This green is somewhat neutralized. It is not a super chromatic green, although it still reads clearly as a green.

    How did you do? Keep practicing by identifying the value, chroma, and hue of the other colours on this chart I made of colours I observed in Iceland.

    Colour Theory
    The upper right colour is the hue green, a value 6, and is somewhat neutralized.

    Conclusion

    Learning colour theory takes practice, and the best way to improve your ability to see colours is to ask yourself these three very important questions:

    1. What is the value?
    2. What is the chroma?
    3. What is the hue?

    By consistently practicing your colour observation, you will become a master of colour theory in no time.

    Read More Color Theory Articles:

    How to Make Blue Colors

    How to Make Purple Paint

    How to Make Brown Paint

    How to Make Yellow Darker

    Color Theory for Beginners

    Color Theory Lesson Plans

    Did you enjoy this article? Join our popular mailing list for more great art insights delivered directly to your inbox.

  • 17 Art Teacher Quotes

    17 Art Teacher Quotes

    Art teachers can never have too many inspiring quotes in their lives! These art teacher quotes are intended to be shared wherever it brings you and your students joy.

    art teacher quote

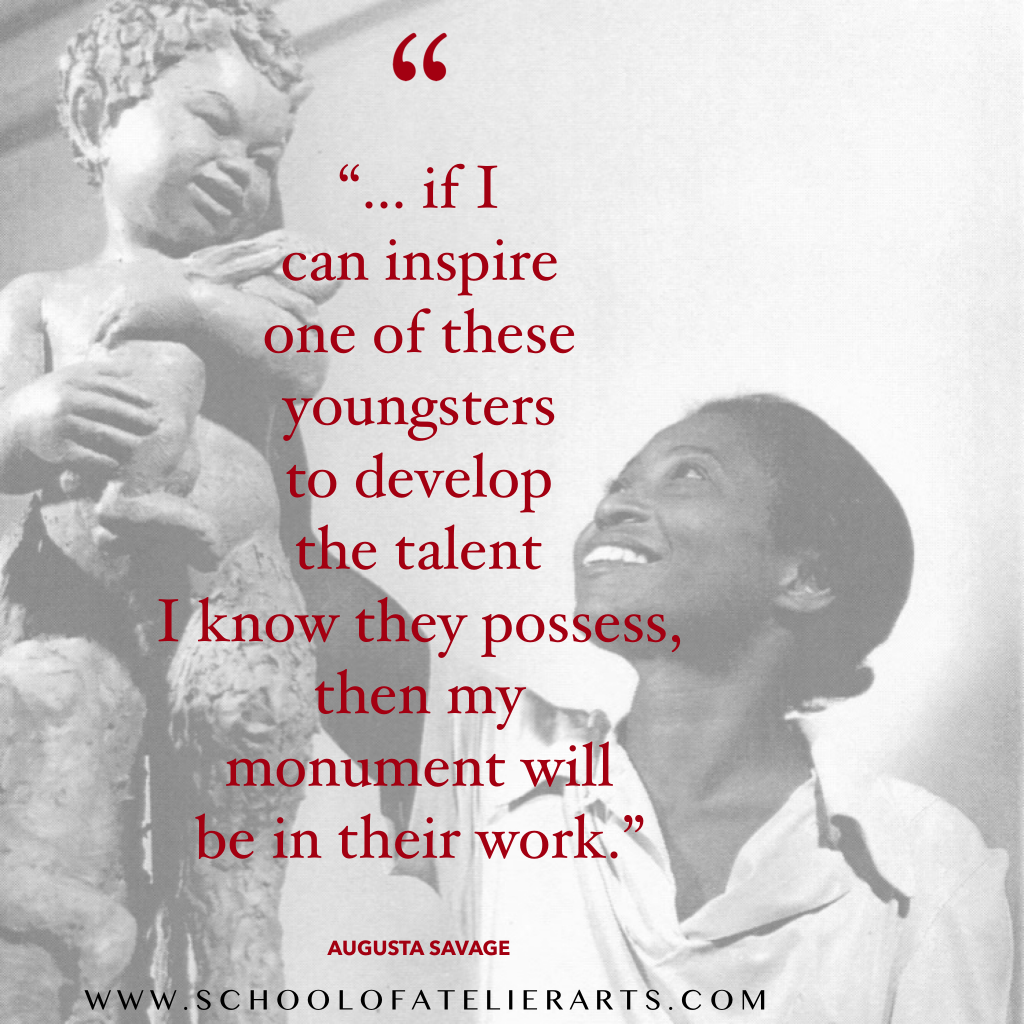
    Augusta Savage was an amazing sculptress an art educator working mostly in Harlem. Augusta Savage is one of my favorite art educators. She trained many students who became major players in the Harlem Renaissance at her atelier. Additionally, she was an incredibly talented and successful artist in her own right.

    Join our wildly poular art teacher newsletter today for more great resources delivered directly to your inbox!

    Check out our art curriculum here that teaches realistic drawing and painting skills.

    quotes for art teachers

    Edward Mitchell Bannister was instrumental for helping create opportunities for learning realism skills in the United States. Because of his passion for art education, he is the perfect artist to quote for art teacher inspiration.

    art teacher inspiration

    George Bridgeman is another prolific art teacher who taught at the Art Student’s League in New York City. His classes were highly sought after, and many of his students drawings are still admired today.

    He also wrote many books to help art students learn his methods for constructing the human figure. He conceived of the human figure as a machine, and his books teach how to draw the human figure as wedges, pulleys, etc.

    Are you enjoying these art teacher quotes? Join our newsletter today for great art resources delivered directly to your inbox.

    art teacher quote

    Sometimes it is difficult to remember that great drawings and paintings are just as much about editing out as they are about including details.

    These portrait drawing worksheets do a wonderful job of helping students find the big ideas in their drawings.

    Art Teacher Quotes by Leonardo Da Vinci

    quotes for teaching drawing

    Leonardo Da Vinci spent nearly 10 years in an atelier before he felt confident in the mastery of his skills. He was one of the world’s great observers, in large part due to his drawing and painting training. Luckily, he left a number of written journals with advice to young artists that are still studied carefully today.

    Want to draw people like Da Vinci? Check our our Yay! People Worksheets that take you step by step through the process of drawing people.

    art teacher quote

    This is another important quote from Da Vinci, reminding our students and ourselves that we must always strive to surpass what is already known and created in order to make something truly original.

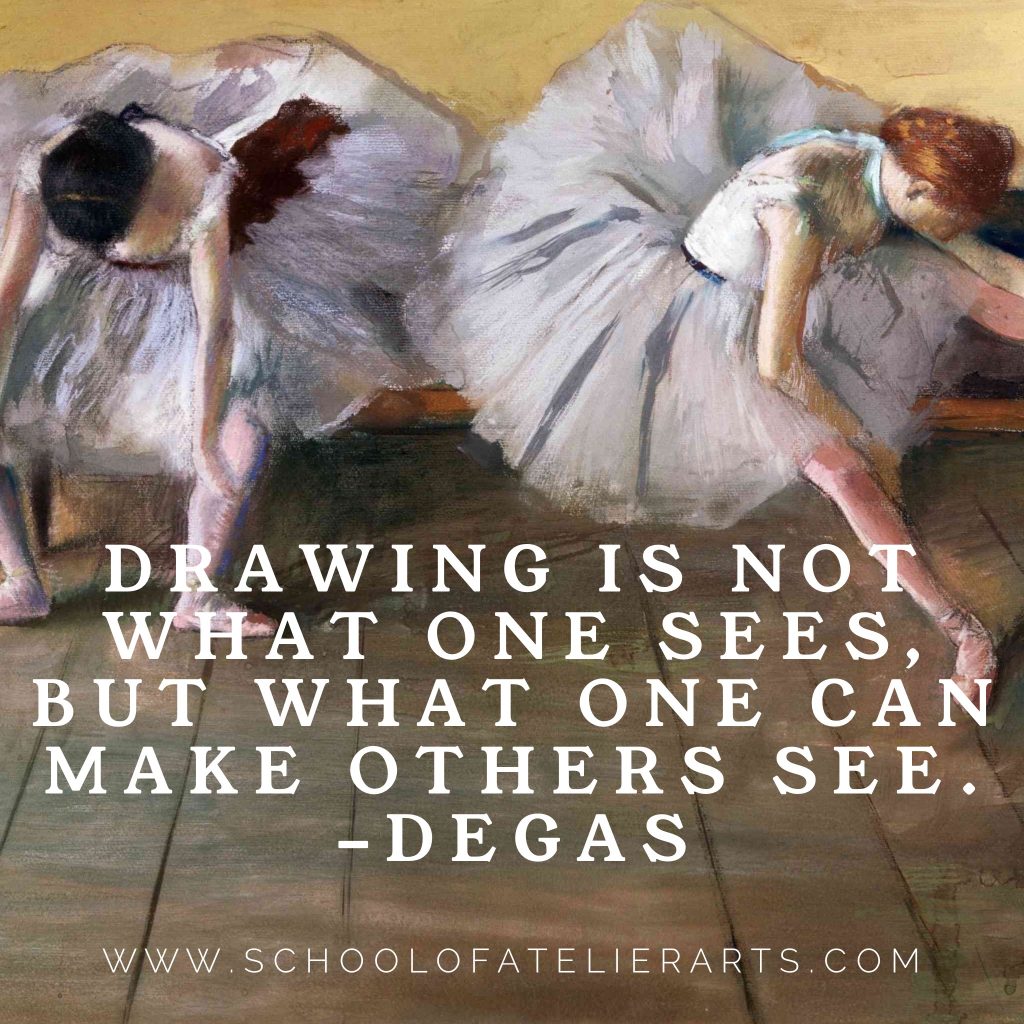
    Degas Quotes for Educators
    art teacher quote

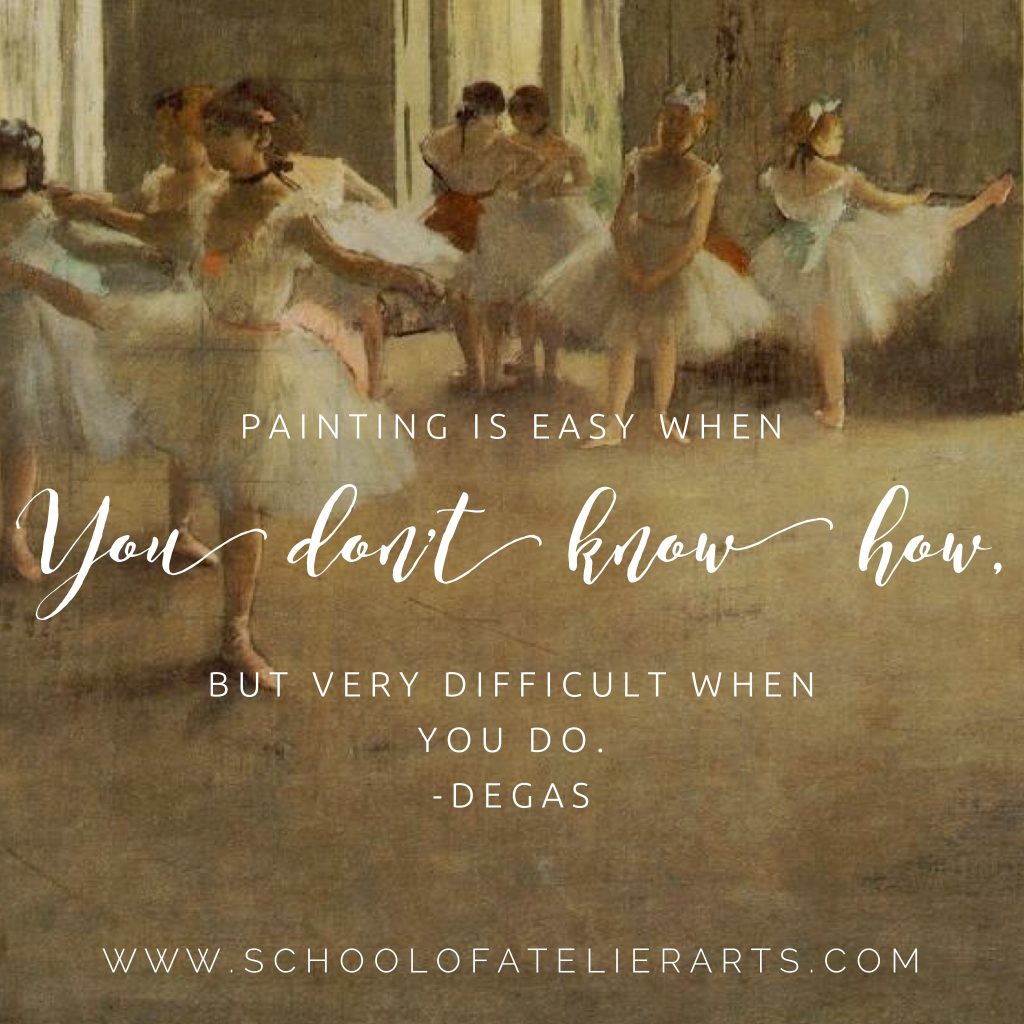
    This great quote by Degas emphasizes the importance of mastering skills in art, which is something atelier training teaches.

     Our art teachers newsletter delivers quality art resources directly to your inbox.

    art teacher quote

    I always try to remind my students that art is a powerful way to help others see in a new way. For example, the rose hue on a beach at sunset is not noticed by everyone, but artists can help others see it.

    Use these helpful worksheets to learn how to draw realistically.

    Art Education Quotes from Unexpected Places

    art teacher quote

    Dr. Seuss was a true visionary and talented educator. Due to his vast experience in illustration and education, this quote helps us to remember that seeing is about art, but also about life.

    art teacher quote

    I love this quote by a gardener, as beauty is universal. 

    If you want to learn how to create beautifully colorful artwork, our Yay! Color Theory worksheets an help. We provide a step-by-step process for understanding color starting at the very beginning and leading through advanced atelier color techniques.

    art quote


    art teacher quote

    Art Teacher Quotes by Famous Artists

    art teacher quote

    Are you enjoying these art teacher quotes? Join our newsletter today for great art resources delivered directly to your inbox.

    art teacher quote


    art teacher quote


    art teacher quote

    Want even more quotes? Check out these 22 Inspirational Quotes for Art Teachers.

    Do you have a favorite art quote? Let me know in the comments below. Join our popular art teacher newsletter for resources and inspiration delivered directly to your inbox!

    Keep reading about great art topics:

  • Teaching Portraits

    Teaching Portraits

    Whether you love it or hate it, portraiture is an important and sometimes required unit for art educators to teach. Here is a realistic drawing approach for teaching portraits to students in your art classroom.
    how to draw portraits

    You Need a Drawing Process for Teaching Portraiture

    When asking students to draw portraits, we are asking them to do something quite challenging. They have to think about shapes, and forms, and values, and symmetry, and asymmetry, and textures, and sometimes even color! This is SOOOOOO much. Don’t make them think about everything all at once! Give them a process that allows them to think about one part of their portrait at a time. This is not to force students to give up their creativity. Rather, it is so students can learn one way of drawing portraits that is consistent so that the steps can be practiced and improved upon. Teaching portraits with a clear process is essential for helping students learn the techniques to achieve high level results.

    ✏️ Make Portrait Drawing Simple! 
    Struggling to teach portraits without overwhelming your students? Our Yay! Portrait Worksheets break the process down into clear, step-by-step exercises so students can build confidence and skill—one step at a time.

    👉 Get the Portrait Worksheets Today!


    Think of Cookies

    Imagine if you wanted to learn how to cook, but every time you went into the kitchen you had to make a completely different recipe using completely different techniques. That would feel so overwhelming! Now, Imagine going into the kitchen and learning how to make cookies by following the same process 5 times in a row. Let’s say the first time you forgot to add an egg, and your cookies came out super flat and gross. Then the next time you go to make cookies, you remember the egg and are super happy with your results. It’s an edible cookie! Maybe by the 3rd or 4th time, you start tweaking the recipe to meet your preferences. You take out the nuts, or add some chocolate chips. By now you have the experience you need to do so without ruining the good parts of the cookie that you want to keep. By the 5th time you go through the process of making the same cookie, you have created the perfect cookie for you, exactly to your preferences. But this perfect cookie for you could not have existed if you didn’t have a process to follow to begin with. You first mastered making a tasty cookie, and THEN started making your cookies unique. This methodology is the best way for teaching portraits in the classroom. Here is how you can do it.
    Teaching Portraits
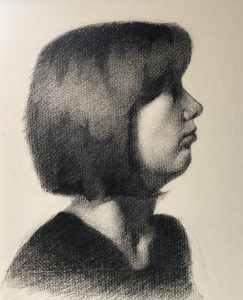
    Portrait Study by Mandy Theis, Charcoal on Paper, 2019

    🎨 Teach Portraits with Confidence! 🎨
    Want to help your students create portraits they’re proud of? Our Portrait Worksheets provide a structured approach to drawing faces, so students can develop strong foundational skills without frustration.

    ✔️ Learn proportions and structure
    ✔️ Build skills progressively with guided steps
    ✔️ Perfect for beginners and advanced students alike

    (Worksheets come in English AND Spanish too!)

    🖊 Give your students the tools for success! 👉 Get the Worksheets Now!

    Your Drawing Process Needs to Make Sense to Both You and Your Students

    Ok, so you agree you need a process because you both like tasty cookies and want to teach students to make portraits that they are proud of. But how do you come up with one? First, you have to decide what kind of portraiture you are teaching. Line drawing? Value drawing? Color painting? When teaching portraits, each of these techniques needs its own approach. The most important aspect of teaching portraits is to make sure you are giving instructions for ONE, and ONLY ONE approach. You can always teach an additional method once students have mastered the first portraiture technique. In order to teach portraits effectively to your art class, your chosen approach needs to make sense to them, which is something easier said than done. Want to improve your portrait drawings? Our Yay! Portraits Worksheets can help.

    Follow a Drawing Process when You Are Teaching Portraits

    However you currently teach portraits, think of a way to simplify it into chunks that are digestible and chronological. Break down the portrait drawing process into smaller and smaller pieces until students feel like “Hey, I can do that!”. Here is the process I use to teach my students portraiture:
    1. Find the height vs width of the entire head
    2. Find the biggest shape of the head
    3. Find the division between the hair and face
    4. Draw the line of symmetry of the face
    5. Use lines to indicate where the ears meet the side of the head
    6. Use horizontal lines as place makers for the top of the eye socket, bottom of the eye socket, bottom of the nose, top and bottom of the upper lip, and bottom of the lower lip
    7. Refine the eyes using only lines
    8. Refine the nose using only lines
    9. Refine the lips using only lines
    10. Find division between lights and shadows
    11. Shade shadow shapes one flat value
    12. Shade the rest of the head
    Get our Yay! Portrait Worksheets today!

    Avoid Overwhelm when Teaching Portraits

    Put restrictions on what part of a portrait students can work on in each lesson. This keeps them from getting overwhelmed by trying to get everything in. Break it down into simple steps where you ask them to think about one aspect of their drawing at a time. For example, have them start by finding the height vs. width of the head, then the overall shape of the head. *Hint* Humans have a LOT of different shapes of heads. Is it squarish? Roundish? Pointy on the bottom? Flat on the bottom? What IS the biggest shape of the head? *Hint #2* There is a big ole ball in the back of your head that is wider than most peoples’ faces. This is the biggest part of the head, and one that students often miss. Do you need lessons that take students from the very beginning to advanced portrait techniques? Check out our Yay! Portraits Worksheets.

    Think Big to Small when Teaching Portraits

    When drawing portraits, students always want to rush into making eyelashes before they even know the shape of their head. A general rule that I always emphasize in my classroom is to think big to small. If a student is working on eyelashes, I will ask them which is physically better, the shape of the hair or the eyelash. This helps redirect them to working from the big ideas first before placing smaller ideas.

    Make Multiple Drawings

    Just like making cookies, students need to practice drawing portraits multiple times to figure out their mistakes and make improvements. They need the time and space to learn what is actually a very complex and challenging skill. Students show significant growth in drawing portraits when they are able to practice an understandable series of steps at least a few times.
    Teaching portraits
    Portrait Study by Mandy Theis, Charcoal on Paper, 2017
    Do you want to learn even MORE about drawing portraits? Get our Yay! Portraits Worksheets today!

    Conclusion

    To teach portraiture well, you need both an understandable, teachable process and to give your portraiture unit enough time to be learned by your students without overwhelming them. They joy of seeing students’ faces when they pull off a portrait that is better than anything they ever thought they could do is a great reward for the amount of time and energy that goes into planning effective portraiture lessons. Happy portraiture teaching to you all!
    Art Class Lesson Plan
    The Portrait Drawing Secret that Every Art Teacher Should Know
    How Should I Draw?
    What is your process for teaching portraiture? Let me know in the comments below.
  • What to Charge for Private Art Lessons

    What to Charge for Private Art Lessons

    Finding the right price for private art classes doesn’t have to cost you sleep. This guide will help you price your services fairly and answer the question, “How much should I charge for art lessons?”.

    what to charge for private art lessons

    The Fear of Charging Money

    So, you are an amazing artist and educator and people are taking notice. You’ve started fielding requests to teach your neighbor’s cousin, or your best friend’s friend. Maybe parents are asking you for private lessons for their children after school.

    This can be exciting (Oh boy! A chance to work with highly motivated students!), affirming (Wow, I must be better than I give myself credit for if others want me to teach them!), and terrifying (What if I ask for the wrong price and people think I’m only into teaching for the money?).

    * Side note *

    ***Do you hear all art teachers everywhere laughing at the idea that you went into art education for the money ***

    *Double side note *

    *** still laughing***

    Ahem, back to the task at hand.

    Put A Price On It

    The first obstacle to overcome is the fear of putting a price tag on your time and expertise. You may have worked in public education so long that you forgot that your time, knowledge, expertise, and energy has value. Real value. Worth real dollars.

    Your skillset is special. If people are asking you for private lessons, it’s because they see you as worthy of teaching them and worthy of ponying up some dough for the privilege of learning from you.

    Asking Too Little

    In fact, if you ask for too little, which is the default of every art teacher I’ve ever met, the people wanting to hire you might start to second guess their choice. If you don’t value your expertise at a reasonable rate, you are signaling to others that you must not know what you are doing. And we both know that you know what you are doing, so stop sending false signals by lowballing yourself!

    And whatever you do, do not offer your services for free.

    I know, I know, there is a kid in your class that is so good and wants extra training but does not have the means to pay for it. If this is the case, get your school to pay you to start an art club.

    But for goodness’ sake make sure you are paid something!

    Nothing is more frustrating than essentially donating your time and then having it wasted by no-shows because they don’t have any skin in the game. Charging serious money for one-on-one training makes sure that your students stay serious. If they are paying real money for your services they will pay real attention to their progress in art.

    Let’s take a clear view of the situation: You are already donating a significant portion of your potential income and time to teaching in a public school in the first place. Some estimates show that teachers in the U.S. make 60% less than their college-educated peers. You are already a very generous soul JUST by choosing to work in public education. Additional time is YOUR time, and you deserve to be compensated fairly for it.

    How Much Money to Charge for Art Lessons

    Ok, hopefully by now I’ve convinced you that your skills are worth dollars. Now it is time to discuss how many dollars your skills are worth.

    The answer? More than most art teachers think.

    The best way to fairly price your work is to compare yourself to other qualified educators offering private lessons in the arts. There is one very obvious group to recon: Piano Teachers.

    Piano teachers are often licensed educators that teach private lessons on the side. Many piano teachers offer 30 minute and hour-long lessons. Their prices vary by location, but whatever they are charging in your area is a fair barometer of what you – a licensed educator offering private instruction in the arts – could and should be charging.

    The average piano lesson prices I see online is that one-on-one private art lessons run approximately $40 per half hour, or $60 for a full hour of instruction.

    So charge at least that.

    By the way, this DOES NOT INCLUDE THE COST OF SUPPLIES. Piano teachers require their students to purchase music in addition to their teaching fee. Similarly, the cost of art supplies should not be paid by you, but by your students.

    If you feel like you are “nickel-and-diming” your students by charging an additional fee for supplies, simply up your teaching rate to include the cost of supplies.

    Private Group Art Lessons

    When trying to price your services, find the most apples-to-apples comparison you can. For private lessons, piano teachers are an obvious comparable. For group lessons, look to the contemporary phenomena of the Paint-and-Sip parties.

    Consider this Paint n Sip model that suggests its instructors make between $200-$700 per class. And then keep in mind that these classes are often run by people who are not trained, licensed, experienced art educators.

    Often, you can reach out to people who run these events and request a quote for a group event. There you go, that is the market rate for teaching a group of people art skills. Add a premium for your experience and in-depth knowledge of teaching art.

    Another good place to look for comparable pricing is kids’ summer camps. My friend Shelley runs an amazing summer art program for students in the Seattle area and recently added “pod” classes. You can check out her rates for group classes at www.earlymasters.com . As of the publishing of this article, the rate is about $55 for two hours of instruction per child in a group class.

    Conclusion

    Hopefully this article helps you determine a fair price for your knowledge and expertise teaching art. Remember, your work is valuable and you deserve to be compensated accordingly.

    How much are you charging for private or group art lessons? Share in the comments below to help your fellow educators find the right price for their work.

  • Art Teacher Quiz

    Art Teacher Quiz

    [quiz-cat id=”2160″]

  • 3 Unexpected Podcasts for Art Teachers

    3 Unexpected Podcasts for Art Teachers

    There are obvious podcasts for art teachers, and then there are the hidden gem that you might have missed. Here are 3 unexpected art teacher podcasts that we think you should definitely know about.

    Art Ed Radio

    This podcast produced by The Art of Education has great resources and is very well-researched an run. School of Atelier Arts Director Mandy Theis was recently interviewed on this art teacher podcast to share a little bit about atelier training. You can listen to the episode here: An Introduction to Atelier Training.

    Skill-Based Art: A Learning Resource for Art Students & Artist-Teachers™

    Brought to you by a high school art teacher from Australia, Emilio brings key art education issues to life with a delightful accent.

    Emilio’s interviews are thoughtful and well-planned. He keeps his guests focused on interesting questions and there is less rambling than you find in other more free-form podcasts. Having been interviewed by him myself, I know that he is very well-prepared and sends a pretty intensive questionnaire prior to recording his episodes.

    Additionally, his guests are experts in their field. He has a particular focus on atelier training in art classrooms, and his interviewees include some of the most respected artist-teachers in the world. His guests include Daniel Graves, Paul Ingbretson, Catherine Lack, Iliya Mirochnik, and many others.

    Emilio is also very thorough with his podcasts, which are known to last hours. So, if you are looking for a deep dive into contemporary art education issues, this is the podcast for you.

    Paul Ingbretson Talks About Painting

    Paul Ingbretson is an atelier-trained artist and educator that teaches students from his studio in Lawrence, Massachusetts. He studied with the famous R.H. Ives Gammell in Boston who is largely credited with saving atelier training from extinction in the United States.

    Paul is a prolific video podcaster that releases a steady stream of videos. He currently has more than 240 video podcasts uploaded to his channel!

    If you are new to atelier training, you might get hung up a bit by some of the vocabulary he uses in his video podcasts. However, if you stick with it through a few episodes you will adapt to his way of speaking about technical art concepts.

    Paul is an invaluable resource for learning about atelier concepts – and particularly learning about composition and color. I am so grateful he started making these art teacher podcasts to share his knowledge with the rest of us.

    BONUS PODCAST!

    The Thriving Artist™ Podcast

    thriving artist podcast art teacher

    As art teachers, we know that we can’t just teach art – we also need to teach our most eager students how to make a career out of art. This podcast is perfect for helping students learn how to market themselves, their art, and their field.

    And if you are like most art teachers I know, it will also help you with your art side hustle.

    This podcast covers everything you need to know to sell art in the contemporary marketplace. It will guide you away from easily-avoided mistakes, and towards art marketing strategies that work best. It also covers the ever-changing philosophy and history of selling art.

    If you are ready to treat your art like a business or help your students succeed as independent artists, this is the podcast for you.

    What art teacher podcasts do you think should be added to this list? Let me know in the comments below.

  • How to Set Up a Painting Studio

    How to Set Up a Painting Studio

    Save yourself frustration and hassle by setting up your painting studio space the right way.

    painting studio setup

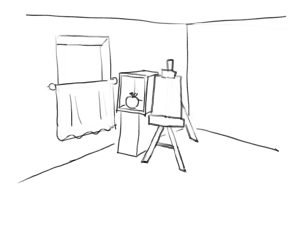
    Learning how to draw and paint at the highest levels is challenging enough – there is no need to make the task even harder with an inadequate painting studio setup. In order to make your painting studio space work for you, you need to set up your painting studio space in a way that allows you to set your easel properly, control your light, and place your still life setup in the right location in relation to your easel.

    Please note that this article contains affiliate links.

    Make sure to check out our shop for more great drawing and painting resources.

    Easel Setup

    An extraordinarily common mistake I see students make is that they set up their easels so that they are tilting backwards quite a bit. This is bad! You want your canvas or drawing board to be in the most vertical position on your easel that you can make it. When your work surface is tilted away from you, it creates distortion in your work due to perspective. Having your drawing or painting surface vertical eliminates much of this distortion.

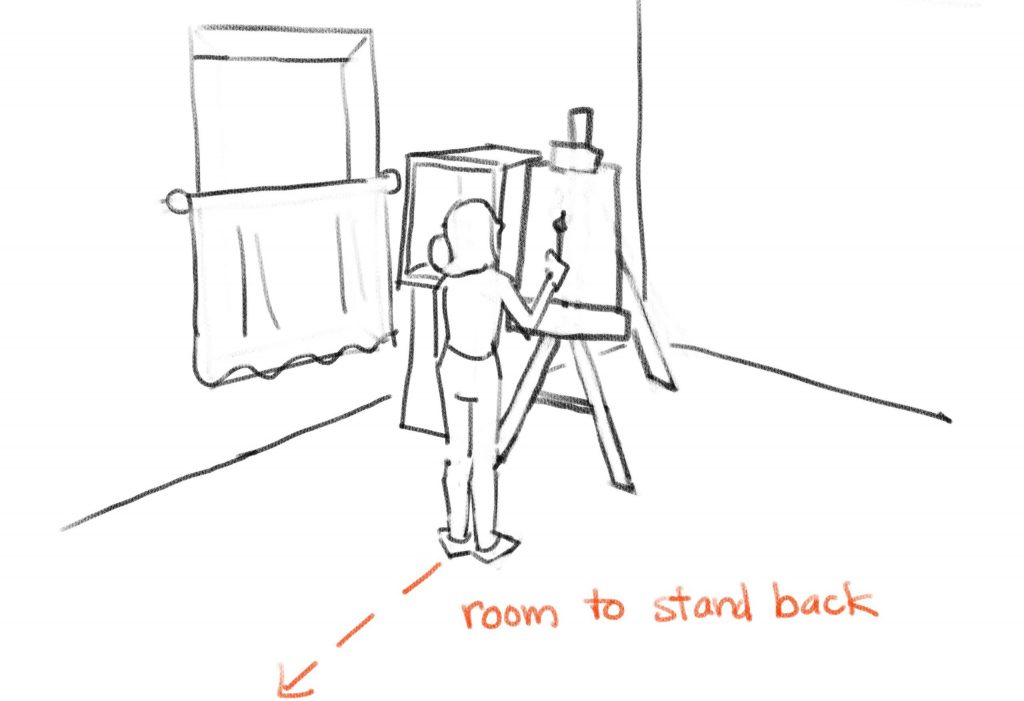
    Another common mistake I see is students sitting at their easel in their painting studio. One of the greatest assets you have as an atelier student is to stand back far away from your work. It helps you see big, which is one of the most important skills to learn in atelier training. If you do not have room to stand back when you set up your painting studio, you are depriving yourself of a huge advantage for progressing in your realistic drawing and painting skills.

    If you have physical limitations that prevent you from standing for long periods, I strongly encourage you to place a second chair further away from your easel so that you can see it from a distance in between painting sessions.

    Enjoying this article? Join our newsletter full of art delights.

    Lighting

    There are two approaches to lighting for a painting studio. One is to use natural light, and the other is to use artificial light. Both approaches have their pros and cons. Determine your preference in order to set up a painting studio for your needs.

    Natural Light

    Pros: Subtlety of light on the forms of your subjects, more nuance of color visible when painting, atmospheric with a wide range of edges visible.

    Cons: You cannot work after sundown, the light can shift the colors of your subjects depending on how overcast it is, and ideally you need north-facing light in order to have the most consistent lighting which limits the potential locations of your studio space.

    Want to start atelier training? Join our Ateliyay! Painting Bootcamp today!

    Artificial Light

    Pros: More defined lights and shadows which make it easier to draw and paint, you can work any time day or night, you can set up anywhere

    Cons: Sometimes it is challenging to light your easel without polluting the lighting of your subject, working in a dark room with spots on your subject and easel can be hard on the eyes, there is less nuance of value and color on your subject when lit by a spotlight.

    Enjoying this article? Join our newsletter full of art delights.

    How to set up a painting studio – Natural Light Setup

    If you want to work with natural light in your painting studio, you need to be able to control the light as much as possible. Ideally, you want to find a North-facing window.

    The worst option is a South-facing window. This is because you don’t want any direct sunbeams hitting your subject, only indirect light.

    You can make do with a West- or East-facing window as long as you understand what the limitations of them are.

    You never want direct sunbeams on your subject. Instead, you want to make an oculus out of your window that allows only some of the indirect sunlight to hit your still-life setup. You can do this by blocking out the lower half of your window. This allows light to enter your studio from above and creates a nice angle of light for lighting your subject.

    In the image below, notice how the lower half of the window is covered with a curtain. If you have other windows in your studio space, you want to block them out entirely. You want only one light source coming from one direction on your subject.

    Make sure to check out our shop for more great drawing and painting resources.

    how to set up a painting studio

    How to Set Up a Painting Studio – Artificial Light Setup

    This is the recommended painting studio setup for anyone who is new to atelier training. Artificial light creates clearly-defined shadows, bed-bug lines and cast shadows, which are all very helpful when drawing and painting using atelier methods for the first time. Artificial light also makes values when shading more obvious.

    The most important thing about setting up with artificial light is to make sure that the light on your easel does not pollute the subject which is lit by its own separate light. See the image below and notice how the light on the easel is raking from upper left to lower right across the easel board.

    how to set up an art studio

    The easel light is placed in a way where light pollution from the light on the easel will not get into the still life setup. It also prevents your arm from casting a shadow on your canvas in the area you are working. If you are left handed, you will want to set up the lighting in reverse.

    Want to start atelier training? Join our Ateliyay! Painting Bootcamp today!

    ARtificial Light Recommendations

    I recommend these lights for your painting studio setup:

    Option 1: A small, easy to maneuver light. My favorite thing about this light is that it has both warm and cool lighting options. (Natural light is cool, light from interiors is often warm. So, depending on your subject you have more control over the entire mood of the setup.)

    Option 2: This light has more stability than the first option because it does not have a bendy feature and instead uses solid arms to hold its position. It can be a but more bulky, but it is a solid option to use in the studio.

    Where does your still life go?

    Finally, to perfect your painting studio setup you want to be smart about where you place your still life setup.

    If you are right handed, you want to place the still life to your left. This way, you do not have to look over your arm in order to get a clear view of your setup. Left-handed folks will want to place their subjects to their right.

    If you are working sight-size, you will want to align the front edge of your shadow box with your drawing board.

    Generally speaking, you do not want to have to look too far up or too far down in order to see your subject. This is why I recommend to set up your painting studio by placing both your drawing board and the center of your box at eye level. See the image below.

    Make sure to check out our shop for more great drawing and painting resources.

    how to set up a painting and drawing studio

    You may have a specific artistic purpose to place your still life higher or lower than this recommended location. But if you are new to atelier training, you can literally save yourself some neck aches by being smart about your still life placement in relationship to your easel.

    I hope that this article helps you with how to set up a painting studio that works for you and propels you into a period of prolific art-making.

    What do you think about this easel setup? Do you do something different at home? Let me know your thoughts on how to set up a painting studio  in the comments below.

    Want to start atelier training? Join our Ateliyay! Painting Bootcamp today!

    Make sure to check out our shop for more great drawing and painting resources.

  • How to Clean Oil Painting Brushes

    How to Clean Oil Painting Brushes

    How exactly should you clean your oil painting brushes once you finish working for the day? It depends on who you ask.
    clean oil painting brushes
    Please note that this post contains affiliate links.

    Freezer

    Some artists detest cleaning oil painting brushes so much that they simply wrap them with plastic wrap and place them in the freezer in between sessions. The cold temperature of the freezer helps paint to dry slowly enough that the brushes remain pliable. If you are planning to get back to it the next day, this is the quickest way to deal with your brushes at the end of a painting session.

    That being said, this method only works if you paint most days. The paint will eventually dry on your brushes and ruin them, albeit more slowly in the frozen freezer tundra. Overall, it should be noted that long vacations in the freezer are not ideal for brushes and will eventually ruin them.

    But, if you hate cleaning brushes you might be willing to sacrifice a few here and there to the freezer monster out of convenience.

    Want to learn how to draw and paint realistically? Our Ateliyay! Curriculum can teach you how.

    Ready for some online painting classes? Join our Online Ateliyay! Painting Bootcamp today! No experience required.

    Actually Washing Them

    If you are not the type of heathen that willingly sacrifices your brushes, you will want to actually wash them.

    Step 1

    The first thing you should do is wipe as much paint off of them as possible. I recommend using these automotive paper towels for this purpose. They are specifically designed to capture oil and are less likely to allow the oil paint from your brush to soak through to your hands or other unwanted places.

    Are you enjoying this article? Join our newsletter full of art delights today!

    Step 2

    Next, you will want to dip your brushes in a brush cleaner or little bit of Gamsol (the ONLY solvent of any kind that I recommend to anyone. It is the only mostly odorless “mineral spirit” I have used and is REQUIRED in most ateliers to keep fumes down that other options inevitably create.)

    Dipping your brushes in either brush cleaner or Gamsol dissolves the remaining paint on your brush. In my experience, brush cleaner yields the best results.

    You may also want to consider this paint brush washing canister. You can pour Gamsol or brush cleaner until it covers the coil. By rubbing your brush along the coil, it helps release any paint caught between the bristles of the brush.


    Start learning how to paint the easy way in our online Ateliyay! Painting Bootcamp. Learn more here.

    Step 3

    Wash brushes with soap and water. You read that correctly. Soap attaches to oil and removes it from your brush. They have fancy brush soaps out there but any soap will work for cleaning your oil painting brushes.

    Master oil paint color mixing with our Yay! Color Theory Worksheets.

    Step 4

    Lay brushes flat to dry. DO NOT STORE YOUR BRUSHES UPRIGHT TO DRY. Laying your brushes flat keeps any remaining paint particles from dripping into the ferrule of the brush. If paint gets into this part of the brush and dries, it will splay the bristles of your brush which will ruin it.

    Additional Notes

    Notes from noted Atelier Artist Michael John Angel:

    “The best soap to use is a block of Marsiglia soap—it’s pure soap: no perfume. Failing that, dishwashing soap works like a charm; it’s designed to cut grease.
     
    You might not be aware that Gamblin products, excellent though they are, are not available in Italy (and possibly the rest of Europe).”


    I hope this post helps to take some of the mystery out of cleaning up after oil painting. Make sure to join our newsletter for more great art tips and tricks.

    What do you think? What is your process for washing brushes? Let me know in the comments below.