Draw Realistically Archives - School of Atelier Arts

Category: Draw Realistically

These articles teach you how to draw realistically.

  • Realistic Portrait Drawing

    Realistic Portrait Drawing

    Realistic portrait drawing is one of the most rewarding yet challenging skills an artist can develop. Whether you are a beginner struggling with basic proportions, or an experienced artist looking to refine your technique, this article will help you to draw better realistic portraits.

    Capturing a likeness requires a solid understanding of structure, feature placement, and head proportions.

    And it also means ignoring silly rules that are often taken as inalterable truths. (Eyes halfway on the head anyone? Rarely is this true unless you are sitting eye height with your subject and facing straight on.)

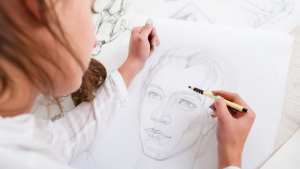
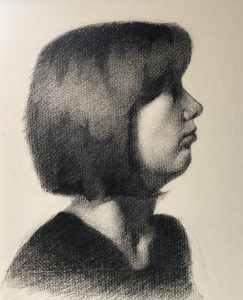
    portrait drawing by mandy theis

    Portrait drawing by SAA Director Mandy Theis.

    Many aspiring portrait artists find themselves frustrated when their drawings don’t resemble their subject, or feel “off” in ways they can’t quite pinpoint. This frustration is common because portrait drawing requires not just artistic inspiration, but also technical knowledge and deliberate practice. Without a clear process, mistakes like incorrect feature placement, wonky proportions, and awkward stiffness in the final portrait are inevitable.

    But there’s good news: realistic portrait drawing is a teachable skill, and with the right approach, anyone can master it. You heard me. REALISTIC PORTRAIT DRAWING IS A LEARNED SKILL.

    The reason many people believe they cannot draw well is because they have previously tried and it didn’t work out so well. But very few people have access to teachers that have portrait drawing skills. The problem wasn’t you. The problem is that you didn’t have access to someone with the skillset you wished to learn.

    Lucky for you, I can teach you EXACTLY how to make realistic portraits. You can see my own portrait work on my Instagram @mandyfineartist https://www.instagram.com/mandyfineartist.

    I am also a licensed art teacher. So not only do I know how to create realistic portraits, I know how to teach you efficiently how to make them too.

    (In fact, helping people learn realistic portraiture is exactly why I created the Yay! Portraits Worksheets. These worksheets help artists overcome the most common struggles and make lifelike, accurate portraits with confidence.)

    In this guide, we’ll explore the major challenges artists face when drawing portraits, the essential principles that lead to realistic results, and how structured practice can accelerate your portraiture drawing skills.

    Why Realistic Portrait Drawing Feels So Difficult

    Many artists, even those skilled in other areas, find portrait drawing uniquely challenging. That’s because the human face is deeply ingrained in our psyche—we are naturally wired to recognize faces and notice even the slightest inaccuracies. When something is off, we can sense it instantly, even if we don’t know exactly what went wrong.

    Here are the most common reasons for portrait drawings fails:

    1. Overall Head Proportions Are Inaccurate

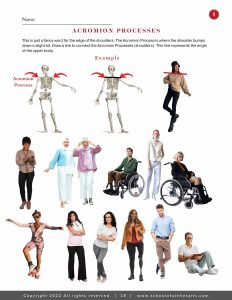
    The human head has a giant mass at the back of the skull that is bigger than the face portion of the head. But students often ignore this mass, essentially cutting off the entire back of the head which is still visible in a front facing portrait. Without understanding that this mass exists, and relating it to the proportions of the face, it’s easy to make the skull too wide, the forehead too small, or the chin too long. One of the most frequent mistakes beginners make is not correctly measuring the height-to-width ratio of the head, which results in absurdly placed features.

    You can practice finding the mass of the back of the head with our Yay! Portrait Worksheets, like the sample worksheet below.

    2. Feature Placement Destroys the Likeness

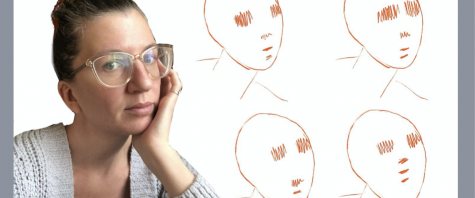
    One of the biggest mistakes artists make is focusing too much on individual details—like a beautifully drawn eye or a well-rendered nose—without first ensuring that all features are placed correctly in relation to one another. LIKENESS IN A PORTRAIT COMES FROM THE FEATURES BEING THE CORRECT DISTANCE FROM EACH OTHER. Even if you perfectly render each feature, if their placement is off by just a little bit, the portrait won’t look like the subject.

    For example:

    • Eyes that are even slightly too high or too far apart will make a face look like somebody else.
    • A nose that’s just a fraction too low can make the subject look older than they really are.
    • A misplaced mouth can completely change the expression, making the portrait feel “wrong.”
    • Misaligned features make the head feel like it is turning in different directions within the same portrait.

    This is why getting feature placement right from the start is essential for capturing a likeness.

    If your drawing looks “off,” chances are it’s a feature placement issue, not a rendering issue. Even slight misplacements can destroy a likeness, so it’s crucial to observe and measure distances between features carefully.

    While placement “rules” about the eyes being halfway on the head can help establish general structure, be wary of the many dubious rules batted about in drawing books about the heights, widths, and general locations of individual facial features.

    Some people have wide-set eyes, others have narrow noses, and lips come in countless shapes and sizes. This is what makes each face unique. Instead of following rigid formulas, artists must train their eyes to observe these variations and adjust their drawings accordingly. Capturing these subtle differences is what truly brings a portrait to life.

    In fact, all of these so-called “rules” are mostly nonsense. They represent an idealized version of a human face—one that almost no real person actually matches exactly. If you try to force every face into these proportions, you’ll end up with generic portraits that fail to capture the unique individual qualities of your subject.

    Instead, use the ideal figure as a reference point to analyze how your subject deviates from the idealized version. Is their nose slightly shorter? Are their eyes wider apart? Does their chin extend lower than the “right” proportions suggest? Recognizing and emphasizing these differences is what makes a portrait look like the actual person rather than just another generic face.

    Getting the relationship of features to each other right is one of the hardest things for students to learn. It takes a lot of practice to get it right. It also helps to have a system, like what I teach in the online Ateliyay! Painting Bootcamp, to get it right.

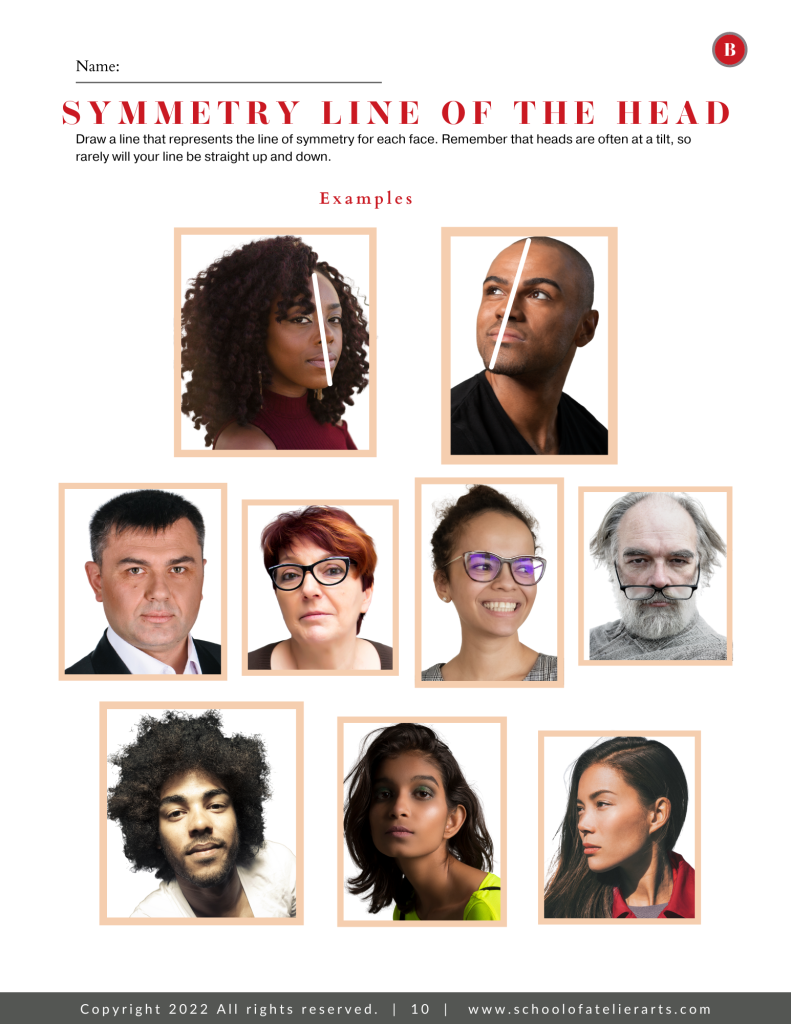
    I also teach this system for feature relationships in our Yay! Portrait Worksheets like the one you see below.

    3. The Angle and Gesture of the Head Are Incorrect

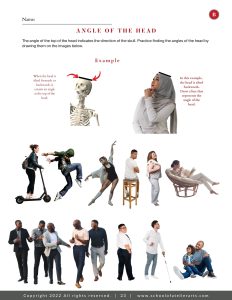
    A common reason portraits feel “off” is that the tilt or angle of the head hasn’t been properly established. Even a small mistake in the tilt of the brow line, nose, or mouth can create an unnatural or distorted look. The head is rarely perfectly straight-on, so artists must learn to accurately depict head angles to create believable portraits.

    Our Yay! Portraits Worksheets help train artists to identify and accurately draw these head directions.
    Want to to be better at realistic portrait drawing? You need a structured approach.

    The key to improving portrait drawing is not just more practice—but the right kind of practice. Instead of drawing the same way as always, while making the same mistakes over and over, artists need a step-by-step process that teaches them how to analyze, construct, and refine portraits that actually look like the person they are trying to draw.

    That’s where the Yay! Portraits Worksheets come in. These worksheets provide a systematic approach to portrait drawing, covering essential techniques that eliminate guesswork. By following guided exercises, artists can build their skills faster and with greater accuracy.

    What Makes the Yay! Portraits Worksheets So Effective?

    1️⃣ Mastering Overall Head Proportions – Learn the rules of facial symmetry, spacing, and the skull’s structure to ensure every portrait starts with a solid foundation.
    2️⃣ Getting Feature Placement Right – Follow a structured method to correctly position eyes, nose, mouth, and ears to ensure accuracy and likeness.
    3️⃣ Understanding Head Angles – Learn how to construct heads at different angles so portraits feel natural and not awkward or stiff.
    4️⃣ Focused Practice – Each worksheet targets specific problem areas, so you improve efficiently without getting overwhelmed.

    Unlike simply copying a reference photo, these worksheets teach you how to “see” like an atelier-trained artist.

    Start Drawing Realistic Portraits Today!

    If you’re tired of struggling with portraits that don’t quite look right, you don’t have to keep guessing. With the Yay! Portraits Worksheets, you’ll get the exact step-by-step guidance you need to start drawing realistic, lifelike portraits right away.

    📥 Download the Yay! Portraits Worksheets now and transform your portrait skills today!

    Your best portraits are just a few practice sessions away.

    Want more?

    If you are ready to take you and your art seriously, the best way to learn how to draw is under an atelier-trained artist. That is what our online Ateliyay! Painting Bootcamp gives you. You will get to practice your portraiture under the guidance of a true expert. Learn more about our online Ateliyay! Painting Bootcamp here.

  • Drawing Assignments for High School Students

    Drawing Assignments for High School Students

    These drawing assignments for high school students are perfect for helping your students learn how to draw at a higher level.

    Drawing Assignments to Help Your Students Draw People Better

    So your students want to draw people that look “real”, but they never come out quite right.

    Most often this is because students focus on drawing details like eyelashes or strands of hair.

    For successful figure drawings, however, students need to draw the most important concepts first: proportion and gesture.

    Teaching your students how to draw people with correct proportions is a game-changer for getting their figures to look “real”.

    Gesture is equally important, because without it drawings of people look like wooden statues.

    This free drawing assignment lesson plan shows your students how to get consistently good proportions and figure gestures in their drawings.

    drawing assignments for high school students

    Want to start atelier training? Join our Ateliyay! Painting Bootcamp today!

    Drawing Assignments that Teach Your Students About Edges

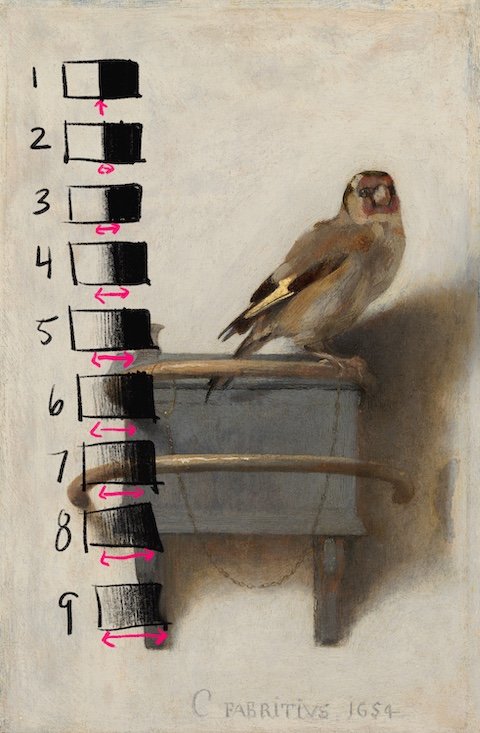
    Edges are the often-neglected but oh-so-important workhorse of drawing. Understanding and applying good edgework in drawings takes students to the next level.

    Often, we art teachers spend a lot of time teaching drawing assignments about values – how light and dark to shade things in a drawing.

    But JUST AS IMPORTANT is what happens when one value meets another value.

    Does the light value meet the dark value abruptly? Or is it a soft transition?

    Edgework is actually quite a simple drawing skill to teach, and this free edges drawing assignment will help your students learn how to master the concept.

    drawing assignments for high school students

    Drawing Assignments that Teach Texture

    Texture is a skill that is always impressive when seen, but often a confusing concept for students.

    “Shiny” is perhaps the most impressive texture of all to see in a drawing, and is actually one of the easiest textures to achieve in a short drawing assignment.

    In this free drawing lesson, students will discover how to manipulate values to create a drawing of a shiny object.

    Drawing Assignments for High School Students

    Looking for more great drawing ideas? Check out these blog posts:

    Drawing Worksheets

    Portrait Drawing Secrets

    Name Your Shapes When Drawing

    Want to start atelier training? Join our Ateliyay! Painting Bootcamp today!

  • How to Draw a Person

    How to Draw a Person

    Have you always want to learn how to draw a person, but didn’t know where to start? This article will show you everything you need to know to draw people well.

    How to Draw People
    How to Draw People Worksheets

    How to Start

    The temptation for many people when they are drawing people is to first make the eyes, or nose, or something that is relatively small.

    But this is a mistake.

    When drawing people, you always want to start with the biggest ideas first, and then work your way to the smaller ideas.

    And the biggest idea you need to capture first, before even THINKING about drawing eyes, is the overall proportion of your figure. How tall compared to how wide is your figure?

    Artists often indicate the height of the figure by marking the bottom of the feet and the top of the head.

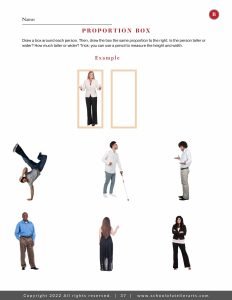
    For the width, artist sometimes use what is called a “Proportion Box”. It is a box that represents the height and width of the person.

    proportion box figure drawing
    Proportion Box Figure Drawing

    Do you want fool-proof, step-by-step guidance on how to draw a figure? Our Yay! People Worksheets will teach you everything you need to know to draw believable figures.

    Envelope Method

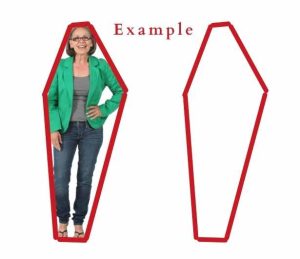
    Once you have determined the height and width of your figure, you can get a little more specific with the shape. To do this, use a technique called an envelope.

    An envelope contains a small number of straight lines that incapsulate the overall shape of the person you are trying to draw.

    Envelopes are advantageous because they help you find the bigggest overall shape before getting distracted by details.

    The envelope also helps you start to organize how one major point, say the elbow, relates to another major point like the head.

    Look at the image below, and notice how this relatively simple envelope shape helps describe the entire person that is being drawn.

    envelope how to draw a person

    Major Anatomical Landmarks

    When learning how to draw people, it is important that you know how to identify important anatomical landmarks. This takes both knowledge and practice.

    Our Yay! People Worksheets help students learn how to identify important anatomical landmarks and practice finding them in a variety of poses.

    Key landmarks to learn include the greater trochanter, symphysis pubis, sternal notch, and acromian processes.

    It is important that you not only know what these landmarks are, but how to find them on the human figure. Students often mistake the greater trochanter for the hip, for example. That is why it is important to practice finding key landmarks over and over again so that you can internalize them.

    (Need help learning anatomical landmarks? Our Yay! People Worksheets include dozens of examples to help you learn and practice how to find key landmarks on the human figure.)

    anatomical landmarks of the figure
    Learn key landmarks when drawing figures.

    Refine Your Drawing of a Person

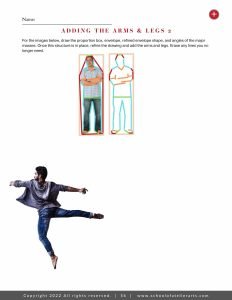
    Once you have your major proportions and shape set, and your key anatomical landmarks identified, you can start to refine your drawing.

    Again, it is best to always work from the biggest ideas to the smallest. The shapes of the arms and legs, for example, are much bigger than an eyelash. Be mindful of what is physically the next biggest idea when learning how to draw a person and it will help you.

    how to draw a person in stages

    Next Steps for Drawing People

    By starting with a proportion box and envelope and then working to smaller ideas such as the individual arms and legs, you are well on your way to drawing believable people.

    It can be challenging to learn how to draw people, which is why the School of Atelier Arts created these extensive worksheets to help people learn. ANYONE can make believable people that has access to good knowledge and quality practice, and that is what these people drawing worksheets provide.

    Once you master drawing people, you might want to learn more about portraits in order to bring your drawing of people to the next level. Check out our articles on portraiture:

    Teaching Portraits

    5 Mistakes Art Teachers Make When Teaching Portraits

    Yay! Portraits Worksheets

    How do you draw people? Let me know in the comments below.

  • Drawing Worksheets

    Drawing Worksheets

    Are you looking for drawing worksheets that will actually teach you useful skills? These worksheet sets might be just what you are looking for.

    drawing worksheets

    Yay! Portraits Worksheets

    Go from terrified to confident with these easy-to-follow worksheets that help you draw believable portraits.

    Do you want to create wow-worthy portraits? These worksheets will help you create believable portraits that boost your drawing confidence.

    JUST IMAGINE HOW IT WOULD FEEL IF YOU COULD…

    • Learn portraiture with diverse cultural representation
    • Have a method for succeeding at portrait drawing
    • Improve your drawing abilities so that you can make believable portraits
    • Get wow-worthy work portraits every time you attempt to draw a person
    • Access 50+ worksheets that make learning how to draw portraits easy

    I want these portrait worksheets now!

    portrait worksheets

    Created by SAA Director Mandy Theis

    These worksheets are created by SAA Director Mandy Theis. This is what she has to say about them:

    “When my students first started asking me to teach them how to draw people, I was intimidated. I didn’t really learn those skills in my own college classes. How was I going to teach them something I didn’t know?

    Worse, I saw art teachers all around me posting amazing student portrait drawings. How were they getting their students to make such impressive artwork?

    While searching for resources to teach portrait drawing better, I came across something called “atelier (pronounced ah-tel-ee-ay) training”, which is a method for learning how to draw and paint realistically. Atelier training was the answer I was looking for!

    After studying full time in ateliers for 5+ years, I made it my mission to share what I learned with my fellow art teachers through the Ateliyay! Curriculum. I want to help art educators like you teach their students amazing drawing skills using methods that have been handed down from artist to artist for centuries.”

    Looking for more information? Read Mandy’s article on how to teach portraits.

    Want to start atelier training today? Join our Ateliyay! Painting Bootcamp today!

    Why These Portrait Drawing Worksheets Work So Well

    EASY WINS

    Our worksheets start off with super easy and accessible concepts to build student confidence when drawing portraits.

    BUILD SKILLS

    Our worksheets help you to avoid student overwhelm by teaching just one simple drawing concept at a time and then scaffolding the different skills.

    Order portrait worksheets now!

    What’s Included?

    Yay! Portraits is a collection of more than 50 worksheets that teach students an approachable method for drawing portraits.

    It’s a digital product that is delivered via a PDF download to your email account. Please note that sometimes school districts block large downloads like our worksheets, so we recommend using a personal email address for purchasing our digital products.

    Get these portrait worksheets now!

    Yay! People Worksheets

    Our Yay! People Worksheets show you exactly how to break down complex drawing concepts, and how to really achieve that wow-factor in drawings of people.

    School of Atelier Arts’ proven process for drawing people starts with simple ideas, and helps students build to more complex skills. ANYONE can learn how to draw realistic people by following these worksheets.

    I want these people drawing worksheets now!

    yay! people Worksheets

    Lessons include:

    • How to find the biggest shape when drawing people

    • How to control proportions when drawing people

    • How to identify major anatomical landmarks

    • How to use anatomical landmarks to find major relationships on the human figure

    • How to correctly identify the gesture of a figure

    • How to make drawings of people look real

    • How to follow a drawing process to eliminate frustration and confusion

    • How to “anchor” feet in a drawing

    • How to check work for accuracy

     and much, much more!

    I want these worksheets now!

    Yay! People Worksheets #2

    How Do I Get Yay! People Worksheets?

    Yay! People Worksheets is a digital product, and will be delivered electronically to your inbox. This is not a physical product.

    Some school district internet networks and email addresses don’t know how important our resources are to art teachers and block large downloads. If you have difficulty downloading your product for any reason, please reach out to help@schoolofatelierarts.com for assistance.

    Like all of our resources, we offer a 30-day, money-back guarantee. If you don’t LOVE your worksheets, simply write to help@schoolofatelierarts.com within 30 days for a full refund, no questions asked.

    You have nothing to lose, and everything to gain. Get your worksheets today, and watch your ability to draw grow exponentially.

    Want to start atelier training today? Join our Ateliyay! Painting Bootcamp today!

  • 6 Easy Steps to Draw & Paint Realistically

    6 Easy Steps to Draw & Paint Realistically

    6 EASY Steps to Draw and Paint Realistically RIGHT NOW

    Here are 6 easy steps you can take to to learn how to draw realistic things RIGHT NOW.

    If the idea of being able to draw realistically and paint like the Old Masters makes your heart sing, there are some simple steps you can take to get started on your atelier journey right away.

    In order of smallest time commitment to biggest time commitment, here are some ways to start learning how to draw and paint realistic things TODAY.

    1 Minute: Join our SAA mailing list for tips, tricks, inspiration & more. We send out lesson plans and other resources for learning how to draw realistically.

    10-15 Minutes: Watch an atelier video that teaches a skill. The videos in this mini-series on color theory take only 10-15 minutes to watch, and you will come away with at least one new color concept you didn’t know before.

    30-90 Minutes: Download some of our free art lessons and give them a spin. These short, easy-to-follow lessons will help you build some realistic drawing skills with only a 30-90 minute time commitment.

    10-15 Hours: Ready for a bit more serious study? Try our Yay! Portraits Worksheets that take you through a series of realistic drawing exercises to help you make accurate portraits.

    1 Week: Ready to jump in to your first full atelier project? This free YouTube class takes you step-by-step through the process of completing a project that most ateliers have you do as your very first one. It’s called a Bargue Plate. Don’t worry – you don’t have to do it all at once! Each video is about 15 minutes long, and the series has ~30 videos. You can work through them at your own pace. And by the end, you will know how to draw realistic images at a high level.

    6 Weeks: Apply for the MA in Studio Art. Now you are playing in the big-kids pool.

    This accredited MA in Studio Arts program is summers-only, has remote and in-person options, is 100% studio-based, and requires ZERO year-round obligations. Train intensively in atelier skills for 3 summers.

    If you are serious about expanding your technical art skillset without quitting your current job, this is what you need. This program will teach you how to draw and paint realistically.

    It’s not easy taking first steps towards atelier training, but the most important thing is to take a step.

    So pick one and give it a try, your future self will thank you when you are drawing realistic images!

    What steps are you taking to start your atelier journey? Let me know in the comments below!

  • 5 Mistakes Art Teachers Make When Teaching Portraits

    5 Mistakes Art Teachers Make When Teaching Portraits

    Are your students’ portraits just so-so? Here are 5 common mistakes to avoid when teaching portraiture to help you get wow-worthy work from your students.

    how to draw portraits

    Mistake #1 Bad Student Model Setup

    Nothing will kill a student drawing session faster than a bad model setup. If your model is moving and swaying, students become very discouraged very easily. Luckily, there are some easy tips and tricks for helping your model hold a pose well, even if it is their first time ever modeling.

    Manageable Pose

    First-time models will swear up and down they can hold a pose with arms over their heads, or weight all on one leg, or any number of other poses that are bad ideas. It is your job to dissuade them.

    For holdable poses, put your student models in a chair. With arms. With pillows or folded cloth on the arms, and a pillow behind the back. Tape these cushions in place so they don’t move. Have your model keep both feet on the floor (no crossed legs or ankles!), or even place feet slightly elevated on a stool for comfort.

    Point of Focus

    To keep the head from looking around the room, you need to provide your student model with a single point of focus. Ask them to pick out a small object in the room to look at, or place a piece of tape on the wall for them to focus on. Make sure that the point of focus does not require them to turn their head more than 15-20 degrees from center in either direction. Exaggerated head turns may feel easy to begin with, but will strain the neck of inexperienced models.

    Mark the Pose

    Once your model is positioned in a comfortable chair that is well-padded, mark the pose. You can do this by placing electrical tape where the arm meets the chair, the feet meet the floor, etc. These tape marks should be easy for the model to see so they can place their limbs correctly after breaks. Marking the pose allows the model to sit as close as possible in the original position when there are breaks between poses.

    *Note* Often poses settle during the first 20 minutes of their duration. It’s best to mark the pose at the END of this first 20 minutes, once it has settled. Which brings us to our final important tip about posing student models…

    Enjoying this post? Join our popular art teacher newsletter for more great teaching tips delivered directly to you inbox!

    Time the Pose

    Inexperienced models should not pose for more than 20 minutes. This is both for safety (new models often do not have the experience to know whether or not one of their extremities is falling asleep) and for the most movement-free modeling for your drawing students.

    Of course there is always movement when drawing a living, breathing creature. However regular breaks are ideal for helping your models sit still.

    A good rule of thumb is to have a model take a 5 minute break for every 20 minutes of posing. If you have block scheduling with 90-minute periods or longer, allow for at least one longer break half way through the sitting.

    By following these suggestions, you will be setting your model (and your drawing students) up for a successful portrait drawing session, and avoid one of the biggest mistakes art teachers make when they start their portraiture unit.

    Do you want help teaching portraits? Get our Yay! Portraits Worksheets today!

    Mistake #2 Dependent on Photographs

    Another common mistake I see art teachers make is depending on photographs for their students to copy. Even if the photographs are originals, using photography prevents students from developing the basic portraiture skills they need to build their drawing confidence.

    Cameras do a lot of the work for students, without them even realizing it. A photograph has already translated massive amounts of visual information from the three-dimensional world into two dimensions. This makes working from photos extra digestible for students, but simultaneously deprives them of the opportunity to choose which information to include in their portraits for themselves.

    There is a huge difference between drawing from life and drawing from photographs. This is such an important (and controversial!) topic that I’ve devoted an entire post to the question, “Why not just use a camera?”.

    If you have never had your students work from a live model before, I encourage you to give it a try. It has different challenges and different learning outcomes. When students are able to achieve solid results without a camera, it bolsters their belief in their abilities.

    If you are concerned about teaching how to draw portraits from life because you personally prefer photographs, fear not. We have lots of great lesson plans available to help you teach portrait drawing from a living model to your students.

    Accelerate your students’ learning with our Yay! Portraits Worksheets.

    Mistake #3 Too Many Light Sources

    This is a big one. It’s so satisfying to see beautiful, shaded and modeled portrait heads done by students. But if you are going to have students shade their portraits, it is important for ease of student learning that only one light source is hitting the model.

    When there is only one light source on the model, shadow shapes are the most obvious, and the ability to identify values becomes easier. It helps students rack up easy wins by correctly identifying and drawing accurate shadow shapes.

    Contrarily, many light sources often create the illusion of flattened forms and makes it much more difficult for students to identify shadows. Confusion for students nearly always leads to greyed-out portraits and frustration for all.

    How to Control the Light in an Art Classroom

    Lighting is a constant source of struggle for single artists, let alone a group of 30 novice artists. Art teachers have to be able to manage light for an entire classroom of students, which is no easy feat.

    Additionally, classrooms are often designed with multiple, competing and unwieldy light sources that can be challenging for art teachers to control. This often means coming up with creative ways to control the lighting.

    Some art teachers manage multiple light sources in their classrooms by blocking out all of their windows except for one. Others set up a spotlight in their room to focus on the model, and turn off most of the other lights, leaving one far-away light on to act as ambient light to help students see their papers.

    Every classroom is unique with its own lighting challenges, and it will likely take a few different attempts at controlling light before you narrow in on the strategy that works best for you. But it is absolutely worth applying a few light-controlling strategies to help make sure only one light source hits your model, as lighting makes a huge difference in the quality of work you can get from students.

    Ready to take your students’ artwork to the next level? Get our Yay! Portraits worksheets NOW.

    Mistake #4 No Drawing Boards

    Drawing boards are so important. In fact, they are so important I wrote this entire article on why drawing boards are essential art classroom materials.

    When students have their drawing flat on a table, it creates distortion. The bottom part of their drawing is closer to them and therefore appears larger, and the top is farther away and therefore appears smaller. Visually, this tricks students into making the top part of their drawing much too big and the bottom part of their drawing much too small.

    Drawing boards reduce the distortion be allowing the drawing to be worked on more upright. Even if you do not have easels in your classroom, drawing boards are easy to implement. Simply have students rest the bottom of the boards on their laps and lean again a table.

    Drawing boards do not have to be heavy and expensive either. You can learn more about best drawing boards for the art classroom here.

    Mistake #5 No Clear Drawing Method

    In order to teach portraiture successfully, you need to have an easy-to-understand method that breaks down complex drawing skills for your students.

    So often I see art teachers set up a model and tell students “Ok, draw!” This is unlikely to yield the results students want for themselves.

    Remember, it is your job as an art educator to teach art. This means providing knowledge and insight to help students achieve their objective. If you are teaching realistic portraiture, you need to have a method that helps students achieve this aim.

    There are many, many methods for teaching portraiture. The important thing is to stick to ONE METHOD to teach at a time. You can always teach additional approaches at another time, but avoid confusion in the classroom by focusing on just one series of steps students can take to achieve their portrait goals. You can get a free portrait teaching guide here.
    To help your students accelerate their learning you can purchase our extensive worksheets that teach portrait drawing.

    By avoiding these 5 common portraiture lesson mistakes, you can up the level of your students’ work, garner more attention for your amazing art program, and bolster the confidence of your students.

    Teaching Portraits

    Ateliyay! Curriculum

    Art Class Lesson Plan

    What mistakes do you think art teachers should avoid when teaching portraiture?  Let me know in the comments below.

  • The Portrait Drawing Secret that Every Art Teacher Should Know

    The Portrait Drawing Secret that Every Art Teacher Should Know

    Capturing a likeness when drawing portraits is one of the most difficult challenges students face in the art classroom. This one secret will make you a hero for teaching students how to make accurate portraits. Every. Single. Time.

    Please note that this article contains affiliate links.

    Learning from Forensic Illustration

    First off, I would like to give credit to the incredible work of the forensic illustrator, Karen T. Taylor, for being the first art instructor to introduce me to the significance of the concept I am about to share with you. Although I had glossed over it in my atelier training, in her book Forensic Art and Illustration she proved beyond a doubt that this one overlooked concept is THE KEY to accurate portraits.

    I strongly encourage you to read her fascinating (but somewhat morbid) book on forensic illustration. She is a world expert on creating likenesses of people when it matters most for catching heinous criminals, and identifying missing persons.

    Want to accelerate your portrait drawing skills? Get our Yay! Portraits Worksheets today!

    The Portrait Drawing Secret

    So, are you ready for the portrait drawing secret that will change your drawing life forever?

    It’s simple, really. The one portrait drawing secret you simply must know is this:

    Likenesses come from accurately representing the relationship of the features to each other.

    What does this mean, exactly?

    The key word here is relationship.

    When people draw portraits, they tend to obsess on what color the eyes are or what shape the mouth is. And while these things have some importance, they are insignificant compared to the relationship of the features to each other.

    Let’s say you draw a mouth that is EXACTLY the accurate shape of your subject, and eyes that are EXACTLY the right color. Both of these things can be perfect, but the drawing won’t have a likeness unless the distance between your mouth and eyes is accurate. Getting the correct relationship between the mouth and eyes is far more important for capturing a likeness than the shapes or colors of those features.

    Consider this simple illustration that uses the exact same shapes for eyes, nose, and mouth but changes the relationship of these features to each other. Notice how the likeness completely changes?

    Teach portrait drawing

    (Enjoying this article? Download our Yay! Portraits Teaching Guide for even MORE tips and tricks for drawing portraits.)

    Want to accelerate your portrait drawing skills? Get our Yay! Portraits Worksheets today!

    How does this help me teach portrait drawing?

    Have you ever spotted a friend really, really far away, and immediately knew it was them? You couldn’t possibly see the color of their eyes, so how did you know it was them?

    The answer might surprise you.

    It turns out that humans rely heavily on contrast for intaking visual information. When your very-far-away friend is first spotted, what you are seeing is a light and shadow pattern on their face created by their facial features.

    When the sun is overhead, the eye sockets cast a shadow on the face. The nose casts a shadow on the face. The upper and lower lips cast a shadow on the face. It is the relationship of these dark shadows to each other that create a pattern. This pattern in turn tells your human brain “That’s my friend!”

    The reason the relationship of features to each other matters so much is because humans simplify visual intake and rely heavily on patterns. It is simply too much information to take in the color of someone’s eyes, when the only information we really need to identify someone is the pattern of lights and darks created by shadows of the features onto the face.

    Want to accelerate your portrait drawing skills? Get our Yay! Portraits Worksheets today!

    Teach Portrait Drawing Like a Champ

    Getting a true likeness in portraiture is a challenging task. By spending time correctly considering the relationship of the features to each other, and recreating these relationships in their drawings, students will makes portraits with better likenesses.

    Did you find this article helpful? Download our Yay! Portraits Teaching Guide for even MORE tips and tricks for drawing portraits.

    What is your portrait drawing secret? Let me know in the comments below.

    Want to accelerate your portrait drawing skills? Get our Yay! Portraits Worksheets today!

  • Teaching Portraits

    Teaching Portraits

    Whether you love it or hate it, portraiture is an important and sometimes required unit for art educators to teach. Here is a realistic drawing approach for teaching portraits to students in your art classroom.
    how to draw portraits

    You Need a Drawing Process for Teaching Portraiture

    When asking students to draw portraits, we are asking them to do something quite challenging. They have to think about shapes, and forms, and values, and symmetry, and asymmetry, and textures, and sometimes even color! This is SOOOOOO much. Don’t make them think about everything all at once! Give them a process that allows them to think about one part of their portrait at a time. This is not to force students to give up their creativity. Rather, it is so students can learn one way of drawing portraits that is consistent so that the steps can be practiced and improved upon. Teaching portraits with a clear process is essential for helping students learn the techniques to achieve high level results.

    ✏️ Make Portrait Drawing Simple! 
    Struggling to teach portraits without overwhelming your students? Our Yay! Portrait Worksheets break the process down into clear, step-by-step exercises so students can build confidence and skill—one step at a time.

    👉 Get the Portrait Worksheets Today!


    Think of Cookies

    Imagine if you wanted to learn how to cook, but every time you went into the kitchen you had to make a completely different recipe using completely different techniques. That would feel so overwhelming! Now, Imagine going into the kitchen and learning how to make cookies by following the same process 5 times in a row. Let’s say the first time you forgot to add an egg, and your cookies came out super flat and gross. Then the next time you go to make cookies, you remember the egg and are super happy with your results. It’s an edible cookie! Maybe by the 3rd or 4th time, you start tweaking the recipe to meet your preferences. You take out the nuts, or add some chocolate chips. By now you have the experience you need to do so without ruining the good parts of the cookie that you want to keep. By the 5th time you go through the process of making the same cookie, you have created the perfect cookie for you, exactly to your preferences. But this perfect cookie for you could not have existed if you didn’t have a process to follow to begin with. You first mastered making a tasty cookie, and THEN started making your cookies unique. This methodology is the best way for teaching portraits in the classroom. Here is how you can do it.
    Teaching Portraits
    Portrait Study by Mandy Theis, Charcoal on Paper, 2019

    🎨 Teach Portraits with Confidence! 🎨
    Want to help your students create portraits they’re proud of? Our Portrait Worksheets provide a structured approach to drawing faces, so students can develop strong foundational skills without frustration.

    ✔️ Learn proportions and structure
    ✔️ Build skills progressively with guided steps
    ✔️ Perfect for beginners and advanced students alike

    (Worksheets come in English AND Spanish too!)

    🖊 Give your students the tools for success! 👉 Get the Worksheets Now!

    Your Drawing Process Needs to Make Sense to Both You and Your Students

    Ok, so you agree you need a process because you both like tasty cookies and want to teach students to make portraits that they are proud of. But how do you come up with one? First, you have to decide what kind of portraiture you are teaching. Line drawing? Value drawing? Color painting? When teaching portraits, each of these techniques needs its own approach. The most important aspect of teaching portraits is to make sure you are giving instructions for ONE, and ONLY ONE approach. You can always teach an additional method once students have mastered the first portraiture technique. In order to teach portraits effectively to your art class, your chosen approach needs to make sense to them, which is something easier said than done. Want to improve your portrait drawings? Our Yay! Portraits Worksheets can help.

    Follow a Drawing Process when You Are Teaching Portraits

    However you currently teach portraits, think of a way to simplify it into chunks that are digestible and chronological. Break down the portrait drawing process into smaller and smaller pieces until students feel like “Hey, I can do that!”. Here is the process I use to teach my students portraiture:
    1. Find the height vs width of the entire head
    2. Find the biggest shape of the head
    3. Find the division between the hair and face
    4. Draw the line of symmetry of the face
    5. Use lines to indicate where the ears meet the side of the head
    6. Use horizontal lines as place makers for the top of the eye socket, bottom of the eye socket, bottom of the nose, top and bottom of the upper lip, and bottom of the lower lip
    7. Refine the eyes using only lines
    8. Refine the nose using only lines
    9. Refine the lips using only lines
    10. Find division between lights and shadows
    11. Shade shadow shapes one flat value
    12. Shade the rest of the head
    Get our Yay! Portrait Worksheets today!

    Avoid Overwhelm when Teaching Portraits

    Put restrictions on what part of a portrait students can work on in each lesson. This keeps them from getting overwhelmed by trying to get everything in. Break it down into simple steps where you ask them to think about one aspect of their drawing at a time. For example, have them start by finding the height vs. width of the head, then the overall shape of the head. *Hint* Humans have a LOT of different shapes of heads. Is it squarish? Roundish? Pointy on the bottom? Flat on the bottom? What IS the biggest shape of the head? *Hint #2* There is a big ole ball in the back of your head that is wider than most peoples’ faces. This is the biggest part of the head, and one that students often miss. Do you need lessons that take students from the very beginning to advanced portrait techniques? Check out our Yay! Portraits Worksheets.

    Think Big to Small when Teaching Portraits

    When drawing portraits, students always want to rush into making eyelashes before they even know the shape of their head. A general rule that I always emphasize in my classroom is to think big to small. If a student is working on eyelashes, I will ask them which is physically better, the shape of the hair or the eyelash. This helps redirect them to working from the big ideas first before placing smaller ideas.

    Make Multiple Drawings

    Just like making cookies, students need to practice drawing portraits multiple times to figure out their mistakes and make improvements. They need the time and space to learn what is actually a very complex and challenging skill. Students show significant growth in drawing portraits when they are able to practice an understandable series of steps at least a few times.
    Teaching portraits
    Portrait Study by Mandy Theis, Charcoal on Paper, 2017
    Do you want to learn even MORE about drawing portraits? Get our Yay! Portraits Worksheets today!

    Conclusion

    To teach portraiture well, you need both an understandable, teachable process and to give your portraiture unit enough time to be learned by your students without overwhelming them. They joy of seeing students’ faces when they pull off a portrait that is better than anything they ever thought they could do is a great reward for the amount of time and energy that goes into planning effective portraiture lessons. Happy portraiture teaching to you all!
    Art Class Lesson Plan
    The Portrait Drawing Secret that Every Art Teacher Should Know
    How Should I Draw?
    What is your process for teaching portraiture? Let me know in the comments below.
  • Visual Arts Lesson Plans

    Visual Arts Lesson Plans

    Are you in need of some visual arts lesson plans? Here is a FREE, extensive K-12 curriculum that you can download right now.

    visual arts lesson plan

    Do you need art lessons? 

    As art teachers, it can be a challenge to constantly be coming up with new visual art lesson plans for our students.

    Many of us teach multiple grade levels and see hundreds or even thousands of art students every quarter!

    But don’t worry, you don’t have to do it all by yourself. The School of Atelier Arts is here to help.

    Because no matter what grade you teach, these free visual arts lesson plans include many lessons that you can incorporate seamlessly into your classroom curriculum maps.

    Additionally, these art lessons focus heavily on realistic drawing and painting skills. They also cover technical aspects such as accurate shape drawing, nuanced value applications, and in-depth color theory.

    Are you enjoying this article? Join our newsletter full of art teacher delights.

    One of my favorite lesson series in the entire curriculum is this one.  It helps students discover that every color also has a value.

    By making each color lighter and darker, students realize that a color can still be green, but can also be light in value or dark in value.

    THEN, the lesson continues by having students use their own value color charts for a color-by-number.

    The final result? Students figure out that they can make a box look three-dimensional just by changing the lights and darks of their colors!

    Join our popular art teacher newsletter today.

    Want to start atelier training? Join our Ateliyay! Painting Bootcamp today!

    Art Lesson Plan Packets

    The best part of these curriculum packets is that they develop one skill and build on it. This happens throughout the lessons at each grade level.

    No matter how much (or little!) experience your students may have with art classes, you can scale the difficulty up or down the grade levels based on your students’ needs.

    Did I mention that these are entirely digitized and 100% sub-proof lessons with thorough teaching directions for each lesson?

    Whatever your visual arts lesson plans needs are, you are bound to find something to love in these extensive curriculum packets. 

    Have you taught any lessons from this curriculum? Let us know in the comments below.

    Want to start atelier training? Join our Ateliyay! Painting Bootcamp today!

    Our art teacher newsletter has a cult following – are you missing out? Join our art newsletter today! 

  • Art Class Lesson Plan

    Art Class Lesson Plan

    Need an easy-peasy art class lesson plan that works for most ages? Look no further.

    art class lesson plan

    This free, easy-to-follow art class lesson plan teaches students how to create an Artist’s Stick Figure. If you have students who claim “I can’t even draw a stick figure!” then this lesson plan is perfect for you.

    Because this art lesson doesn’t just teach how to draw a regular old stick figure, it teaches how to draw an Artist’s Stick Figure.

    Want to start atelier training? Join our Ateliyay! Painting Bootcamp today!

    First Steps

    The first step to upgrading your students’ stick figures is understanding the basic proportions of what an actual human being looks like. This presentation helps students learn some of the most basic proportions of the three major body masses. In this art class lesson plan, they will discover how to make each part the right size. And just as importantly, they will learn how to make sure they are the right size in relationship to each other.

    DOWNLOAD THIS FREE SLIDE LESSON

    Articulate the Stick Figure

    Next, this lesson helps students discover how to use two lines for arms and legs instead of just one, so that they can articulate their figures. This is a very exciting “Aha!” moment for many students. It gives them the freedom to start posing their stick figures with more dynamic gestures.

    Incorporate Gesture

    Finally, students are lead through an exercise that helps them create more interesting poses with their Artist’s Stick Figure by starting with a random gestural line. This random scribble becomes the inspiration for creating a stick figure that follows along with it. It is great fun to see what poses students come up with in this art class lesson plan!

    By learning how to draw an Artist’s Stick Figure, students gain confidence with drawing figures. The ability to knowledgeably control poses with a stick figure that has believable proportions is a helps students who are terrified of drawing people.

    Conclusion

    Hopefully, this art class lesson plan helps you to bring your students one step closer to creating the art that is in their heads and hearts. What are you waiting for? Download this free art class lesson plan today and dispel your students’ fear of the figure once and for all!

    Want to start atelier training? Join our Ateliyay! Painting Bootcamp today!


  • Name Your Shapes when Drawing Shadows

    Name Your Shapes when Drawing Shadows

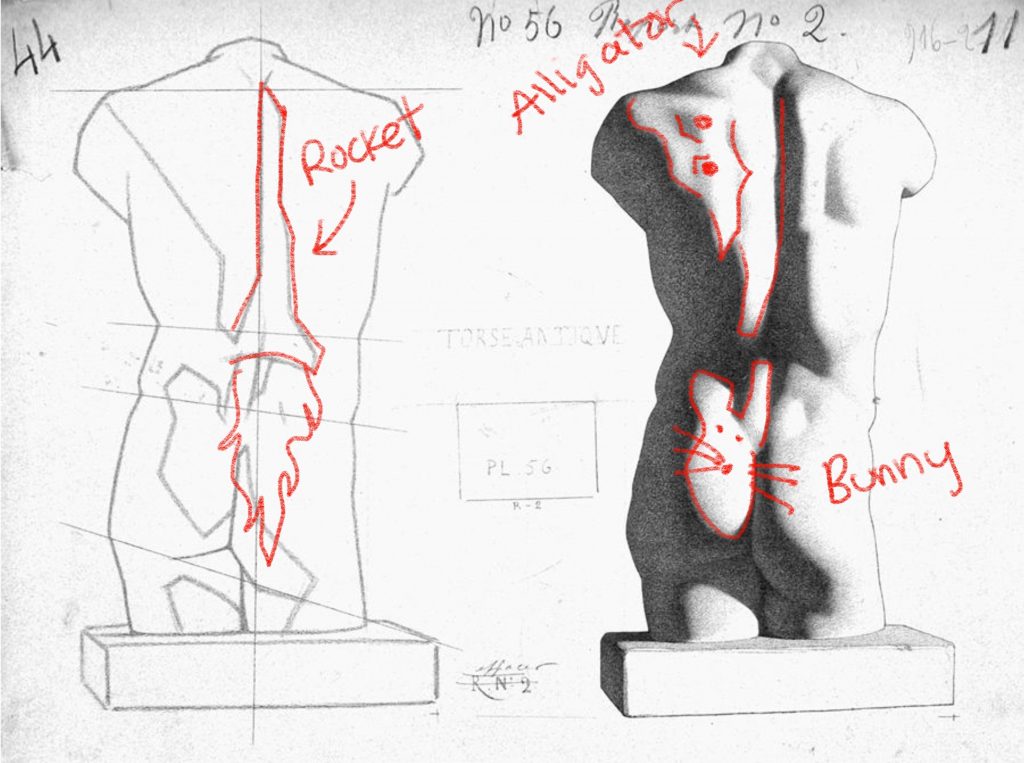
    Naming the shapes within your shapes helps you to draw accurately.

    drawing shadows

    Name Those Shapes

    “Don’t you see? It looks like Minnesota on crack.”

    This is how I once described a shadow shape to one of my students in her drawing. She was struggling to achieve the nuance of the shape because it was complex. Her perception was polluted by her preconceived notion that she was drawing a “face”.

    In fact, when drawing shadows, artists have to extract themselves as much as possible from the label of their subject matter. This allows artists to be impartial observers and achieve accuracy.

    If you think “eyes” you are bound to draw caricatures of eyes. If you draw all the shadow shapes around the eyes, the forms emerge that look like real eyes. This is because the drawing is not polluted by preconceptions. Instead, the eyes emerge due to the accurate observations of shapes.

    Once my student conceived of the shape as something else – no longer a feature of the face but simply a shape that happened to look like Minnesota on crack – she had a visual idea she could use for comparison between what was the same and different between her observations and her drawing. 

    Want to take your drawing game to the next level? These drawing worksheets can help.

    Name Them All

    One of the quickest ways to improve accuracy when drawing shadows is to give everything a name. Big shapes. Little shapes. Shapes within shapes. Give them all names.

    Naming shapes abstracts them from the thing it really is (like a face) into something more accessible, like the flat outline of Minnesota on crack.

    Like finding shapes in the clouds, identify shapes in your lights and shadows that look like other things. Find shapes in your negative spaces.

    For those of you who are masters of the Cloud Game and can find the most specific and funny shapes floating in the sky, greatness awaits you.

    Once you get used to abstracting the essence of something from its shape, you might find that the rest of the visual world can be analyzed similarly.

    Enjoying this article? Make sure to sign up for our popular newsletter full of art delights.

    Shadow Shapes

    Naming your shapes will help you immensely when drawing shadows. If you take the time to practice and apply this concept when drawing shadows, you will impress yourself with increased skill.

    An Extra Note on Abstraction: Bell Centennial

    I was very amused to read in a book about fonts, Just My Type, an overall visual impression of the font Bell Centennial as perceived by the calligrapher Gunnlauugur SE Briem:

    Bell Centennial [looks like] a bulletproof rhinoceros that could dance Swan Lake.”

    Bell Centennial Font

    And indeed, when you look at the font, it appears to gracefully gallumph.

    This quote is a perfect example of abstracting the feel or look of something in terms that helps us to understand its innate visual nature. Briem’s description helps us as the viewer to forget that there are letters that make words that make sentences that make meaning. They become simply visual objects to behold, and indeed the font does look like a bulletproof rhinoceros that could dance Swan Lake.

    Want to help your students learn how to find shapes? Check our our Ateliyay! Curriculum.

    Read Next:

    Drawing Assignments for High School Students

    Portrait Drawing Secrets

    Deftness of Touch when Drawing

    What’s the funniest shape you’ve ever found in the clouds? Let me know in the comments below.

  • What Should I Draw?

    What Should I Draw?

    “What should I draw?” is a common refrain from students in my art classroom. After years of answering this question, I have found that the answer is different for each student.

    What calls to your art heart?

    As artists develop their skills, certain drawing subjects are more attractive to them than others. For some students, painting people is their JAM. There is gesture, and movement, and anatomy!

    To others, the same subject tortures them because people as subjects are constantly moving. I have had students ask the model not to breathe before! These students want to be able to capture the figure perfectly in exactly one position. This is not really possible when drawing from life because, as it turns out, people need to breath. 

    Want to start atelier training? Join our Ateliyay! Painting Bootcamp today!

    Draw & Paint What You Love

    My advice to all atelier students: do not torture yourself with drawing subjects you detest. Find the subjects that are the best match for your artistic personality and gifts.

    That is not to say that you shouldn’t learn how to draw a wide variety of subjects, especially as you are developing your skillset. It is extremely important to seriously attempt drawing a broad variety of subjects before making any binding decisions about what your artistic calling is.

    Bargue plates, for example, may not always be the most interesting to new atelier students, but they are extremely efficient at helping students develop a strong drawing base.

    Once techniques are mastered, however, there comes a time to decide on what exactly it is that you want to draw and paint.

    Learn from Chardin

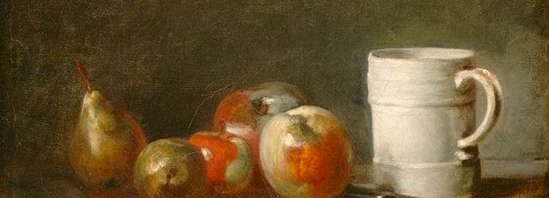
    The well-known French artist, Chardin, was frequently admonished by his peers to paint more serious subjects than his beloved still lifes of humble dinnerware and fruits. It was believed by the ruling art elite that truly great artists must be history painters who create multi-figure grand canvasses.

    what should I draw

    Still Life with a White Mug, oil on canvas by Jean-Baptiste-Siméon Chardin, c. 1764; in the National Gallery of Art, Washington, D.C. 33.1 × 41.2 cm.
     

    But Chardin always painted what he found most admirable, and what suited the techniques that he loved most. And if that subject was a handful of pears, so be it.

    Chardin’s clear affinity for chromatic color notes, scumbled layering, and dissolved edges creates a charm that delights viewers to this day and has secured his place in the art history canon. Those “grand” and “serious” and “real artist” history painters? Do you know many of them on a last-name-only basis?

    I believe much can be learned from Chardin’s persistence of still life painting at the height of its unfashionableness. Most importantly, how to be true to your individual artistic spirit.

    Want to start atelier training? Join our Ateliyay! Painting Bootcamp today!

    HOW I CHOOSE What to Draw & PAINT

    I know a wonderfully talented contemporary painter that makes the most delightful still life paintings. They are imbued with all kinds of nuanced story-telling, and no detail is ever overlooked. This type of painting requires a thorough and patient mindset. The technique requires many passes with a tiny brush. What might appear to be a tedious way of working to me, brings delight to my friend.

    I, on the other hand, am a very impatient and brash artist. In fact, I prefer to capture the gesture of something in an exact moment, and there is no time to spare before the magic of the gesture might fade away. I like to paint flowers as they are constantly moving and following the light. I want to paint the whole bouquet at once, as the bouquet as a whole encompasses its own unique gesture.

    Painting of daisies in progress by author Mandy Theis

    If I want to paint at the level of meticulousness of my friend, I would either have to paint one flower at a time, replacing the flowers in the bouquet as they fade, or replace the bouquet all together with silk flowers.

    I can’t stand the thought of painting from fake flowers, whose gestures are never genuine, but whose presence would be required for careful, detailed painting. I adore the gesture of a bouquet as a whole too much to isolate all the parts by painting flowers one by one. Therefore, my technique has evolved in a way that allows me to paint an entire bouquet at a non-meticulous level over the course of the life of that bouquet.

    It should be noted, however, that I had to learn how to draw and paint meticulously in order to acquire the skillset I needed to draw and paint more freely. It is very important to me to have the “meticulous painting” tool in my tool box for the times that I do need it, like putting a fine finish on the vase of the flowers.

    Want to start atelier training? Join our Ateliyay! Painting Bootcamp today!

    Master Skills and Your Style Becomes a Choice

    When studying atelier skills, learn everything you can at a meaningful level. Try drawing everything you can in order to discover what you, as the unique individual you are, actually like.

    Be true to yourself. If you find you are drawing something because it is what you are supposed to draw to be a “serious artist” (multi-figure work come to mind), channel your inner Chardin and pursue drawing what resonates with your artistic soul. Maybe you are a master of creatures. Or waves. Or hands.

    As long as you draw what calls to you, your audience will always sense it. They will appreciate your chosen subject more deeply by seeing it through your eyes. After all, sharing your inspiration with others is the true gift of great artists.

    Do you want to expand your skillset? Check out our Ateliyay! Curriculum that helps students learn technical drawing skills.

    What are your favorite subjects to draw? Let me know in the comments below.

    Want to start atelier training? Join our Ateliyay! Painting Bootcamp today!