Atelier Training Archives - School of Atelier Arts

Category: Atelier Training

Atelier Training is a way of learning how to draw and paint realistically. These articles teach you everything you need to know about what ateliers are and how they can help you.

  • Painting Composition: The Key to Making Better Art

    Painting Composition: The Key to Making Better Art

    Creating a stunning painting composition isn’t just about the rule of thirds or following mathematical formulas. In fact, those rules aren’t very helpful, and can even harm your compositions, if you don’t understand the big underlying concepts of pictorial design.

    A well-balanced composition draws viewers in, directs their eye through the piece, helps to tell a visual story, and makes the overall artwork much more compelling.

    Yet, many artists struggle with composition. They tend to bumble about placing things on their canvasses awkwardly, and inevitably end up with paintings that feel like something is always “off”.

    If this sounds familiar, you’re not alone. I’ve been teaching students realistic drawing and painting skills for more than a decade, and composition continues to be the most difficult aspect of painting for students to grasp.

    Fortunately, mastering composition is possible with guidance from a knowledgeable atelier-trained instructor. So, let me be your guide today through the world of pictorial composition and let’s discover what good painting composition is, what it isn’t, and how to practice your composition skills effectively and elevate your art.

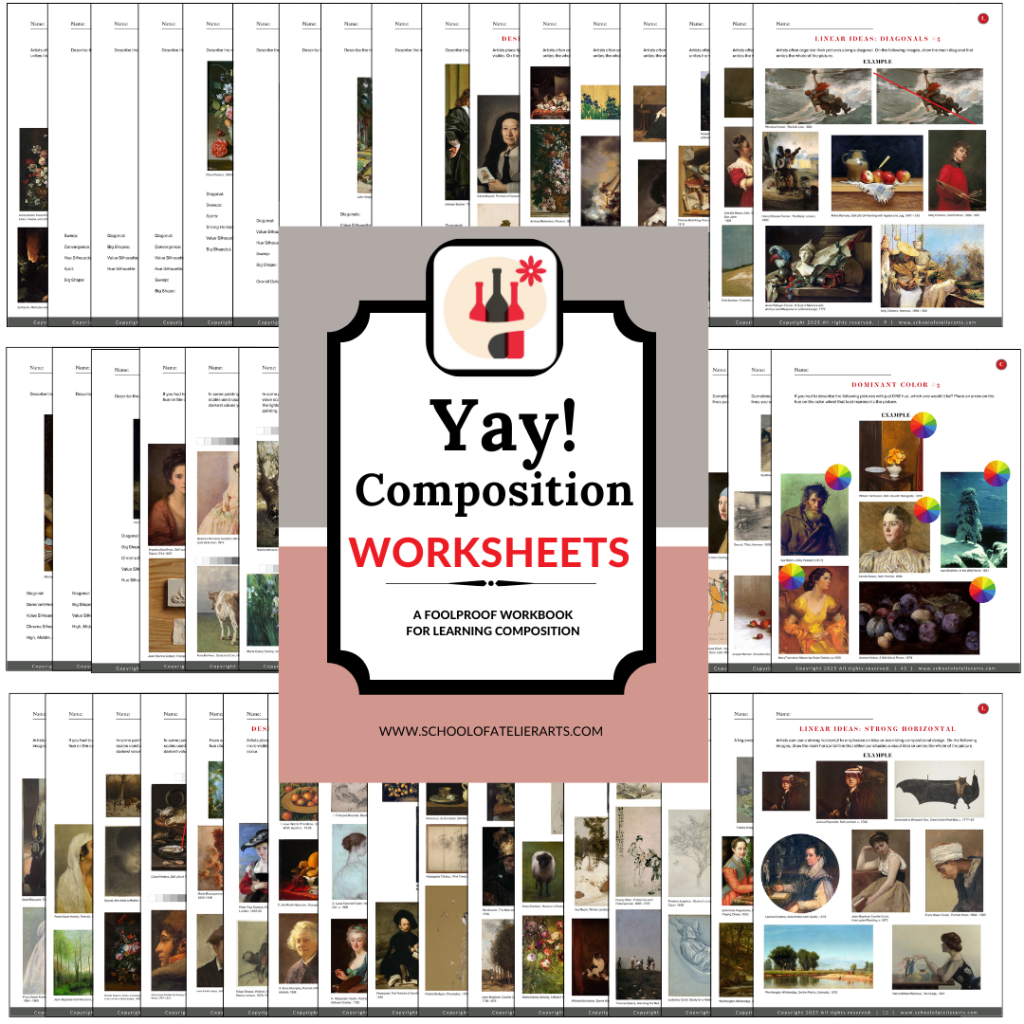
    The Yay! Composition Worksheets from The School of Atelier Arts are designed to teach you our foolproof system for creating powerful, dynamic compositions—without frustration or guesswork… Get yours today!


    Mastering Painting Composition

    Creating a strong composition is the foundation of compelling artwork. Whether you’re drawing a portrait, designing an outdoor plein air painting, or even arranging abstract forms, understanding composition helps guide the viewer’s eye and enhance visual impact.

    The following key composition techniques offer a structured approach to building complex and visually engaging artworks. By practicing these methods, artists can develop a deeper understanding of how visual elements work together to create harmonious compositions. Mastering these principles allows for greater artistic confidence and the ability to communicate ideas more effectively – and intentionally – through art.


    painting composition s curve

    Sweeps & S-Curves

    Sweeps and S-curves are powerful compositional tools that create movement and unity within a piece. By learning to recognize how flowing these implied curves lead the viewer’s eye through a composition, you can make your painting feel dynamic and cohesive.

    Learn how to harness the natural elegance of curves to create rhythm and harmony in your artwork. Whether used subtly in a portrait, or prominently in a landscape, sweeps and S-curves are a useful tool for achieving a visually engaging composition.

    painting composition big shapes

    Big Shapes & Spots

    One of the most effective ways to simplify composition is by focusing on the big ideas, such as big shapes and spots. These concepts help students to identify dominant forms that establish structure and balance within an artwork.

    By organizing a composition around major shapes before diving into details, artists can create a solid compositional foundation that delivers clarity for the viewer. Learning to place key shapes and focal spots strategically helps create compelling visual hierarchies, guiding the viewer’s attention carefully through the piece.
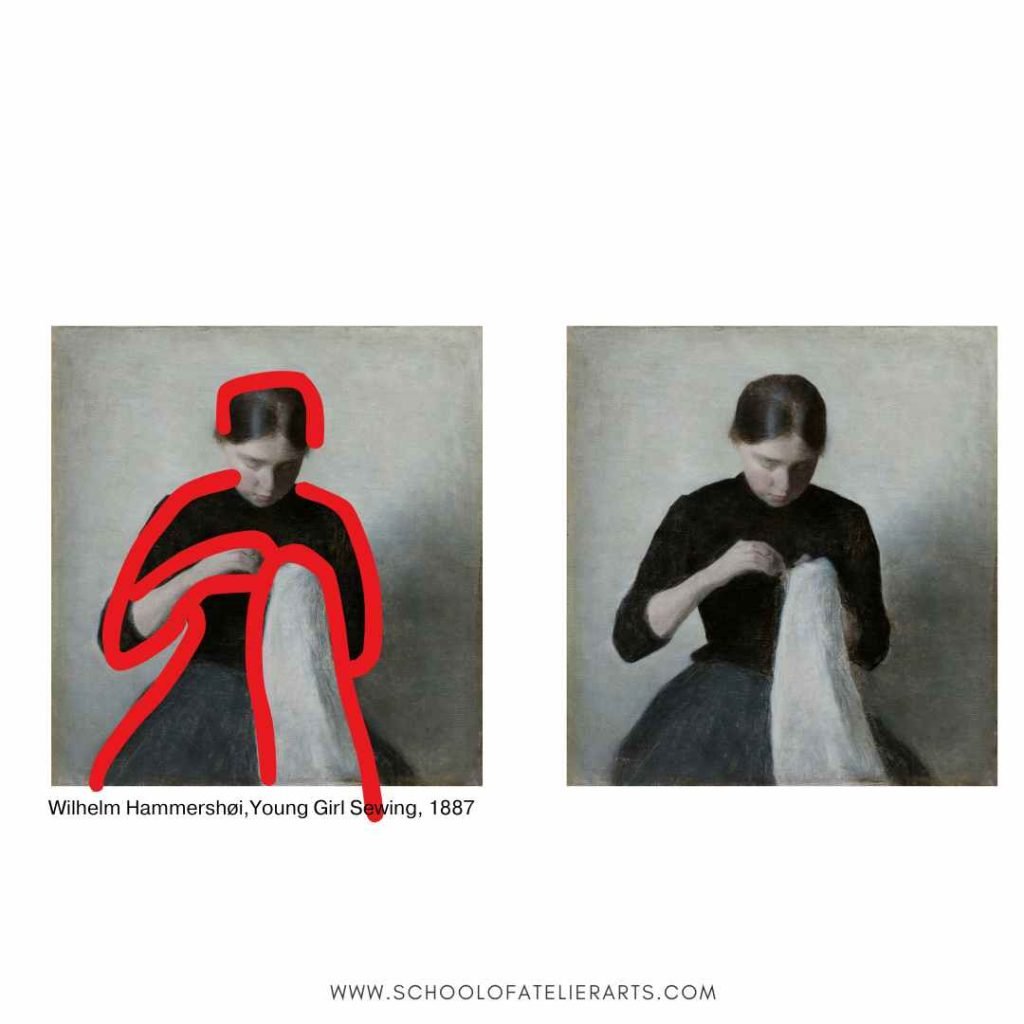
    Designing with Edges & Silhouettes

    Edges and silhouettes play a crucial role in how we read the big ideas of a composition. Edges and silhouettes can work to your benefit, or detriment if you are not careful.

    If you want something to read cleanly and clearly, strong contrasts of light on dark or dark on light create clear edges.

    If you want your subject to read calmly and mysteriously, low contrasts of light on dark or dark on light create subtlety and nuance in a painting composition.

    Carefully placed edges and silhouettes create visual statements. By studying how two different colors meet (Softly? Harshly?), students can gain mastery and use edges and silhouettes to control the visual feeling of their compositions.
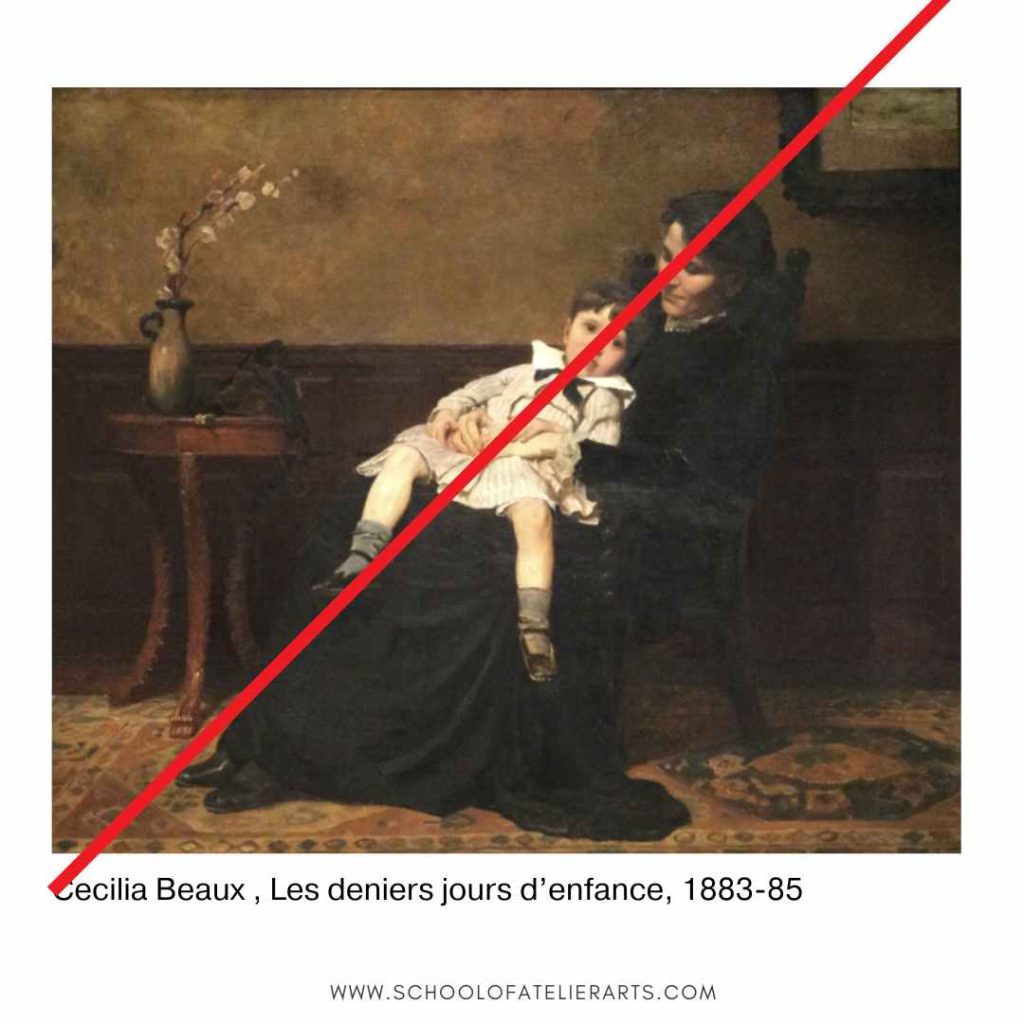
    Linear Ideas in Painting Compositions

    Understanding the power of lines in composition is fundamental to creating visually engaging artwork.

    Sometimes the more subtle applications of this concept are difficult for students to see at first. Identifying and utilizing diagonal, vertical, horizontal, and converging lines in a composition creates visually effective structures in paintings.

    Lines not only guide the viewer’s eye, but also establish guidelines for placing other elements in the composition.

    Designing your painting composition around lines also contributes to the mood of your painting. Diagonal lines create energy and movement, verticals evoke strength and stability, while horizontals hint at calmness.
    The best way to learn how to effectively learn these concepts is to practice seeing how other artists used them. This is exactly what our Yay! Composition Worksheets teach students how to do. Through deliberate worksheet practice, students learn how to use these linear elements to create balanced and dynamic compositions.

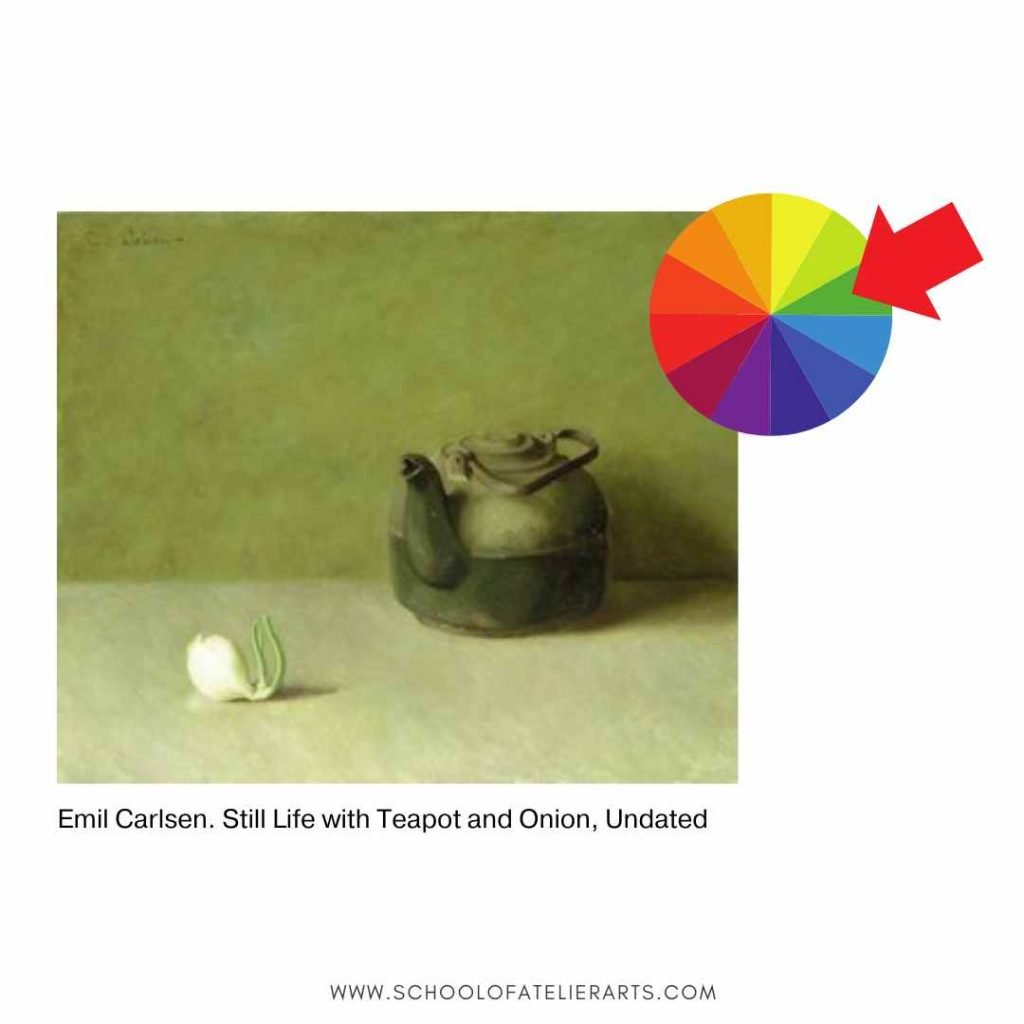
    Color/Value of a Picture

    Color and value are essential compositional tools that impact the overall feel and readability of an artwork. Students need to learn how to recognize and apply dominant color schemes and value structures to strengthen their compositions.

    By understanding how a picture can be light, medium, or dark, artists can control the mood of their painting compositions.

    By practicing identifying the overall color of a picture, students can manipulate their hues to evoke specific feelings from their viewing audience.

    Mastering seeing a picture holistically, including its overall value and hue, allows artists to control the emotional and visual impact of their compositions with confidence.

    Painting Composition: Putting It All Together

    Mastering composition involves the ability to integrate multiple elements seamlessly. That’s why our popular Yay! Composition Worksheets have students practice each element individually, and then combine them together. By practicing the ideas presented in this article, artists can create compositions that are visually captivating.

    Deliberate composition training ensures that students can apply their knowledge in real-world artistic scenarios, leading to more confident and effective artwork.

    Why Artists Love our Yay! Composition Worksheets for Learning Painting Composition

    Artists and educators alike have seen immediate improvements in their work using our popular worksheets. Here’s what some have said:

    “My students were always intimidated to try and draw realistically. With the help of the School of Atelier Arts resources, I now know how to help them experience success with their drawings every time! Their confidence is through the roof!”
    Nina Dirienzo, High School Art Teacher

    “I am extremely thankful for these resources because they offer skill-based lessons that give my students a strong foundation for their artworks.”
    Kelsea Fischer, Elementary Art Teacher


    What’s Included in the Yay! Composition Worksheets?

    When you purchase the Yay! Composition Worksheets, you get:

    • 50+ digital worksheets that guide you through the composition process step by step.
    • A Spanish translation for educators teaching bilingual students.
    • A structured approach that makes learning composition easy and practical.

    These worksheets are designed for artists of all skill levels, whether you’re a beginner struggling with composition or an experienced artist looking to refine your skills.


    Start Creating Stronger Painting Compositions Today

    If you’ve been struggling with composition, it’s time to stop guessing and start mastering it. The Yay! Composition Worksheets provide a clear, repeatable method that works every time. No more frustration. No more uncertainty. Just strong, confident compositions in every painting you create.

    Get instant access to your digital worksheets:
    ➡️ BUY NOW

    30-Day Money-Back Guarantee – If you don’t love the worksheets, we’ll give you a full refund. Simply write to help@schoolofatelierarts.com with your refund request, no questions asked.

  • Realistic Portrait Drawing

    Realistic Portrait Drawing

    Realistic portrait drawing is one of the most rewarding yet challenging skills an artist can develop. Whether you are a beginner struggling with basic proportions, or an experienced artist looking to refine your technique, this article will help you to draw better realistic portraits.

    Capturing a likeness requires a solid understanding of structure, feature placement, and head proportions.

    And it also means ignoring silly rules that are often taken as inalterable truths. (Eyes halfway on the head anyone? Rarely is this true unless you are sitting eye height with your subject and facing straight on.)

    portrait drawing by mandy theis

    Portrait drawing by SAA Director Mandy Theis.

    Many aspiring portrait artists find themselves frustrated when their drawings don’t resemble their subject, or feel “off” in ways they can’t quite pinpoint. This frustration is common because portrait drawing requires not just artistic inspiration, but also technical knowledge and deliberate practice. Without a clear process, mistakes like incorrect feature placement, wonky proportions, and awkward stiffness in the final portrait are inevitable.

    But there’s good news: realistic portrait drawing is a teachable skill, and with the right approach, anyone can master it. You heard me. REALISTIC PORTRAIT DRAWING IS A LEARNED SKILL.

    The reason many people believe they cannot draw well is because they have previously tried and it didn’t work out so well. But very few people have access to teachers that have portrait drawing skills. The problem wasn’t you. The problem is that you didn’t have access to someone with the skillset you wished to learn.

    Lucky for you, I can teach you EXACTLY how to make realistic portraits. You can see my own portrait work on my Instagram @mandyfineartist https://www.instagram.com/mandyfineartist.

    I am also a licensed art teacher. So not only do I know how to create realistic portraits, I know how to teach you efficiently how to make them too.

    (In fact, helping people learn realistic portraiture is exactly why I created the Yay! Portraits Worksheets. These worksheets help artists overcome the most common struggles and make lifelike, accurate portraits with confidence.)

    In this guide, we’ll explore the major challenges artists face when drawing portraits, the essential principles that lead to realistic results, and how structured practice can accelerate your portraiture drawing skills.

    Why Realistic Portrait Drawing Feels So Difficult

    Many artists, even those skilled in other areas, find portrait drawing uniquely challenging. That’s because the human face is deeply ingrained in our psyche—we are naturally wired to recognize faces and notice even the slightest inaccuracies. When something is off, we can sense it instantly, even if we don’t know exactly what went wrong.

    Here are the most common reasons for portrait drawings fails:

    1. Overall Head Proportions Are Inaccurate

    The human head has a giant mass at the back of the skull that is bigger than the face portion of the head. But students often ignore this mass, essentially cutting off the entire back of the head which is still visible in a front facing portrait. Without understanding that this mass exists, and relating it to the proportions of the face, it’s easy to make the skull too wide, the forehead too small, or the chin too long. One of the most frequent mistakes beginners make is not correctly measuring the height-to-width ratio of the head, which results in absurdly placed features.

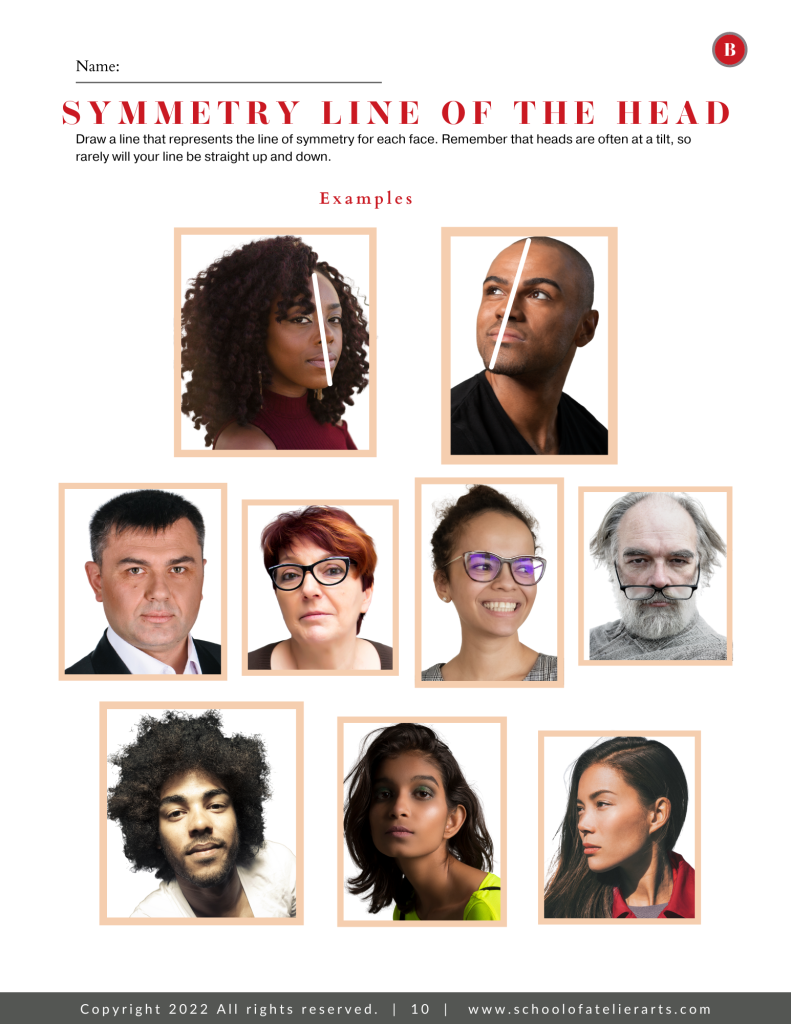
    You can practice finding the mass of the back of the head with our Yay! Portrait Worksheets, like the sample worksheet below.

    2. Feature Placement Destroys the Likeness

    One of the biggest mistakes artists make is focusing too much on individual details—like a beautifully drawn eye or a well-rendered nose—without first ensuring that all features are placed correctly in relation to one another. LIKENESS IN A PORTRAIT COMES FROM THE FEATURES BEING THE CORRECT DISTANCE FROM EACH OTHER. Even if you perfectly render each feature, if their placement is off by just a little bit, the portrait won’t look like the subject.

    For example:

    • Eyes that are even slightly too high or too far apart will make a face look like somebody else.
    • A nose that’s just a fraction too low can make the subject look older than they really are.
    • A misplaced mouth can completely change the expression, making the portrait feel “wrong.”
    • Misaligned features make the head feel like it is turning in different directions within the same portrait.

    This is why getting feature placement right from the start is essential for capturing a likeness.

    If your drawing looks “off,” chances are it’s a feature placement issue, not a rendering issue. Even slight misplacements can destroy a likeness, so it’s crucial to observe and measure distances between features carefully.

    While placement “rules” about the eyes being halfway on the head can help establish general structure, be wary of the many dubious rules batted about in drawing books about the heights, widths, and general locations of individual facial features.

    Some people have wide-set eyes, others have narrow noses, and lips come in countless shapes and sizes. This is what makes each face unique. Instead of following rigid formulas, artists must train their eyes to observe these variations and adjust their drawings accordingly. Capturing these subtle differences is what truly brings a portrait to life.

    In fact, all of these so-called “rules” are mostly nonsense. They represent an idealized version of a human face—one that almost no real person actually matches exactly. If you try to force every face into these proportions, you’ll end up with generic portraits that fail to capture the unique individual qualities of your subject.

    Instead, use the ideal figure as a reference point to analyze how your subject deviates from the idealized version. Is their nose slightly shorter? Are their eyes wider apart? Does their chin extend lower than the “right” proportions suggest? Recognizing and emphasizing these differences is what makes a portrait look like the actual person rather than just another generic face.

    Getting the relationship of features to each other right is one of the hardest things for students to learn. It takes a lot of practice to get it right. It also helps to have a system, like what I teach in the online Ateliyay! Painting Bootcamp, to get it right.

    I also teach this system for feature relationships in our Yay! Portrait Worksheets like the one you see below.

    3. The Angle and Gesture of the Head Are Incorrect

    A common reason portraits feel “off” is that the tilt or angle of the head hasn’t been properly established. Even a small mistake in the tilt of the brow line, nose, or mouth can create an unnatural or distorted look. The head is rarely perfectly straight-on, so artists must learn to accurately depict head angles to create believable portraits.

    Our Yay! Portraits Worksheets help train artists to identify and accurately draw these head directions.

    Want to to be better at realistic portrait drawing? You need a structured approach.

    The key to improving portrait drawing is not just more practice—but the right kind of practice. Instead of drawing the same way as always, while making the same mistakes over and over, artists need a step-by-step process that teaches them how to analyze, construct, and refine portraits that actually look like the person they are trying to draw.

    That’s where the Yay! Portraits Worksheets come in. These worksheets provide a systematic approach to portrait drawing, covering essential techniques that eliminate guesswork. By following guided exercises, artists can build their skills faster and with greater accuracy.

    What Makes the Yay! Portraits Worksheets So Effective?

    1️⃣ Mastering Overall Head Proportions – Learn the rules of facial symmetry, spacing, and the skull’s structure to ensure every portrait starts with a solid foundation.
    2️⃣ Getting Feature Placement Right – Follow a structured method to correctly position eyes, nose, mouth, and ears to ensure accuracy and likeness.
    3️⃣ Understanding Head Angles – Learn how to construct heads at different angles so portraits feel natural and not awkward or stiff.
    4️⃣ Focused Practice – Each worksheet targets specific problem areas, so you improve efficiently without getting overwhelmed.

    Unlike simply copying a reference photo, these worksheets teach you how to “see” like an atelier-trained artist.

    Start Drawing Realistic Portraits Today!

    If you’re tired of struggling with portraits that don’t quite look right, you don’t have to keep guessing. With the Yay! Portraits Worksheets, you’ll get the exact step-by-step guidance you need to start drawing realistic, lifelike portraits right away.

    📥 Download the Yay! Portraits Worksheets now and transform your portrait skills today!

    Your best portraits are just a few practice sessions away.

    Want more?

    If you are ready to take you and your art seriously, the best way to learn how to draw is under an atelier-trained artist. That is what our online Ateliyay! Painting Bootcamp gives you. You will get to practice your portraiture under the guidance of a true expert. Learn more about our online Ateliyay! Painting Bootcamp here.

  • Articles Featuring School of Atelier Arts

    Articles Featuring School of Atelier Arts

    Check out these articles featuring the School of Atelier Arts.

    Redfin

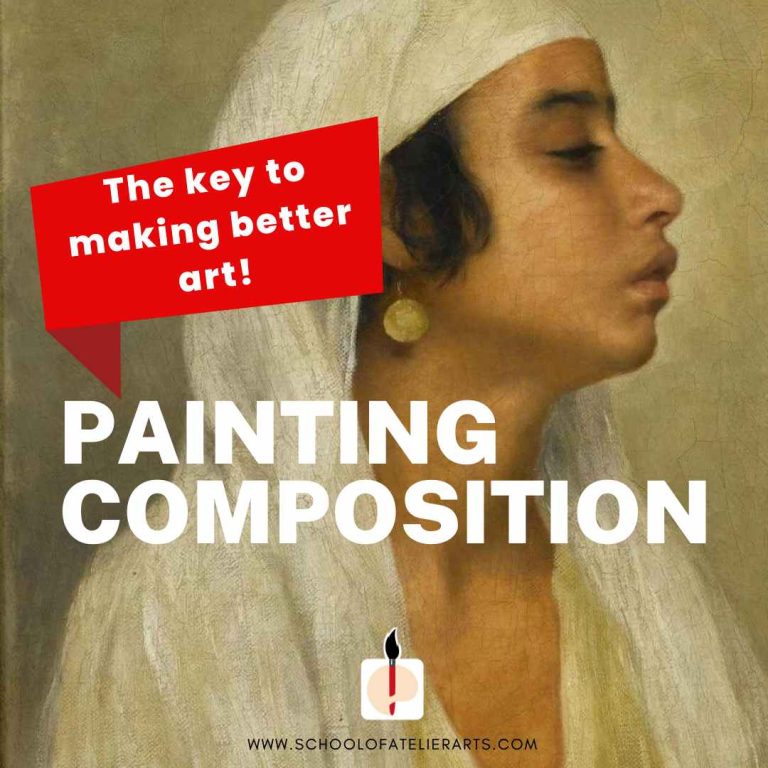
    This article draws on SAA Director Mandy Theis’ knowledge of setting up a studio. By intentionally controlling light the way we teach in our online Ateliyay! Painting Bootcamp, any content creator can have a more conducive place to work.

    https://www.redfin.com/blog/content-creator-room-ideas

  • Is Atelier Training Right for You? Quiz

    Is Atelier Training Right for You? Quiz

    New to atelier training? Curious if atelier training is right for you? This free diagnostic quiz will help you figure out if atelier training is a good next step for you in your artistic career.

    Simply answer the questions as honestly as possible. Don’t overthink your answers – this diagnostic quiz will help guide you on whether or not you are ready to pursue atelier training.

    Don’t worry – the quiz is completely free and doesn’t even ask for your email address!

    It WILL help you determine whether atelier training is a good fit for you and your artistic goals.

    [quiz-cat id=”5767″]

  • Online Master’s Degree in Studio Art

    Online Master’s Degree in Studio Art

    If you have ever wanted to learn how to draw and paint realistically, this is the Master’s Degree in Studio Art for you.

    Realistic Drawing and Painting Training

    If your undergraduate training was anything like mine, you might not have learned much about the technical aspects of art.

    I always wanted to be able to draw and paint realistically. And I thought going to college would teach those skills.

    Boy was I wrong. My professors were much more interested in esoteric philosophies than they were in sharing any knowledge they may or may not have possessed.

    So, where CAN you get this magical training that will teach you how to draw and paint realistically?

    online master's degree in studio art

    Atelier Training

    After I graduated college, I learned about this special kind of art training known as atelier training.

    Basically, it is a type of training that was used by the Old Masters to learn their craft. And it still exists today at places called “Ateliers”.

    Through precise drawing and painting exercises, you learn how to draw and paint super realistic imagery.

    If you ever wanted to draw and paint something and make it look “real”, this type of training is for you!

    Unfortunately, atelier training has largely existed outside of most university systems for the last century, making it difficult for people to access this knowledge. In fact, many artists don’t even know it exists!

    But now, all of that is changing.

    A Master’s Degree in Studio Art

    The Florence Academy of Art now has an accredited MA in Studio Arts program available that will train you in realistic drawing and painting skills.

    And it is one of the very few places in the world where you can get this training AND an accredited graduate-level degree.

    Better yet, they have both remote and in-person options for students. You can now receive top notch atelier training from the comfort of your home.

    Throughout the program, you will learn how to

    • set up a professional drawing and painting studio
    • control proportions in drawing and paintings
    • maintain nuanced control of drawing and painting materials
    • safely manage art materials and care for them
    • draw and paint anything you want and make it look believable
    • much, much more!

    What are you waiting for? Apply for this Master’s Degree in Studio Art today!

  • Color Theory for Beginners

    Color Theory for Beginners

    Do you want to understand color theory better, but don’t know where to start? This article explains the three most basic elements of color theory for beginners..

    The 3 Elements of Color Theory for Beginners

    Every color is composed of three elements: Value, Chroma, and Hue. When learning about color theory as a beginner, it is best to consider each of these elements individually in order to better understand the exact color you are observing.

    It is especially important when mixing paint colors to consider each variable separately as it will help you mix colors more accurately.

    Check out our extensive worksheets that teach realistic drawing and painting!

    Color Values

    What is Value?

    Value represents how light or dark a color is.

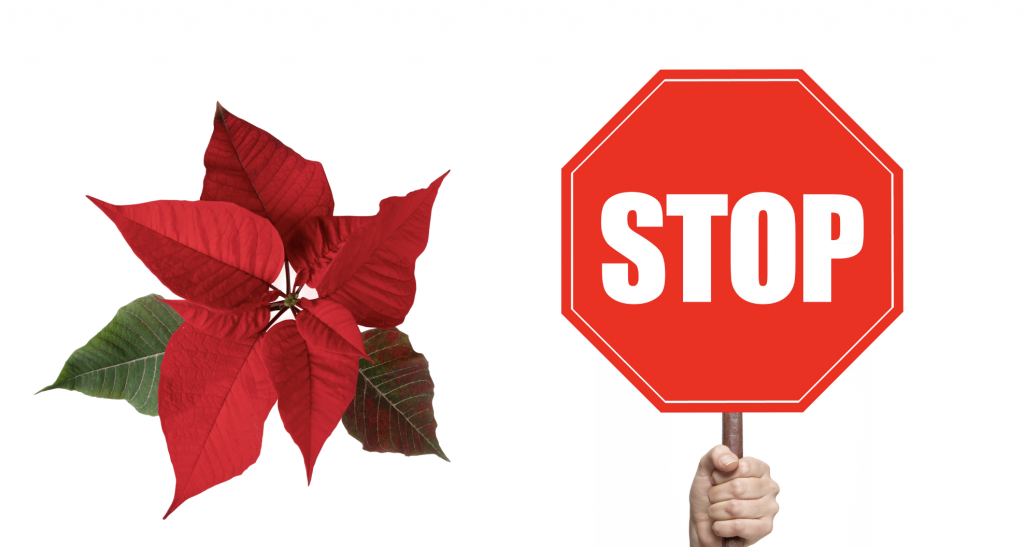
    A stop sign is red, and poinsettias also red.

    But even though they are both red, the red stop sign is a lighter value of red than the darker red of a poinsettia. The poinsettia is a darker value of red than that of the stop sign.

    If you were to take a black-and-white photo of the poinsettia next to the stop sign, the stop sign would appear lighter in the photograph.

    If you are a beginner, recognizing how light and dark colors are is one of the essential elements of color theory.

    (But what about black and white? Read this article on black and white to learn why black – which is often just a very dark blue – will turn yellow into green.)

    Colors can be light or dark. The stop sign is lighter in value than the poinsettia.

    Color Chroma

    What is Chroma?

    Chroma is how intense a color is.

    Purveyors of Caribbean vacations are often quick to showcase the “azure” water on island beaches. This water is appealing to us because it is intensely colored. There is less particulate in the water than the greyer seas found in New England, which gives Caribbean waters the appearance of a more intense blue.

    So although New England waves are blue, and Caribbean island waves are blue, the Caribbean water is more chromatic – it is a more intense color of blue.

    This is the color theory element of chroma. If the color you are looking at is very intense, it is chromatic. If it is not very intense, it is not chromatic.

    New England Ocean Blue vs. Caribbean Ocean Blue

    What is the opposite of chroma?

    The opposite of chroma is neutral. The New England water is a bluish grey and the blue is not very intense, it’s a neutralized blue.

    What is a true neutral?

    It is possible for a color to be so neutralized that it isn’t any color at all. It simply looks like a grey that is not a green-grey, or a blue-grey, or a red-grey – not even a little bit. This is called a “true neutral”.

    Enjoying this article? Join our popular mailing list for more great art insights delivered directly to your inbox.

    Color Hues

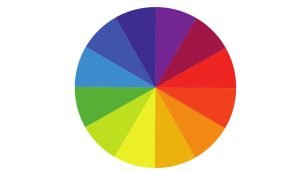
    In color theory, the word “hue” describes which color family, of you had to assign just one, the overall color belongs to.

    The color families are red, orange, yellow, green, blue or purple. Some people refer to this collection of hues in color theory as ROYGBP for short. (Sometimes they are also abbreviated as ROYGBIV, ROYGBV, etc.)

    So in the example of the oceans mentioned earlier in this color theory article, we would say that the hue of both oceans is “blue”, even though these two oceans are different colors of blue. If we had to assign just ONE color – and our choices are limited to red, orange, yellow, green, blue and purple – BLUE is the hue that stands out to us the most.

    Do you like learning how to draw and paint? Check out our Ateliyay! Curriculum for worksheets that will teach you art skills.

    Color Theory Hues – Red, Orange, Yellow, Green, Blue, Purple

    Color Theory for Beginners Conclusion

    You can start practicing these color theory concepts quite easily.

    Simply find an object in the room and ask yourself the 3 color theory for beginners questons:

    1. What is the value (how light or dark is this object)?
    2. What is the chroma (how intense is the color of this object)?
    3. What is the hue (red, orange, yellow, green, blue, or purple)?

    You will find that just by practicing thinking about colors and their specific attributes that your eyes will start noticing more nuanced color.

    Did you enjoy this article? Join our popular mailing list for more great art insights delivered directly to your inbox.

    Want more color theory knowledge? Check out our other color theory articles:

    Colour Theory

    Opposites on the Color Wheel

    Color Theory Lesson Plans

    How to Make Yellow Darker

  • How to Draw a Bargue Plate Step-by-Step

    How to Draw a Bargue Plate Step-by-Step

    If you are interested in atelier training, a Bargue Plate is often the first project you will do. This article will show you exactly how to draw a Bargue Plate step-by-step.

    Bargue Plate of an Arm

    What is a Bargue Plate?

    Bargue Plates come from a 19th century drawing course created by Jean-Léon Gérôme and Charles Bargue.

    Bargue Plates are a collection of drawings meant to be copied. By creating mastercopies of these images, students learn various drawing techniques.

    Bargue Plates teach students how to create nuanced proportions, values, lines, as well as other essential drawing skills.

    In fact, this Bargue Plate was completed by Picasso when he was learning how to draw from his academically trained father:

    picasso bargue plate
    Bargue Plate copy by Picasso

    Contemporary artists use these plates even still today in order to improve their realistic drawing skills.

    And you can too!

    Please note that this article contains affiliate links.

    We send out all our best resources via our wildly popular art newsletter. Join today!

    How to Get the Most Out of Drawing Bargue Plates

    In order to best learn from copying Bargue Plates, you want to recreate them as exactly as possible.

    Different Bargue Plates teach different drawing skills. If you complete one Bargue Plate, you will see how much you can learn from them. If you complete many, you will steadily improve your realistic drawing skills.

    Some of the plates are more difficult to copy well than others. Some of them offer multiple stages of a drawing to help you learn the process. It is strongly encouraged to copy every plate in a series, and not just the final one.

    Need art supplies? Check out our Bargue Art Supply List

    How to Draw a Bargue Plate

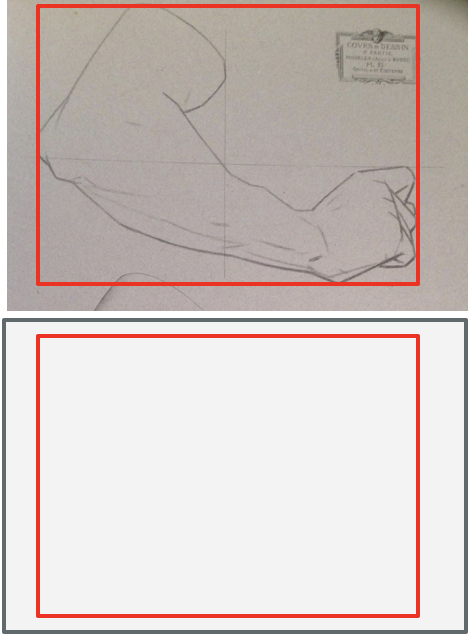
    Start by setting up your drawing space. Print a Bargue Plate (or photocopy one from the Charles Bargue Drawing Course) and tape it side by side on a drawing board. They can be placed either vertically or horizontally.

    Make a Notional Space Box

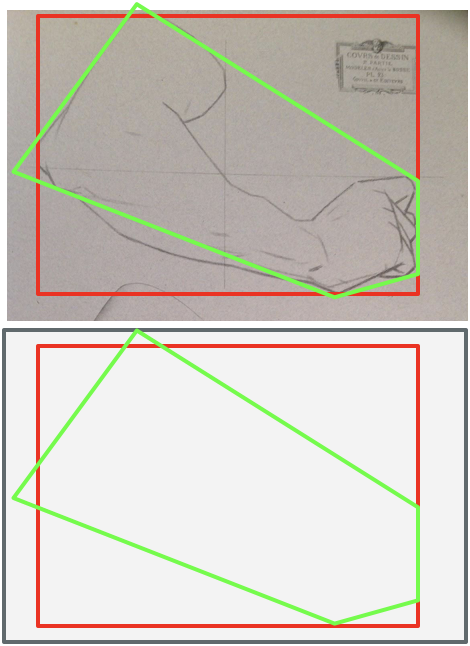
    Make a box that touches all sides of the Bargue Plate. Then, recreate this box on your drawing paper. This box is called the Notional Space Box and it determines the overall amount of space your drawing will take up.

    If you make this box too long, your final drawing will be stretched out horizontally. If you make this box too tall, it will make your final drawing look like it was stretched out vertically.

    It is important to measure and double check that your box is the exact same size on your drawing paper as it is on the Bargue Plate.

    Notional Space Box Bargue Plate

    Need art supply suggestions? Read this article with recommendations for Bargue Plate drawing supplies.

    Make an Envelope

    Now, use a small number of straight lines to describe the biggest overall shape of the subject. It is ok to cut off insignificant areas. You want to capture the biggest idea of the shape.

    In the example below, only 5 straight lines create the envelope shape.

    Once you determine the shape of the Bargue Plate, translate this shape to your drawing paper.

    envelope Bargue Plate drawing how to

    Enjoying this article? You won’t want to miss out on our popular art newsletter where we send out ALL our best resources. Join today!

    Find Follow-Through Lines

    Now, find some follow-through lines that connect different areas of the drawing together.

    For example, in the drawing below notice how the blue line connects the corner of the arm with the wrist.

    Next, transfer this follow-through line to your drawing.

    Need more thorough instructions? Watch this detailed video tutorial that teaches Bargue Plates.

    follow through line bargue plate drawing how to

    Continue adding follow through lines to the original Bargue Plate, and then find their equivalent location in your drawing.

    Keep adding follow-through lines until most of the Bargue Plate is defined.

    If the above drawing looks a little crazy to you, don’t despair. Sometimes you have to be able to see through the maze of lines in order to remember what you are trying to do.

    Look what happens when I simply shade in the part of the drawing I intend to keep:

    follow through lines biggest shape bargue plate

    Refine the Block-In

    Now that you set your proportions and have the basic relationships of the parts to each other, you can use smaller straight lines to refine your drawing.

    refined block in bargue plate how to

    Need more thorough instructions? Watch this detailed video tutorial on how to copy a Bargue Plate.

    Next Steps

    Many people wrongly assume that the hard part of drawing is the shading. But that’s not true.

    It doesn’t matter how good you are at shading if your block-in is inaccurate.

    By following the process outlined in this article, you will ensure that your proportions and block-in are solid before moving onto shading.

    When you ARE ready for shading, this detailed video instruction on rendering can help you:

    Watch this Bargue Plate video series for detailed information about how to shade your Bargue Plate.

    What do you think about Bargue Plates? Let me know in the comments below.

    Need art supplies? Check out our Bargue Art Supply List

  • 6 Easy Steps to Draw & Paint Realistically

    6 Easy Steps to Draw & Paint Realistically

    6 EASY Steps to Draw and Paint Realistically RIGHT NOW

    Here are 6 easy steps you can take to to learn how to draw realistic things RIGHT NOW.

    If the idea of being able to draw realistically and paint like the Old Masters makes your heart sing, there are some simple steps you can take to get started on your atelier journey right away.

    In order of smallest time commitment to biggest time commitment, here are some ways to start learning how to draw and paint realistic things TODAY.

    1 Minute: Join our SAA mailing list for tips, tricks, inspiration & more. We send out lesson plans and other resources for learning how to draw realistically.

    10-15 Minutes: Watch an atelier video that teaches a skill. The videos in this mini-series on color theory take only 10-15 minutes to watch, and you will come away with at least one new color concept you didn’t know before.

    30-90 Minutes: Download some of our free art lessons and give them a spin. These short, easy-to-follow lessons will help you build some realistic drawing skills with only a 30-90 minute time commitment.

    10-15 Hours: Ready for a bit more serious study? Try our Yay! Portraits Worksheets that take you through a series of realistic drawing exercises to help you make accurate portraits.

    1 Week: Ready to jump in to your first full atelier project? This free YouTube class takes you step-by-step through the process of completing a project that most ateliers have you do as your very first one. It’s called a Bargue Plate. Don’t worry – you don’t have to do it all at once! Each video is about 15 minutes long, and the series has ~30 videos. You can work through them at your own pace. And by the end, you will know how to draw realistic images at a high level.

    6 Weeks: Apply for the MA in Studio Art. Now you are playing in the big-kids pool.

    This accredited MA in Studio Arts program is summers-only, has remote and in-person options, is 100% studio-based, and requires ZERO year-round obligations. Train intensively in atelier skills for 3 summers.

    If you are serious about expanding your technical art skillset without quitting your current job, this is what you need. This program will teach you how to draw and paint realistically.

    It’s not easy taking first steps towards atelier training, but the most important thing is to take a step.

    So pick one and give it a try, your future self will thank you when you are drawing realistic images!

    What steps are you taking to start your atelier journey? Let me know in the comments below!

  • Color Theory Lesson Plans

    Color Theory Lesson Plans

    Teaching color theory lesson plans can be lots of fun with the right curriculum resources. But sometimes there is so much contradictory information out there, it’s hard to give your students consistent content. These 3 color theory lessons will help your students learn color theory in a cohesive way.

    color theory lesson plans

    Lesson #1: What is Chroma?

    In this video color theory lesson plan, students will discover what chroma means and how it applies to different colors. If they have ever tried to mix a red before, but it just wasn’t the right red, this video lesson will help them discover what went wrong.

    Students will also learn about the opposite of chroma, neutral. By discovering what a neutral is and how it is used, it will expand students’ ability to apply nuanced color theory in their own artworks.

    Want more great color theory information? Read this article on colors opposites on the color wheel.

    Lesson #2 The Conflict Between Value and Chroma

    Now that students know all about chroma from Color Theory Lesson Plan #1, they can start to evaluate how it comes into play when painting objects that are both very bright and very chromatic. There is an inherent conflict between the two, and this color theory lesson helps students navigate making difficult color choices when painting.

    Want more great color knowledge? Read this article on Colour Theory

    Lesson #3 Color Temperature & Hue

    This color theory lesson plan helps students discover how the words “warm” and “cool” are used to describe different temperatures when it comes to colors. Did you know that EVERY color is both warm AND cool? This is just one of many key takeaways they will get from this video lesson.

    There is so much to learn about color, it is impossible to sum up in just a handful of color theory lesson plans.

    However, the School of Atelier Arts has tons of resources to help you learn and teach art at the highest levels. Check out our lesson plans in our store for even more great content.

    What color concepts do your students struggle with learning? Let me know in the comments below.

    Want to learn even more about color theory? Check out this article about why black and white aren’t on the color wheel:

  • How to Paint

    How to Paint

    Do you want to learn how to paint? Here is how special art schools, called “ateliers“, teach painting to students.

    how to paint

    Learning How to Paint Starts with Drawing

    Everyone who enters an atelier for the first time just can’t wait to start painting! And then they find out that before the school will teach them color work, they have to acquire some realism drawing skills first.

    Many students see drawing as something to get through in order to get to the “good stuff”, but it is important to note that a good portion of painting IS drawing. If you can’t make a shape correctly with a pencil, there is little chance that you will be able to do so with a relatively unwieldy brush.

    One key to learning how to paint is to make sure your drawing is in tip top shape.

    Not to mention that as you start to master the art of drawing, it is easy to fall in love with the beauty and challenge of it. When I was training with Juliette Aristides, she had to MAKE me start painting. I was completely enamored with drawing by the time I really started to understand the nuances of it, and I needed a nudge to move on to the next phase of my art education.

    If you truly want a rock-star art education, you need to learn how to draw first. Luckily for you, the School of Atelier Arts has online painting classes that can teach you everything you need to know to become a successful painter.

    Check out our Ateliyay! Curriculum for more great painting resources.

    atelier painting school
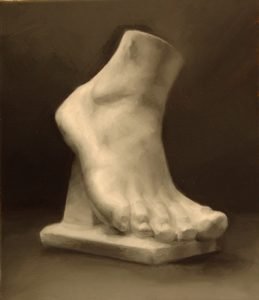
    “Foot” painted en Grisaille by Mandy Theis

    Grisaille Painting

    The next step in learning how to paint is to learn Grisaille. Grisaille means painting in black and white. It is similar to drawing in the sense that you are using lights and darks in order to create believable forms. You’re just doing it with paint now instead of pencil or charcoal.

    However, Grisaille can be frustrating because your hand is always a little bit better than your eye at this stage in your painting education.

    Drawing has trained your eye to see things much better than you used to. Drawing has also trained your hand to manipulate charcoal and pencil with nuance. Therefore, it can be frustrating to start SEE what needs to be done, but you do not yet have the experience with paint manipulation to make it happen at the level you can see it.

    In fact, this is such a common frustration that I wrote and entire article on how your hand gets better before your eye.

    Are you enjoying this article? Join our newsletter full of art education delights today!

    WarmCoolSetupEducation

    How to set up a white object to paint warm/cool

    Warm/Cool Method

    Warm/Cool painting is one of the most exciting phases of learning how to paint. By now you’ve learned to master the basics of realism drawing and how to control the medium in a fairly nuanced manner. In the Warm/Cool stage of training, you now start adding colors to your palette.

    But not too many colors.

    There are many variations of Warm/Cool painting, but the palette that I learned and teach uses titanium white, burnt sienna, and ultramarine blue.

    By limiting colors on your palette, it helps keep students from being overwhelmed while they are trying to integrate learning color with their drawing skills.

    Using the warm/cool method is also very satisfying. Even though I made this painting with only 3 colors, it feels like a full-color painting.

    painting education

    This was the stage of my own painting education that I found the most inspiring. I was learning how to paint, and all the previous drawing and Grisaille work was paying off.

    Did you know that EVERY color is BOTH warm AND cool? Read about warm and cool colors here. 

    Ready to start taking painting classes? Join our Ateliyay! Painting Bootcamp today.

    Full Color Painting

    Want to start learning full color right now? Our Yay! Color Theory Worksheets teach you how to think about and mix colors. Say good bye to cartooney coloring by mastering value, chroma, and hue in these worksheets.

    After exploring a limited color palette, the next step of your painting education is to start adding colors to your palette.

    But again, not too many colors at first. The fewer colors you have to work with, the less overwhelming it is to explore and apply your color palette.

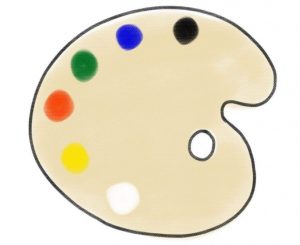
    You will start to discover what colors you really need as you go. There is a color palette, known as the Zorn palette, that is a great place to start when you are working with a full color palette for the first time.

    Zorn Palette

    Red

    Yellow

    White

    Black

    That’s it. That’s the Zorn palette, and you can get some variation of every color you might need out of it.

    Some of you might be wondering about not having blue in the palette. But in this case, black acts as the blue. If you add white to it, it will become a grayish blue.

    Start learning color today with  our  Yay! Color Theory Worksheets .

    Adding More Colors

    As you advance in our painting education, you might find that you need a stronger blue than black provides. If you just can’t live without a true blue, you can add an ultramarine blue to your palette.

    The green that is mixed with black and yellow is fairly neutral, so a Viridian Green helps artists hit more chromatic notes. If you find you can’t make your mixed green as green as you need it, Viridian Green is a good color to add to your expanding palette.

    (Want to learn where to place paint on your palette? Check out this article on How to Set Up an Oil Painting Palette.)

    learning how to set up an oil painting palette

    Once you can easily manipulate the colors in a more basic palette, there are many different palettes that can be explored. Examples include the Fletcher Palette, the Gilbert Stuart palette, and many others that artists have recorded for us in their journals and writings.

    *** Warning about jumping from palette to palette***

    Often students believe they just need that one more color to be a better painter, when really what it is they need is more experience with their current palette. The colors on your palette cannot make you a better painter. Putting in the hours practicing painting with your palette is what makes you a better painter.

    Master color mixing with our  Yay! Color Theory Worksheets .

    “Roses” by Mandy Theis, 2018

    Are you enjoying this article? Join our newsletter full of art education delights today!

    Anyone Can Learn How to Paint Realistically

    There is a pervasive myth that somehow people get bopped on the head by a talent fairy one day, and paint like Rembrandt the next.

    Well, the truth is that Rembrandt and Da Vinci and nearly any other artist working realistically had a painting education. They learned how to paint in ateliers.

    And you can learn how to paint realistically too. You simply need to go to a school that offers what is called “atelier training” such as our online Ateliyay! Painting Bootcamp. This online class offers extensive painting training that will teach you the skills you need to draw and paint anything your heart desires.

    Do you think atelier training is right for you? Tell me about it in the comments below.

    Did you enjoy this article? Join our newsletter full of art education delights today!

  • Art & Education

    Art & Education

    Are you an artist? An educator? Both? This guide will help you balance the crazy that comes with pursuing art AND education.

    art and education

    Please note that this article contains affiliate links. You can read our affiliate policy here.

    Master Your Inner Demons

    Your heart still secretly hopes to be discovered as a world-class artist, but your passions for education leads you to spend the majority of your time in the classroom. You have to put up with a lot of nonsense statements from uninformed people about how serious artists don’t teach.

    But are they right? Sometimes doubt creeps in, or the desire to work solely as an artist becomes more prominent.

    If this describes you, you are not alone. I work with educators all over the world through this MA program designed for art teachers, and the inner emotional and mental fight between being an artist or an educator is a common theme.

    Are you enjoying this article? Join our newsletter full of art education delights today!

    You Can Be Both

    You can be both at different times in your life. Or you can do neither at different times in your life. You can do just art or just education at different times in your life.

    The key to calming the inner turmoil is to own whichever path you are on while you are on it, and to recognize that you can change paths as the seasons in your life change.

    If you are choosing to teach in a classroom and not make art, recognize that it’s ok to focus on teaching right now. Maybe this is the place in your journey where you really grow and master the art of teaching, and that is a wonderful thing.

    If at some point in the future you want to pursue art primarily, you can change your priority. And that’s ok too. You are not a fraud of an educator if you take a time-out from teaching to focus on making art.

    You don’t have to do everything all the time. Accepting that you are actively choosing to let go of something for a while (not forever, not permanently, just for now) helps you master the inner demons. It also enhances the joy in the path that you are currently choosing with thought and purpose.

    Want to start atelier training? Join our Ateliyay! Painting Bootcamp today!

    Master Saying No in Both Art & Education

    You receive an invitation to a figure drawing session. Someone wants you to join the state art education association board. Ooo! A group show invite! Your principal offers to pay for you to get your MA degree (LoL, I know, I know, but it does happen sometimes.)

    Remember the “Master Your Inner Demons” thing we were talking about a few paragraphs ago? This is where it applies. If you are owning being an educator, join the state art association or pursue the advanced degree. Say no to the others. It is not their turn.

    But… but… what if you miss out on something?

    The fear of missing out is real. But what is rarely part of that conversation is what you are missing out on by pursuing too much at once. Your time and energy become more fragmented with every “yes!” you issue in your life. The inner conflict between being an artist or a teacher grows with every activity that is not in line with your current stated purpose.

    Instead of seeing the invitations you turn down as missed opportunities, consider framing them as distractions. Focus on how lucky you are to be able to dedicate your precious time to the thing you care most about right now. Consider how much more deeply you can value the experiences you do commit to when excess opportunities are discarded.

    In order to have meaningful growth in the path you are currently choosing, you have to commit to it. You have to give it space and time to breathe. And that means saying no to the things that are out of season.

    Are you enjoying this article? Join our newsletter full of art teacher resources today!

    The Art of Mastering Your Time

    Time is our most precious resource. If we are lucky, we get about 4,000 weeks on this Earth to spend. But there is no amount of money that can buy back even a minute of your life once it is spent.

    Time is a resource to be guarded carefully and spent wisely. And nothing is more costly than the ever-present threat of time creep. In both art and education, it is incredibly challenging to keep time creep out of our professional lives.

    Want to start atelier training? Join our Ateliyay! Painting Bootcamp today!
    Time Creep

    We’ve all battled time creep… This student needs me an extra 15 minutes after school. That potential painting commission client wants to meet me for coffee an hour away. This class turned in all their work late so now I have to grade at home. That gallery wants me to reframe all 15 drawings. This new school policy means I have to document all my lessons in a completely different format, and on and on and on.

    Even worse, there is a heroism complex in both art and education that rewards allowing time creep to run rampant such as working 10 hour days, grading until midnight, and sacrificing weekends with our friends and families to “catch up at work”.

    It is imperative to wrestle back control of our time in order to find a balance with art and education that actually works for us and brings fulfillment to our lives. Because it doesn’t matter if we decide this is the season for being an artist or an educator if we have no time with which to pursue our choice meaningfully.

    Work expands to fill the time we allot to it. Therefore, it is essential to put firm boundaries around work hours and guard outside hours with all our might.

    I am going to say something that is somehow controversial in education:

    If you are contracted to work from 7am-3pm, you work from 7am-3pm. Period.

    If 3pm rolls around and you still have grading to do. Too bad. It will have to wait to be done until tomorrow.

    Maybe you change your grading system to be simpler so you can do it faster during your allotted time during the day for grading.

    Alternatively, you grade during teaching time.

    Or maybe you decide that being present for teaching students is more important than grading during the class period and adopt an anti-grading system of everyone gets an A.

    Or possibly you don’t grade that assignment at all.

    The only unacceptable choice is to allow this task to eat up your precious and non-renewable life energy that is earmarked for other things. How are you going to truly learn in your MA program if you are ignoring your own assignments to grade those of your students?

    It is little wonder that art teachers are constantly pining for more time to create their own artwork considering that the standard in education is to work all day, come home and work, and then work weekends. It’s madness. Uncompensated madness. Life-energy consuming madness.

    Remember, those 4000 weeks are the only weeks you will ever have. When they are spent, they are gone forever. Make sure that when you do spend them, it is done intentionally to fulfill your stated purpose.

    If you are feeling conflicted about whether you are an artist or a teacher, try taking back some of your time to make the space you need to explore these different aspects of yourself.

    Are you enjoying this article? Join our newsletter full of art education delights today!

    Art & Education

    You can focus on being an art teacher today, and an artist in a different season in your life. Or vice-versa. You can create space for your stated focus by saying “no” to the constant shiny objects. You can make the intentional choice to extract hours from the time-creep monster so that you have meaningful time to spend on your art. All of these are deliberate choices that are available to you. Ultimately, however,  it is up to you to choose whether they are worthy of pursuing.

    Do you ever feel conflicted about being an artist or an educator? Share your story in the comments below.

    Did you enjoy this article? Join our newsletter full of art education delights today.

    Want to start atelier training? Join our Ateliyay! Painting Bootcamp.


  • 3 Ways to Start Your Atelier Art Training Right Now

    3 Ways to Start Your Atelier Art Training Right Now

    So, you finally found this type of art school you were looking for your entire life but didn’t even know existed. It’s called an Atelier, and you want to start atelier training right away.

    If you study hard for a few years, you can learn how to paint and draw like the Old Masters. Just like your heart always desired.

    If you are half as excited as I was when I first made this discovery, I know that you just can’t wait to start atelier training.  Here are 3 ways to start your atelier art training RIGHT NOW.

    1. FREE ONLINE YOUTUBE BARGUE PLATE COURSE

    The very first project you will be asked to complete in many ateliers is called a Bargue Plate. This is basically a mastercopy of another artist’s work. By copying these plates, you learn significant drawing techniques.
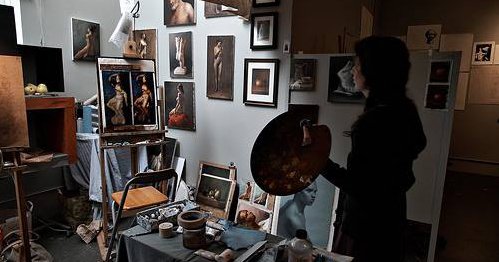
    However, it is important that you copy them correctly in order to get the most learning out of the experience. That’s why I made this free online Bargue Plate Drawing Course.

    This course covers everything you need to know in order to draw a Bargue Plate using atelier skills. Everything from what materials to use to which line to draw first is covered in-depth.

    This course is a great place to start atelier training. And best of all, you can start right this very minute.

    Here is a complete list of materials for drawing a Bargue Plate.

    2. FREE LESSON PLANS FROM SCHOOL OF ATELIER ARTS

    You may already be aware of our blog (hint: you’re reading it right now), but did you know we also provide free lesson plans? Although these lessons were originally designed to help art teachers share knowledge in their classrooms, they can be used by anyone desiring to expand their realistic drawing and painting skillset.

    Lesson plans that will help you start atelier training include how to create a “block-in” (the first and most important stage of a drawing) and cover other significant atelier topics including proportion, values, shapes, and more!

    If you just can’t wait to start learning atelier skills, simply download our thorough slide presentations and following along.

    start atelier training

    START YOUR ATELIER TRAINING WITH OUT ONLINE ATELIYAY! PAINTING BOOTCAMP

    If you are truly serious about pursuing atelier training, you need to train with a master artist for an extensive period of time. That’s why we created this online atelier, Ateliyay! Painting Bootcamp.

    This online painting class meets 2x each week with an atelier trained instructor to help give you individualized guidance on your paintings.

    There are precorded lessons you can follow along with at your own pace, as well as extensive additional lessons given by atelier instructors as individual student problems arise.

    Best of all, you can start training with us any time, as the program enrolls you for one month. You can start and stop whenever you like.

    IT’S NEVER TOO LATE TO START ATELIER TRAINING

    Sometimes students are intimidated to take their first tentative steps into atelier training. But I know that all students can experience wild success who put in the time and effort to learn these skills. There is no reason to delay your atelier journey. Initiate your training today with these quick-start options and enjoy the process of becoming a technically-skilled artist.

    Have you taken the first step in pursuit of atelier training? Let me know in the comments below.