Art Education Archives - School of Atelier Arts

Category: Art Education

Art teachers unite! These articles help art teachers discover resources in art education.

  • Painting Composition: The Key to Making Better Art

    Painting Composition: The Key to Making Better Art

    Creating a stunning painting composition isn’t just about the rule of thirds or following mathematical formulas. In fact, those rules aren’t very helpful, and can even harm your compositions, if you don’t understand the big underlying concepts of pictorial design.

    A well-balanced composition draws viewers in, directs their eye through the piece, helps to tell a visual story, and makes the overall artwork much more compelling.

    Yet, many artists struggle with composition. They tend to bumble about placing things on their canvasses awkwardly, and inevitably end up with paintings that feel like something is always “off”.

    If this sounds familiar, you’re not alone. I’ve been teaching students realistic drawing and painting skills for more than a decade, and composition continues to be the most difficult aspect of painting for students to grasp.

    Fortunately, mastering composition is possible with guidance from a knowledgeable atelier-trained instructor. So, let me be your guide today through the world of pictorial composition and let’s discover what good painting composition is, what it isn’t, and how to practice your composition skills effectively and elevate your art.

    The Yay! Composition Worksheets from The School of Atelier Arts are designed to teach you our foolproof system for creating powerful, dynamic compositions—without frustration or guesswork… Get yours today!


    Mastering Painting Composition

    Creating a strong composition is the foundation of compelling artwork. Whether you’re drawing a portrait, designing an outdoor plein air painting, or even arranging abstract forms, understanding composition helps guide the viewer’s eye and enhance visual impact.

    The following key composition techniques offer a structured approach to building complex and visually engaging artworks. By practicing these methods, artists can develop a deeper understanding of how visual elements work together to create harmonious compositions. Mastering these principles allows for greater artistic confidence and the ability to communicate ideas more effectively – and intentionally – through art.


    painting composition s curve

    Sweeps & S-Curves

    Sweeps and S-curves are powerful compositional tools that create movement and unity within a piece. By learning to recognize how flowing these implied curves lead the viewer’s eye through a composition, you can make your painting feel dynamic and cohesive.

    Learn how to harness the natural elegance of curves to create rhythm and harmony in your artwork. Whether used subtly in a portrait, or prominently in a landscape, sweeps and S-curves are a useful tool for achieving a visually engaging composition.

    painting composition big shapes

    Big Shapes & Spots

    One of the most effective ways to simplify composition is by focusing on the big ideas, such as big shapes and spots. These concepts help students to identify dominant forms that establish structure and balance within an artwork.

    By organizing a composition around major shapes before diving into details, artists can create a solid compositional foundation that delivers clarity for the viewer. Learning to place key shapes and focal spots strategically helps create compelling visual hierarchies, guiding the viewer’s attention carefully through the piece.
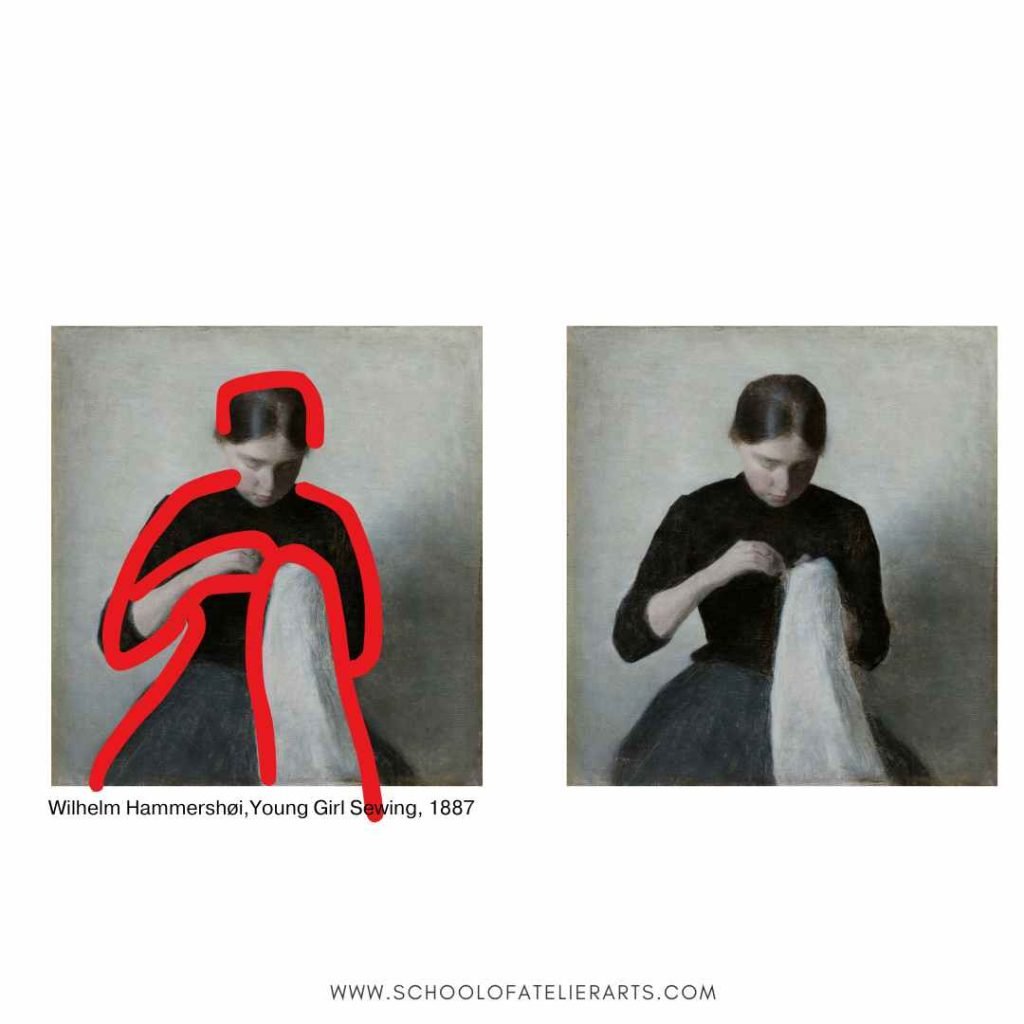
    Designing with Edges & Silhouettes

    Edges and silhouettes play a crucial role in how we read the big ideas of a composition. Edges and silhouettes can work to your benefit, or detriment if you are not careful.

    If you want something to read cleanly and clearly, strong contrasts of light on dark or dark on light create clear edges.

    If you want your subject to read calmly and mysteriously, low contrasts of light on dark or dark on light create subtlety and nuance in a painting composition.

    Carefully placed edges and silhouettes create visual statements. By studying how two different colors meet (Softly? Harshly?), students can gain mastery and use edges and silhouettes to control the visual feeling of their compositions.
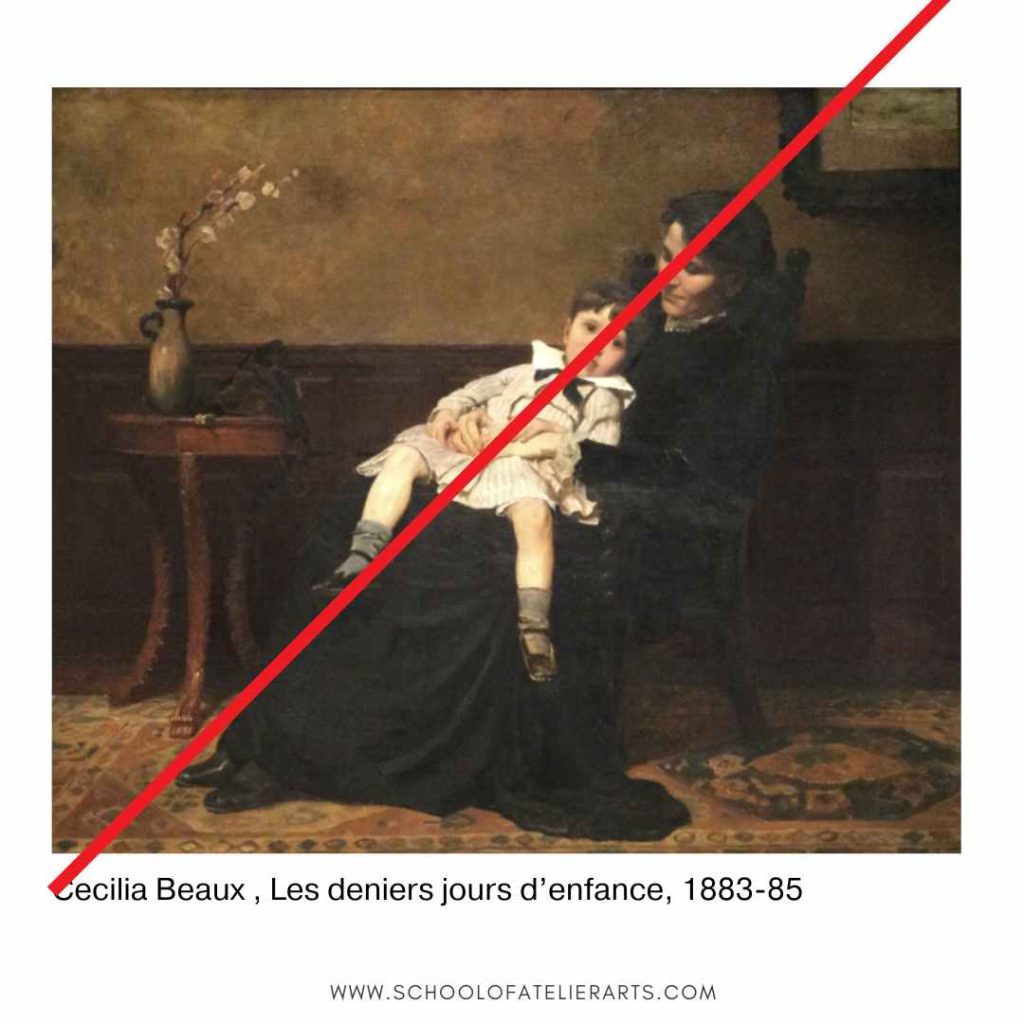
    Linear Ideas in Painting Compositions

    Understanding the power of lines in composition is fundamental to creating visually engaging artwork.

    Sometimes the more subtle applications of this concept are difficult for students to see at first. Identifying and utilizing diagonal, vertical, horizontal, and converging lines in a composition creates visually effective structures in paintings.

    Lines not only guide the viewer’s eye, but also establish guidelines for placing other elements in the composition.

    Designing your painting composition around lines also contributes to the mood of your painting. Diagonal lines create energy and movement, verticals evoke strength and stability, while horizontals hint at calmness.
    The best way to learn how to effectively learn these concepts is to practice seeing how other artists used them. This is exactly what our Yay! Composition Worksheets teach students how to do. Through deliberate worksheet practice, students learn how to use these linear elements to create balanced and dynamic compositions.

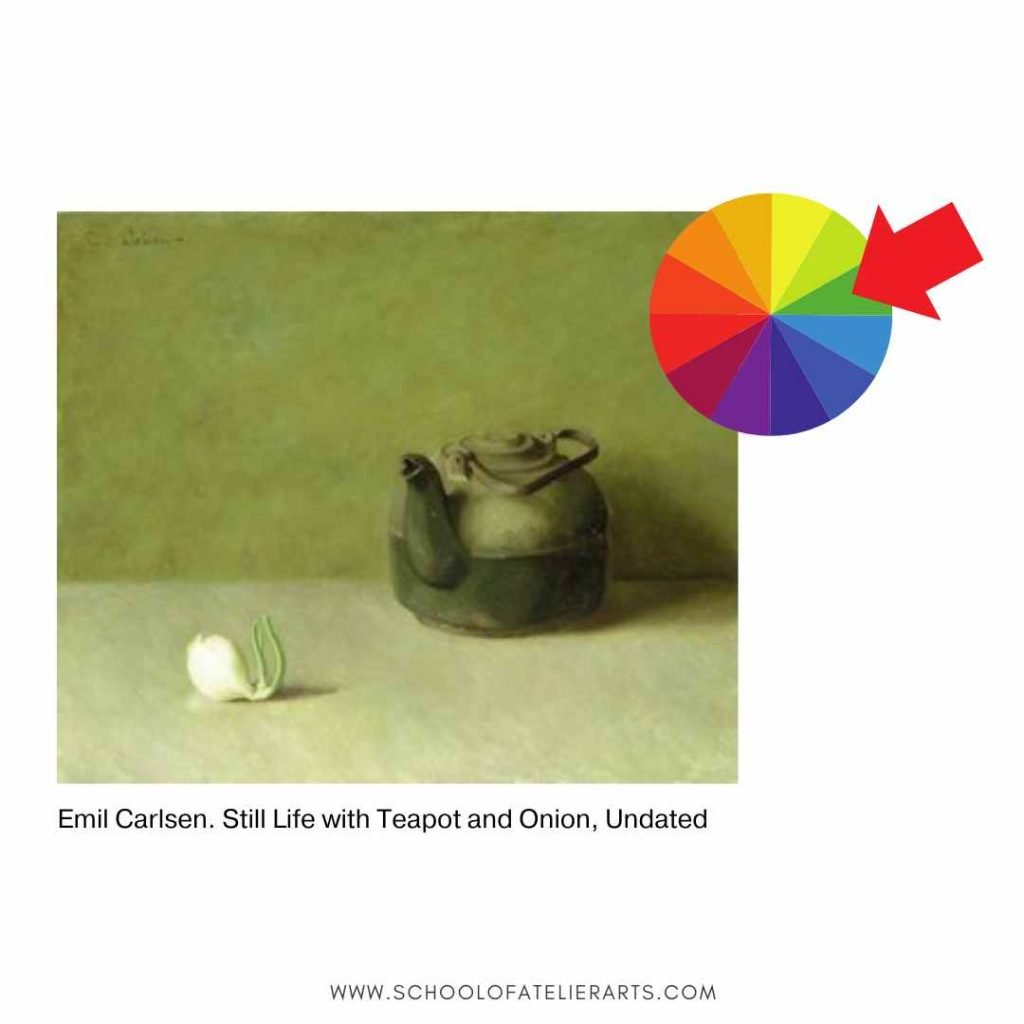
    Color/Value of a Picture

    Color and value are essential compositional tools that impact the overall feel and readability of an artwork. Students need to learn how to recognize and apply dominant color schemes and value structures to strengthen their compositions.

    By understanding how a picture can be light, medium, or dark, artists can control the mood of their painting compositions.

    By practicing identifying the overall color of a picture, students can manipulate their hues to evoke specific feelings from their viewing audience.

    Mastering seeing a picture holistically, including its overall value and hue, allows artists to control the emotional and visual impact of their compositions with confidence.

    Painting Composition: Putting It All Together

    Mastering composition involves the ability to integrate multiple elements seamlessly. That’s why our popular Yay! Composition Worksheets have students practice each element individually, and then combine them together. By practicing the ideas presented in this article, artists can create compositions that are visually captivating.

    Deliberate composition training ensures that students can apply their knowledge in real-world artistic scenarios, leading to more confident and effective artwork.
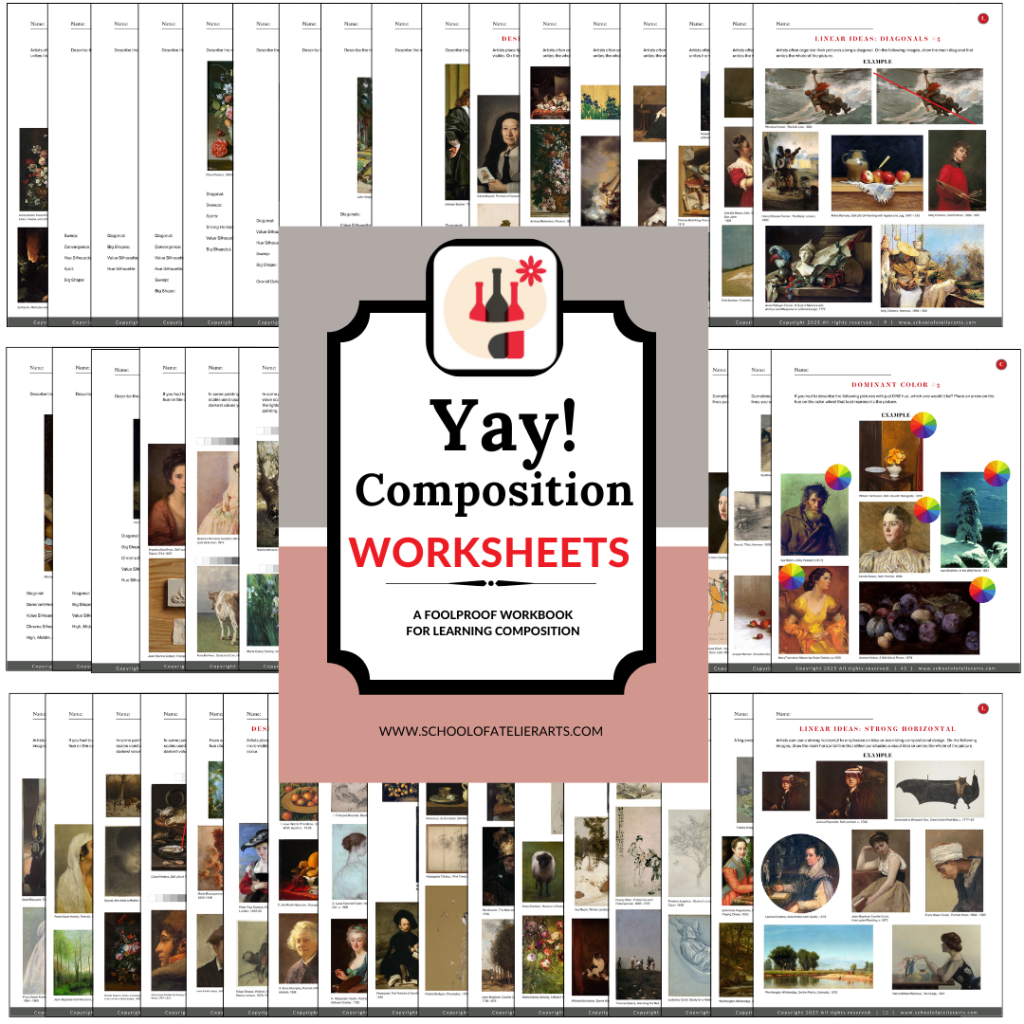

    Why Artists Love our Yay! Composition Worksheets for Learning Painting Composition

    Artists and educators alike have seen immediate improvements in their work using our popular worksheets. Here’s what some have said:

    “My students were always intimidated to try and draw realistically. With the help of the School of Atelier Arts resources, I now know how to help them experience success with their drawings every time! Their confidence is through the roof!”
    Nina Dirienzo, High School Art Teacher

    “I am extremely thankful for these resources because they offer skill-based lessons that give my students a strong foundation for their artworks.”
    Kelsea Fischer, Elementary Art Teacher


    What’s Included in the Yay! Composition Worksheets?

    When you purchase the Yay! Composition Worksheets, you get:

    • 50+ digital worksheets that guide you through the composition process step by step.
    • A Spanish translation for educators teaching bilingual students.
    • A structured approach that makes learning composition easy and practical.

    These worksheets are designed for artists of all skill levels, whether you’re a beginner struggling with composition or an experienced artist looking to refine your skills.


    Start Creating Stronger Painting Compositions Today

    If you’ve been struggling with composition, it’s time to stop guessing and start mastering it. The Yay! Composition Worksheets provide a clear, repeatable method that works every time. No more frustration. No more uncertainty. Just strong, confident compositions in every painting you create.

    Get instant access to your digital worksheets:
    ➡️ BUY NOW

    30-Day Money-Back Guarantee – If you don’t love the worksheets, we’ll give you a full refund. Simply write to help@schoolofatelierarts.com with your refund request, no questions asked.

  • Realistic Portrait Drawing

    Realistic Portrait Drawing

    Realistic portrait drawing is one of the most rewarding yet challenging skills an artist can develop. Whether you are a beginner struggling with basic proportions, or an experienced artist looking to refine your technique, this article will help you to draw better realistic portraits.

    Capturing a likeness requires a solid understanding of structure, feature placement, and head proportions.

    And it also means ignoring silly rules that are often taken as inalterable truths. (Eyes halfway on the head anyone? Rarely is this true unless you are sitting eye height with your subject and facing straight on.)

    portrait drawing by mandy theis

    Portrait drawing by SAA Director Mandy Theis.

    Many aspiring portrait artists find themselves frustrated when their drawings don’t resemble their subject, or feel “off” in ways they can’t quite pinpoint. This frustration is common because portrait drawing requires not just artistic inspiration, but also technical knowledge and deliberate practice. Without a clear process, mistakes like incorrect feature placement, wonky proportions, and awkward stiffness in the final portrait are inevitable.

    But there’s good news: realistic portrait drawing is a teachable skill, and with the right approach, anyone can master it. You heard me. REALISTIC PORTRAIT DRAWING IS A LEARNED SKILL.

    The reason many people believe they cannot draw well is because they have previously tried and it didn’t work out so well. But very few people have access to teachers that have portrait drawing skills. The problem wasn’t you. The problem is that you didn’t have access to someone with the skillset you wished to learn.

    Lucky for you, I can teach you EXACTLY how to make realistic portraits. You can see my own portrait work on my Instagram @mandyfineartist https://www.instagram.com/mandyfineartist.

    I am also a licensed art teacher. So not only do I know how to create realistic portraits, I know how to teach you efficiently how to make them too.

    (In fact, helping people learn realistic portraiture is exactly why I created the Yay! Portraits Worksheets. These worksheets help artists overcome the most common struggles and make lifelike, accurate portraits with confidence.)

    In this guide, we’ll explore the major challenges artists face when drawing portraits, the essential principles that lead to realistic results, and how structured practice can accelerate your portraiture drawing skills.

    Why Realistic Portrait Drawing Feels So Difficult

    Many artists, even those skilled in other areas, find portrait drawing uniquely challenging. That’s because the human face is deeply ingrained in our psyche—we are naturally wired to recognize faces and notice even the slightest inaccuracies. When something is off, we can sense it instantly, even if we don’t know exactly what went wrong.

    Here are the most common reasons for portrait drawings fails:

    1. Overall Head Proportions Are Inaccurate

    The human head has a giant mass at the back of the skull that is bigger than the face portion of the head. But students often ignore this mass, essentially cutting off the entire back of the head which is still visible in a front facing portrait. Without understanding that this mass exists, and relating it to the proportions of the face, it’s easy to make the skull too wide, the forehead too small, or the chin too long. One of the most frequent mistakes beginners make is not correctly measuring the height-to-width ratio of the head, which results in absurdly placed features.

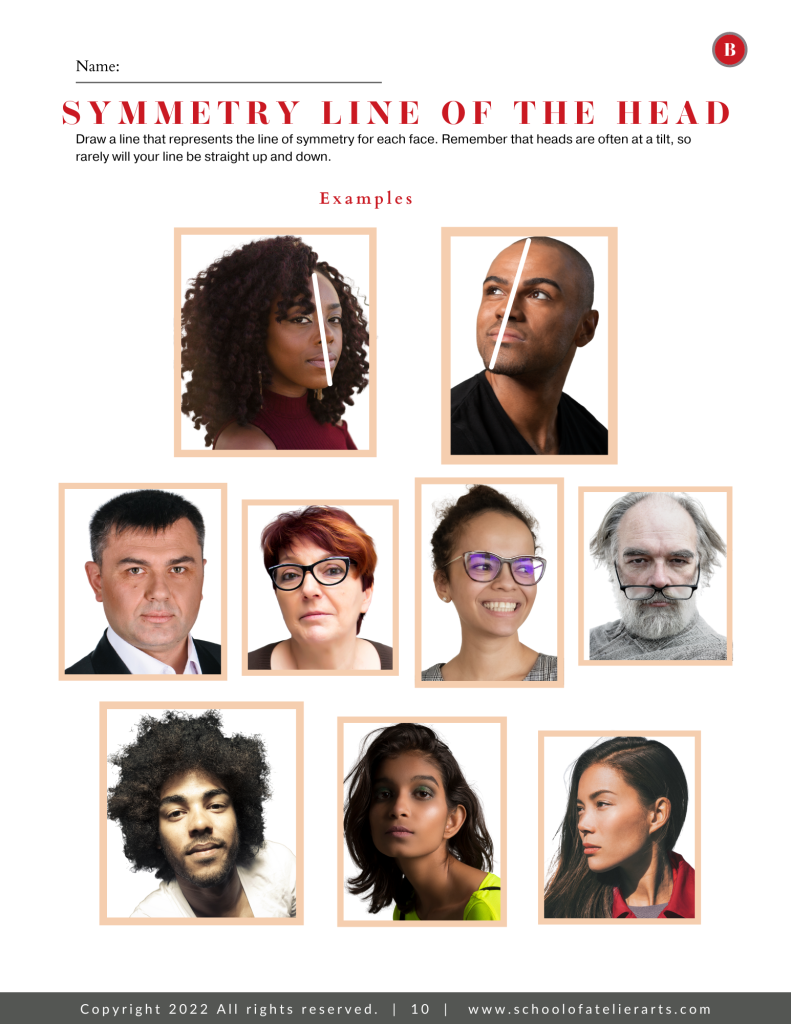
    You can practice finding the mass of the back of the head with our Yay! Portrait Worksheets, like the sample worksheet below.

    2. Feature Placement Destroys the Likeness

    One of the biggest mistakes artists make is focusing too much on individual details—like a beautifully drawn eye or a well-rendered nose—without first ensuring that all features are placed correctly in relation to one another. LIKENESS IN A PORTRAIT COMES FROM THE FEATURES BEING THE CORRECT DISTANCE FROM EACH OTHER. Even if you perfectly render each feature, if their placement is off by just a little bit, the portrait won’t look like the subject.

    For example:

    • Eyes that are even slightly too high or too far apart will make a face look like somebody else.
    • A nose that’s just a fraction too low can make the subject look older than they really are.
    • A misplaced mouth can completely change the expression, making the portrait feel “wrong.”
    • Misaligned features make the head feel like it is turning in different directions within the same portrait.

    This is why getting feature placement right from the start is essential for capturing a likeness.

    If your drawing looks “off,” chances are it’s a feature placement issue, not a rendering issue. Even slight misplacements can destroy a likeness, so it’s crucial to observe and measure distances between features carefully.

    While placement “rules” about the eyes being halfway on the head can help establish general structure, be wary of the many dubious rules batted about in drawing books about the heights, widths, and general locations of individual facial features.

    Some people have wide-set eyes, others have narrow noses, and lips come in countless shapes and sizes. This is what makes each face unique. Instead of following rigid formulas, artists must train their eyes to observe these variations and adjust their drawings accordingly. Capturing these subtle differences is what truly brings a portrait to life.

    In fact, all of these so-called “rules” are mostly nonsense. They represent an idealized version of a human face—one that almost no real person actually matches exactly. If you try to force every face into these proportions, you’ll end up with generic portraits that fail to capture the unique individual qualities of your subject.

    Instead, use the ideal figure as a reference point to analyze how your subject deviates from the idealized version. Is their nose slightly shorter? Are their eyes wider apart? Does their chin extend lower than the “right” proportions suggest? Recognizing and emphasizing these differences is what makes a portrait look like the actual person rather than just another generic face.

    Getting the relationship of features to each other right is one of the hardest things for students to learn. It takes a lot of practice to get it right. It also helps to have a system, like what I teach in the online Ateliyay! Painting Bootcamp, to get it right.

    I also teach this system for feature relationships in our Yay! Portrait Worksheets like the one you see below.

    3. The Angle and Gesture of the Head Are Incorrect

    A common reason portraits feel “off” is that the tilt or angle of the head hasn’t been properly established. Even a small mistake in the tilt of the brow line, nose, or mouth can create an unnatural or distorted look. The head is rarely perfectly straight-on, so artists must learn to accurately depict head angles to create believable portraits.

    Our Yay! Portraits Worksheets help train artists to identify and accurately draw these head directions.

    Want to to be better at realistic portrait drawing? You need a structured approach.

    The key to improving portrait drawing is not just more practice—but the right kind of practice. Instead of drawing the same way as always, while making the same mistakes over and over, artists need a step-by-step process that teaches them how to analyze, construct, and refine portraits that actually look like the person they are trying to draw.

    That’s where the Yay! Portraits Worksheets come in. These worksheets provide a systematic approach to portrait drawing, covering essential techniques that eliminate guesswork. By following guided exercises, artists can build their skills faster and with greater accuracy.

    What Makes the Yay! Portraits Worksheets So Effective?

    1️⃣ Mastering Overall Head Proportions – Learn the rules of facial symmetry, spacing, and the skull’s structure to ensure every portrait starts with a solid foundation.
    2️⃣ Getting Feature Placement Right – Follow a structured method to correctly position eyes, nose, mouth, and ears to ensure accuracy and likeness.
    3️⃣ Understanding Head Angles – Learn how to construct heads at different angles so portraits feel natural and not awkward or stiff.
    4️⃣ Focused Practice – Each worksheet targets specific problem areas, so you improve efficiently without getting overwhelmed.

    Unlike simply copying a reference photo, these worksheets teach you how to “see” like an atelier-trained artist.

    Start Drawing Realistic Portraits Today!

    If you’re tired of struggling with portraits that don’t quite look right, you don’t have to keep guessing. With the Yay! Portraits Worksheets, you’ll get the exact step-by-step guidance you need to start drawing realistic, lifelike portraits right away.

    📥 Download the Yay! Portraits Worksheets now and transform your portrait skills today!

    Your best portraits are just a few practice sessions away.

    Want more?

    If you are ready to take you and your art seriously, the best way to learn how to draw is under an atelier-trained artist. That is what our online Ateliyay! Painting Bootcamp gives you. You will get to practice your portraiture under the guidance of a true expert. Learn more about our online Ateliyay! Painting Bootcamp here.

  • FREE Online Color Theory Class

    FREE Online Color Theory Class

    Color theory can be one of the most confusing yet rewarding aspects of painting, but not with our FREE online color theory class.

    If you’ve ever struggled with muddy colors, contradictory color wheels, or mixing the perfect red, you’re not alone!

    As a licensed art teacher and atelier-trained artist, I’ve seen firsthand how frustrating color mixing can be. And you know what? It doesn’t have to be so hard.

    This FREE color theory training will break it all down, from understanding the power of brown to uncovering the truth about warm and cool colors. (Hint: what you were taught might be wrong!)

    Plus, if you stay in the class until the end, there’s a special bonus waiting for you. Let’s dive in and make sense of color once and for all!

    My Journey with Color Theory: Before and After Atelier Training

    Before I truly understood color theory, I struggled with achieving the technical ability I envisioned having. One of my early paintings, which I was incredibly proud of at the time, had all the hallmarks of an artist struggling with color mixing: the skin tones were muddy, the colors lacked clarity, and I didn’t have a clear goal in mind when I was mixing. While it was the most realistic portrait I had ever created at that point, something about it didn’t feel right—it didn’t match the image in my head.

    Everything changed when I studied in an atelier, a traditional art training method that focuses on realism and technical precision. Atelier training isn’t typically found in universities. Instead, art training including color theory classes is passed down from master to student, preserving centuries of artistic knowledge. Through this structured learning process, I finally cracked the code of color theory.

    Ready to practice your color theory? Our popular Yay! Color Theory Worksheets will help you practice your newfound color theory knowledge.

    The Key to Understanding Color: A Systematic Approach

    If you’ve ever mixed red and yellow to make orange, only to find that your orange wasn’t the RIGHT orange, you already know that color mixing isn’t as simple as basic formulas. The secret to mastering color is breaking it down into three fundamental elements:

    1. Value – How light or dark a color is.
    2. Chroma – The intensity or saturation of a color.
    3. Hue – The actual color family (red, blue, yellow, etc.).

    By understanding these three elements, you can mix colors with intention and avoid common pitfalls, such as unintentional muddy notes.

    Why White and Black Aren’t Really Colors

    One of the biggest misconceptions in color theory is that white and black are standalone colors. In reality:

    • White is not a color but rather an extremely light version of a hue, such as a very light yellow or blue.
    • Black is not a color but an extremely dark version of a hue, like a deep red or blue. This is why black clothing items sometimes don’t match—one may have a cooler (blue) undertone, while the other has a warmer (red) undertone.

    If you’ve ever used a black marker and added water to it, you may have noticed that it separates into different colors. That’s because black is made from pigments of other hues, just in their darkest form.

    Here is a post explaining these white and black color concepts in depth.

    Read more about White Paint and Black Paint.

    The Mystery of Brown—Solved!

    A common question I receive is, “Why isn’t brown on the color wheel?” The answer? It actually is! Brown is simply a darker, lower-chroma version of orange. Once you understand how to manipulate value and chroma, you’ll see that brown is just a neutralized orange.

    How to Mix Brown Paint

    A Path Forward in Color Mastery

    While understanding these concepts is an important first step, true mastery comes with practice. Atelier training provides a structured approach to learning and applying color theory. Structured approaches help artists move beyond trial-and-error mixing.

    If you’ve ever felt frustrated that your artwork doesn’t match what’s in your head, know that there is a path forward! Through the right training and consistent practice, you can develop the technical color theory skills to fully express your artistic vision without compromise.

    Ready to take your color skills to the next level? Keep practicing, keep studying, and most importantly—keep painting!

    Get your Yay! Color Theory Worksheets today to practice what you learn in this free color theory training: https://shop.schoolofatelierarts.com/products/yay-color-theory-worksheets

    Want more great art knowledge? Read our other posts from our Department of Aesthetics Blog.

  • Drawing Assignments for High School Students

    Drawing Assignments for High School Students

    These drawing assignments for high school students are perfect for helping your students learn how to draw at a higher level.

    Drawing Assignments to Help Your Students Draw People Better

    So your students want to draw people that look “real”, but they never come out quite right.

    Most often this is because students focus on drawing details like eyelashes or strands of hair.

    For successful figure drawings, however, students need to draw the most important concepts first: proportion and gesture.

    Teaching your students how to draw people with correct proportions is a game-changer for getting their figures to look “real”.

    Gesture is equally important, because without it drawings of people look like wooden statues.

    This free drawing assignment lesson plan shows your students how to get consistently good proportions and figure gestures in their drawings.

    drawing assignments for high school students

    Want to start atelier training? Join our Ateliyay! Painting Bootcamp today!

    Drawing Assignments that Teach Your Students About Edges

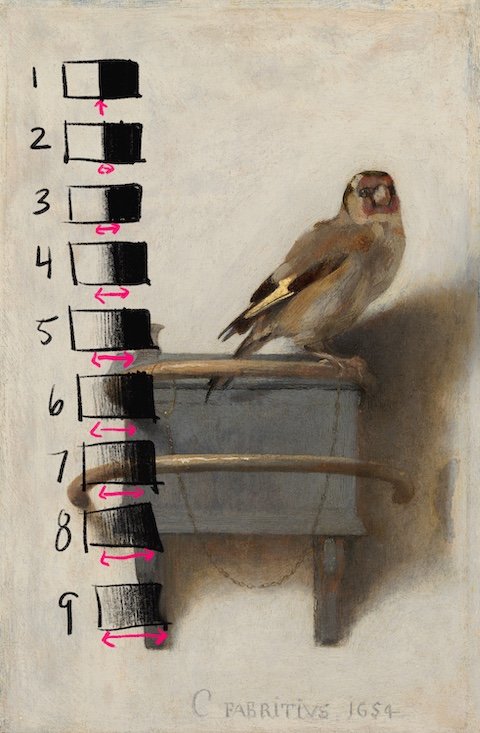
    Edges are the often-neglected but oh-so-important workhorse of drawing. Understanding and applying good edgework in drawings takes students to the next level.

    Often, we art teachers spend a lot of time teaching drawing assignments about values – how light and dark to shade things in a drawing.

    But JUST AS IMPORTANT is what happens when one value meets another value.

    Does the light value meet the dark value abruptly? Or is it a soft transition?

    Edgework is actually quite a simple drawing skill to teach, and this free edges drawing assignment will help your students learn how to master the concept.

    drawing assignments for high school students

    Drawing Assignments that Teach Texture

    Texture is a skill that is always impressive when seen, but often a confusing concept for students.

    “Shiny” is perhaps the most impressive texture of all to see in a drawing, and is actually one of the easiest textures to achieve in a short drawing assignment.

    In this free drawing lesson, students will discover how to manipulate values to create a drawing of a shiny object.

    Drawing Assignments for High School Students

    Looking for more great drawing ideas? Check out these blog posts:

    Drawing Worksheets

    Portrait Drawing Secrets

    Name Your Shapes When Drawing

    Want to start atelier training? Join our Ateliyay! Painting Bootcamp today!

  • How to Draw a Person

    How to Draw a Person

    Have you always want to learn how to draw a person, but didn’t know where to start? This article will show you everything you need to know to draw people well.

    How to Draw People
    How to Draw People Worksheets

    How to Start

    The temptation for many people when they are drawing people is to first make the eyes, or nose, or something that is relatively small.

    But this is a mistake.

    When drawing people, you always want to start with the biggest ideas first, and then work your way to the smaller ideas.

    And the biggest idea you need to capture first, before even THINKING about drawing eyes, is the overall proportion of your figure. How tall compared to how wide is your figure?

    Artists often indicate the height of the figure by marking the bottom of the feet and the top of the head.

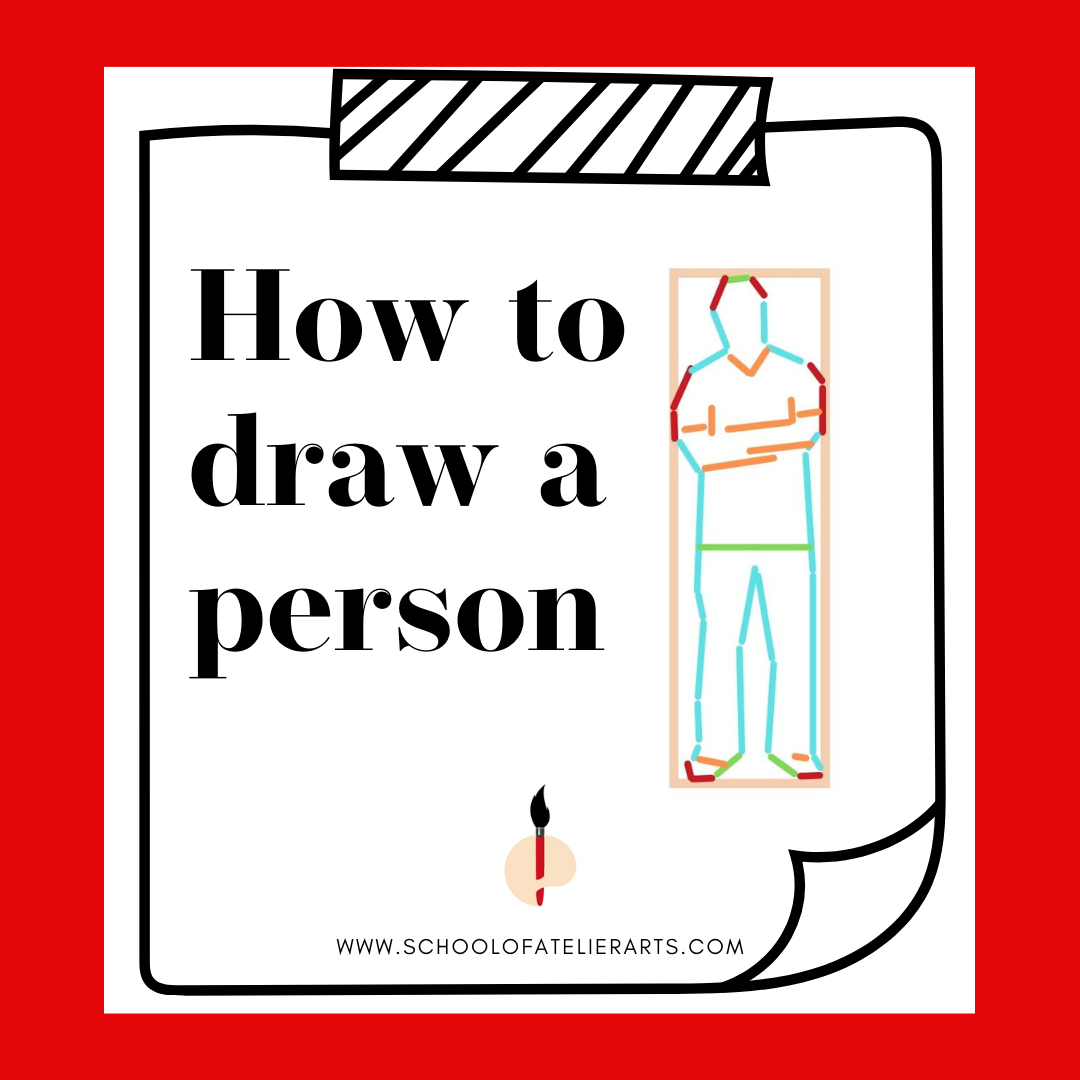
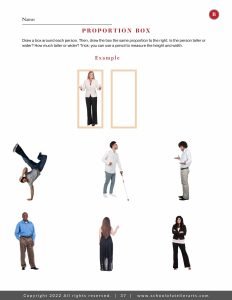
    For the width, artist sometimes use what is called a “Proportion Box”. It is a box that represents the height and width of the person.

    proportion box figure drawing
    Proportion Box Figure Drawing

    Do you want fool-proof, step-by-step guidance on how to draw a figure? Our Yay! People Worksheets will teach you everything you need to know to draw believable figures.

    Envelope Method

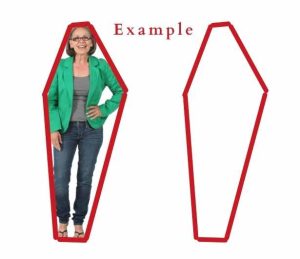
    Once you have determined the height and width of your figure, you can get a little more specific with the shape. To do this, use a technique called an envelope.

    An envelope contains a small number of straight lines that incapsulate the overall shape of the person you are trying to draw.

    Envelopes are advantageous because they help you find the bigggest overall shape before getting distracted by details.

    The envelope also helps you start to organize how one major point, say the elbow, relates to another major point like the head.

    Look at the image below, and notice how this relatively simple envelope shape helps describe the entire person that is being drawn.

    envelope how to draw a person

    Major Anatomical Landmarks

    When learning how to draw people, it is important that you know how to identify important anatomical landmarks. This takes both knowledge and practice.

    Our Yay! People Worksheets help students learn how to identify important anatomical landmarks and practice finding them in a variety of poses.

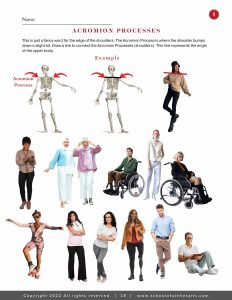
    Key landmarks to learn include the greater trochanter, symphysis pubis, sternal notch, and acromian processes.

    It is important that you not only know what these landmarks are, but how to find them on the human figure. Students often mistake the greater trochanter for the hip, for example. That is why it is important to practice finding key landmarks over and over again so that you can internalize them.

    (Need help learning anatomical landmarks? Our Yay! People Worksheets include dozens of examples to help you learn and practice how to find key landmarks on the human figure.)

    anatomical landmarks of the figure
    Learn key landmarks when drawing figures.

    Refine Your Drawing of a Person

    Once you have your major proportions and shape set, and your key anatomical landmarks identified, you can start to refine your drawing.

    Again, it is best to always work from the biggest ideas to the smallest. The shapes of the arms and legs, for example, are much bigger than an eyelash. Be mindful of what is physically the next biggest idea when learning how to draw a person and it will help you.

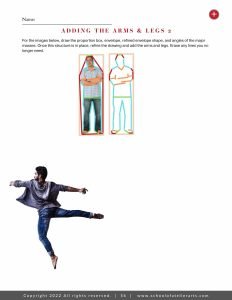
    how to draw a person in stages

    Next Steps for Drawing People

    By starting with a proportion box and envelope and then working to smaller ideas such as the individual arms and legs, you are well on your way to drawing believable people.

    It can be challenging to learn how to draw people, which is why the School of Atelier Arts created these extensive worksheets to help people learn. ANYONE can make believable people that has access to good knowledge and quality practice, and that is what these people drawing worksheets provide.

    Once you master drawing people, you might want to learn more about portraits in order to bring your drawing of people to the next level. Check out our articles on portraiture:

    Teaching Portraits

    5 Mistakes Art Teachers Make When Teaching Portraits

    Yay! Portraits Worksheets

    How do you draw people? Let me know in the comments below.

  • Art Teacher

    Art Teacher

    What is an art teacher? Discover who art teachers are, what they do and how they teach in this article.

    Art Teacher
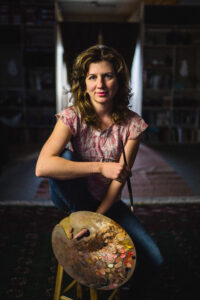
    Art Teacher Mandy Theis

    Types of Art Teachers

    An art teacher is someone who teaches art. Simple enough. But there are many different kinds of art teachers in the world.

    K-12 Art Teacher: In the United States, K-12 art teachers work with students who are between approximately 5-18 years old. These art teachers teach within both public and private schools. In order to teach in a public school in the United States, you must have a teaching license.

    University Art Teacher: Professors, Associate Professors, Adjunct Professors, etc. all fall under this category. These are people who teach art to university students. Often, an M.F.A. degree is required for these positions. Please note that an M.F.A. (Master’s of Fine Art) is DIFFERENT from an M.A. (Master of Art) degree. An M.F.A. is usually a 60 credit program and is a terminal degree, equivalent to a PhD in other fields. An M.A. degree is usually a 30 credit program and is equivalent to Master’s Degrees in other fields.

    Community Art Teacher: These art teachers usually have varying qualifications, but are not required to have any specific license. Often, they teach at local community or arts centers. Sometimes they teach out of museums (although the other types of art teachers on this list may also teach in museums).

    Artist Teachers: These art teachers are practicing artists that also share their knowledge through courses. They often teach out of their studio space to a small group of committed students. They are often invited as artists in residents to schools that do not have a licensed art teacher.

    Are you enjoying this article? Join our newsletter full of art teacher delights for resources, news, and ore delivered directly to your inbox.

    Art Teacher License in the United States

    Art education licenses are issued on a state-by-state basis and have varying requirements. Many states have different options for acquiring a license.

    The traditional route is to pursue an art education undergraduate degree at an accredited university.

    Alternative routes offered by many states involve acquiring a Master’s Degree through an approved program, and/or completing an online training program, and/or having an undergraduate degree in art and then completing an internship program of some kind. Requirements vary by state. But with the ongoing teacher shortage, many states are making licensure easier than it used to be.

    If you are interested in an alternative route to an art education license, The School of Atelier Arts cannot personally advise you. Please reach out to the education department in your state for specifics of alternative licensure. The School of Atelier Arts is not responsible for any actions an individual may take using the information provided in this article.

    Are you looking for art teacher resources? Check out our Ateliyay! Curriculum here.

    What Do Art Teachers Do?

    Art teachers teach other people how to make art, how to look at art, and how to appreciate art. They are responsible for helping a student grow their skillset and their mindset.

    Being a teacher of any kind is a physically, mentally, and emotionally challenging task. Unlike some desk jobs, there isn’t really an option to zone out if you are having a bad day. Your students need you every day and expect the best from you every day.

    Typical Day for a K-12 Art Teacher

    A typical day in the life of a licensed, high school art teacher in the United States might look something like this:

    • Teach anywhere between 5-9 periods each day, depending on the length of each period.

    • Prep lessons for each class, including materials which is a big part of the job for art teachers. Materials management varies depending on which medium you are teaching. Art teachers have many systems in place for handing out and returning art supplies.

    • Maybe get a planning period if you haven’t sold it to the district. (Many teachers do this for a little bit more money because teacher pay in the U.S. is often not very good. You teach an extra class for extra pay, but you do not get a planning period.)

    • Active shooter drill? Help terrified kids practice hiding under their desks to avoid getting shot. Not a fun part of the job.

    • Field emails from students who want to turn in work late, parents who want you to change a student’s grade, administrators that want you to work for free painting a mural for the school, etc. Sometimes, teachers receive threats for teaching on topics that parents disagree with, even if it is in the curriculum.

    • Take student work home with you to grade over the weekend. There is not enough time during the school day to grade hundreds of assignments before report cards are due.

    • Run into your former students who gush about what it meant to them that they had you as an art teacher. (Note: this is why many art teachers stay in the profession despite the other challenges.)

    Are you enjoying this article? Join our newsletter full of art teacher delights for resources, news, and ore delivered directly to your inbox.

    How Do Art Teachers Teach?

    Art teachers employ many methods for sharing their art knowledge with students. There are some philosophies that are becoming more common for public K-12 art teachers.

    Atelier Training: Atelier training is a method of learning art that helps students master technical skills. Technique is emphasized so that students can create any artwork that is in their head or heart without compromise.

    Choice-Based Art Education: Also known as TAB. It is a method of teaching art that encourages independent exploration of studio spaces and materials.

    Traditional: This often, but not always, includes a teacher giving a demonstration of an art technique or project, and students then working on their own version of that project.

    Cookie Cutter: This is a controversial method in many art education circles. It involves a step-by-step process to make an artwork where the goal is to have every student’s project look the same at the end of the lesson. This method is most often in use by elementary teachers to help students learn how to cut, glue, and otherwise control materials.

    Are you thinking about becoming an art teacher? Are you an art teacher? Let me know what you think about this article in the comments below.

    Want to start atelier training today? Join our Ateliyay! Painting Bootcamp today!

    Join our newsletter full of art teacher delights for resources, news, and ore delivered directly to your inbox.

    Are you looking for art teacher resources? Check out our Ateliyay! Curriculum here.

  • 22 Inspirational Quotes for Art Teachers

    22 Inspirational Quotes for Art Teachers

    Teaching is a little more challenging than it was even a year ago. These quotes for art teachers will help you dig deep.

    Feel free to share wherever they bring you joy :)

    art teacher quotes

    Enjoying these quotes? Check out our other art teacher quotes posts.

    art teacher quote

    art teacher quote

    Did you enjoy this post? Join our mailing list for great articles, lesson plans & more delivered directly to your inbox.

    art teacher quote

    art teacher quote

    Did you know that Mark Twain was a huge supporter of artists, and even wrote a letter of introduction for painter Charles Ethan Porter?

    art teacher quote

    Want to start atelier training? Join our Ateliyay! Painting Bootcamp today!

    art teacher quote

    art teacher quote

    Did you enjoy this article? Join our mailing list for great articles, lesson plans & more delivered directly to your inbox.

    art teacher quote

    Enjoying these quotes? Check out this post with 17 Quotes for Art Teachers

    art teacher quote

    art teacher quote

    Like what you are discovering here? Check out our Ateliyay! Curriculum for more great art education content.

    art teacher quote

    art teacher quote

    art teacher quote

    Want to start atelier training? Join our Ateliyay! Painting Bootcamp today!

    art teacher quote

    Like what you are learning? Check out our Ateliyay! Curriculum for more great art education content.

    art teacher quote

    art teacher quote

    art teacher quote

    art teacher quote

    art teacher quote

    art teacher quote

    art teacher quote

    What inspirational art teacher quotes would you add to this list? Let me know in the comments below.

    Want art delights delivered directly to your inbox? Join our popular newsletter today!

    Want to start atelier training? Join our Ateliyay! Painting Bootcamp !

  • Capsule Wardrobe for Art Teachers

    Capsule Wardrobe for Art Teachers

    Ok art teachers, let’s talk fashion.

    Some of us are super into it, others not so much. And probably the majority of us wish we could look put together but simply don’t have the time or know-how as all of our brain resources are monopolized by our students.

    I was definitely in this last group, and then something magical happened. I discovered capsule wardrobes, and suddenly art teacher fashion was within my grasp.

    (Please note that this post contains affiliate links.)

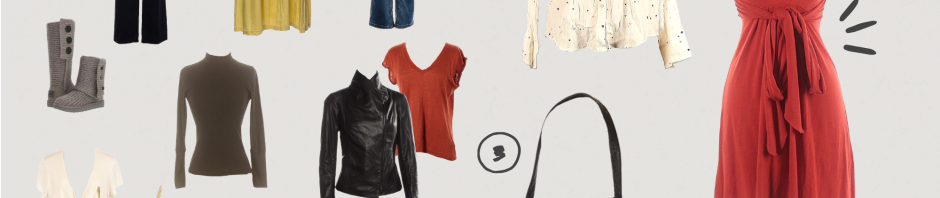
    art teacher clothes

    WHAT IS A CAPSULE WARDROBE?

    Capsule wardrobes encompass a small number of mostly neutral pieces that all go together. The idea is that you can pull any top and bottom out of your closet and they will look great together. There are many different ways to put together a capsule wardrobe, but I really like the guidelines of the 333 Project, and have selected just 33 items to make up my fabulous art teacher wardrobe.

    (If you don’t have many basic pieces in your wardrobe, try using an online thrift store like Thredup to purchase high quality pieces at art teacher prices.)

    HOW A CAPSULE WARDROBE MAKES ARE TEACHER LIFE WAAAAAAY EASIER
    1. Less decisions to be made. You already make 100 kazillioin decisions every day as an art teacher, there is no need to burn out on decision making before you even leave the house.
    2. Less expensive. Let’s face it, we art teachers don’t get paid all that well. A capsule wardrobe keeps your costs down and makes sure everything in your closet gets used and used well.
    3. Less waste. A capsule wardrobe prevents magpie syndrome. When you ask yourself if a piece will fit into your capsule wardrobe and go with the things you already own, it keeps fast fashion impulse buys at bay.
    4. Effortless style. When you plan for everything in your capsule to go together, you look put together. Even when you just had that one class that the whole school dreads and they somehow trampled tempera paint all over the floor of your room. You will look fabulous when you sheepishly approach the custodian (if you have one) and fess up to needing an extra floor cleaning.
    ART TEACHERS CAPSULE WARDROBE NEEDS

    What makes an art teacher capsule wardrobe different from all the other examples out there? Well, let’s face it – art teachers have special art teacher needs.

    SPECIAL ART TEACHER NEED #1 Most wardrobe capsules are so neutral that they are no fun at all for art teachers. No one, and I mean NO ONE, loves color more than art teachers. This is why we need our own special kind of wardrobe capsule – one that allows us to embrace our color impulses.

    SPECIAL ART TEACHER NEED #2 We get paint and markers and ink on things. We need a wardrobe that can take high damage points and still be not just presentable, but fabulous!

    YOUR ART TEACHER CAPSULE WARDROBE

    First, pick 2 colors that you just love to include in your wardrobe. I use a cherry red and cheery yellow because primaries just scream “ART TEACHER!” to me. Although I am using red and yellow in my example, you should pick colors that YOU just love. Simply switch out pieces labeled “Color #1 and Color #2” with your preferred colors.

    Maybe you are a more low key art teacher and prefer a neutral blue or rust. Or maybe you are the kind of art teacher that is known to sport a boa or two and go for hot pink and orange!

    You don’t need to overthink your two color choices. In fact, one of the best ways to choose your colors is to simply open your closet door and pick the two colors you already have the most of in your wardrobe.

    SOME CAVEATS

    CAVEAT #1: I am a straight woman, and my wardrobe examples come directly from my own closet. For men and non-binary folks, you can still use the wardrobe suggestions with common-sense substitutions. Trade the dresses out for button down shirts, the skirts for t-shirts, etc.

    CAVIAT #2 Although I use examples from my own closet, each person will have their own style preferences. For example, I use a fuller striped skirt with pockets in my example, because I hate feeling restricted in my movement and adore pockets. But if you have a more modern sensibility, you might prefer a striped pencil skirt instead. Or if you have a more hippy vibe, you might prefer a floor length flowy striped skirt. Or maybe you hate skirts all together and substitute the striped skirt for striped slacks. The key is to not try to match each example exactly, but rather to go with the main themes (stripes and a bottom piece) and apply it to a style that you adore.

    CAVEAT #3 Before purchasing anything new for your wardrobe, take stock of what you already have. Find pieces that you already own that make great matches for the suggested art teacher wardrobe capsule. If you do decide you need some additional pieces, consider buying higher quality pieces. You can get some amazing high-end pieces made from quality fabrics that will last a long time at online secondhand stores if you are on a budget. (An as an art teacher, I’m going to go ahead and assume you are on a budget.)

    I’m a huge fan of the online secondhand store Thredup, and if you use this link for your first purchase, we both get a free $10 to spend. Art teacher win-win!

    Want to start atelier training? Join our Ateliyay! Painting Bootcamp today!
    art teacher clothes
    THE ART TEACHER CAPSULE WARDROBE
    1. Neutral Stripe Bottom. Patterns are fun! Picking a neutral pattern will guarantee it goes with everything else in your capsule wardrobe. So, when you are fumbling around at 4:30 in the morning because you promised your before-school art club you would do clay but haven’t prepped for it at all and have a million other decisions to make you can literally grab any top you blindly feel for in the dark and it will look great with your striped bottom piece.
    2. Color #1 Skirt. As with any light value colors, it’s probably best to avoid wearing this one on wet media days. But it makes a great colorful splash for less-messy art teaching days. Make sure to consider the height of your students when selecting this skirts, especially if you teach littles.
    3. Your Favorite Jeans. For those clay days when you are granted special permission to wear jeans to school. Or for any art teachers out there whose admins realize that a dress code for grown adults is a load of nonsense. *Note* If jeans are banned at your school, try black jeans. Somehow these often get a pass.
    4. Color #2 Dress. So you are giving an art history lesson on the storied past of true vermillion and want to dress the part a la Miss Frizzle. This colorful staple is just what you need to integrate your look with your lesson.
    5. Neutral sweater Dress. I lost the belt to this dress a long time ago, and a good thing too! because now I get to splash it up with color simply by adding a scarf. Or a belt like a normal person.
    6. Color #1 Fun Dress. Shimmer up your wardrobe by having at least one piece that embodies a touch of flair. I personally love wearing this yellow dress because I feel like I’m on a safari. I have dreams of taking my students on a field trip to the zoo in this dress + cargo jacket.
    7. White Collared Shirt with Small Pattern. Nothing is scarier to art teachers than a white piece of clothing. Will it make it through first period? Lunch duty? It’s pretty stressful. Wearing white is a surefire way to spend the day guarding your shirt with zeal. That’s why art teachers need a special kind of white shirt – one that camouflages potential disasters. For hiding potential paint/marker/crayon/pencil marks, I love this mostly white shirt with colorful hearts all over it. Or ARE they all hearts? You don’t know, do you?
    8. Sacrificial White Shirt. White is just such an important color for a capsule wardrobe, so I’ve included, one, just one, plain white item. Get a nice cheap second hand white shirt that you allow to get messy. Maybe put a mark on it yourself – it’s like a ding in your car, once an imperfection is there, you won’t treat the sacrificial white shirt so preciously. Thredup is a great place to get a high quality, low price sacrificial white shirt.
    9. Neutral Cami. Camis make the process of taking off work clothes and putting on comfy sweater super quick, and therefore it is indispensable.
    10. Color #1 Cami. So you want to get away with wearing a light value color, but want to protect it from the impeding disasters that await light colors in an art classroom. Try a peekabo effect by layering a colorful cami underneath a sweater or button-down shirt.
    11. Grey T-shirt. Duh. You need this. Everyone needs this. Maybe grey offends you because as an art teacher you are more drawn to colors. But grey is a color too! Show it some love. The other colors wouldn’t look nearly so fun if not contrasted next to sturdy ole grey. I like this scoop neck style cotton t-shirt.
    12. Black Long Sleeve Tee. Black is one of the greatest art teacher colors because when you get acrylic paint on your shirt, you can always Sharpie over it.
    13. Pattern Long Sleeve Shirt. Channel your inner Parisian artist with this basic wardrobe staple that goes with every single bottom in your closet.
    14. Neutral Turtle Neck. Good for layering under your fun clothes.
    15. Color #2 Print Graphic Shirt. We all have a favorite t-shirt, and with an art teacher capsule wardrobe it is easy to elevate a t-shirt into something school-acceptable by pairing it with a skirt or layering it with a button down top. I love this t-shirt I had made with the name of my blog on it – Department of Aesthetics. It’s a Bona Fide Art Teacher Credential: there is a white paint stain on the upper part of the shirt. Maybe I should get a red sharpie, too.
    16. Cargo Jacket. Pockets! Lots of pockets! Perfect for teaching art projects that need gradually distributed supplies.
    17. Black Blazer with Working Pockets.  Not one of those blazers with faux pockets. Some designers have never had to confiscate kiddie scissors mid-lesson and it shows.
    18. Pull Over Sweater. A nice comfy sweater give you a place to internally retreat on those hard art teaching days. Also good for hiding certain involuntary hand gestures during pointless admin meetings.
    19. Lightweight Scarf Color #2. Brightens up your neutral wardrobe pieces and can double as a belt if you get one long enough. Bonus: A red scarf is especially good for bandaging hands of students who thought it would be fun to play with the paper cutter.
    20. Neutral Scarf. I love a very long scarf for regulating my body temperature in notoriously fickle school heating environments. I can wrap it around my body for an extra layer of sweaterry warmth, or I can drape it loosely around my shoulder for just a little bit-o-insulation. I’ve been known to wrap it granny style around my head in that one inexplicably freezing cold space that has artic-blasting air conditioning while the rest of the school is stifling hot.
    21. Stretchy Grey Fake Pants. Why wear uncomfortable real pants if you can get away with wearing these comfy pants that look like they are real? This is one of the few exceptions I have for a working-pocket rule. Comfort overrides pockets for this item.
    22. Neutral Leggings. If you are in a cold climate, these will layer to keep you warm. If you are in a warm climate and fortunate enough to have air conditioning but too much of it, these will also keep you from shivering. If you teach art to Littles who can easily look up your skirts, this is a must-have layering item.
    23. Neutral Dress Pants. For those times it might be in your best interest to look like all the other normie teachers in your building, like observation day.
    24. Statement Earrings. Because a good portion of your wardrobe is neutral, you can get away with all kinds of fun jewelry and still look very styled. But commit to just one piece. Remember, a capsule wardrobe is about simplifying the dressing process. You can’t marry everyone (at least not at the moment) so pick one piece you can really commit to.
    25. Statement Jewelry Piece #2. Some of you may like a big chunky necklace as a statement piece (my friend Cynthia at Arttechtivity has an epic one made out of color pencil nubbins!). Personally, I am tired of being punched in the face by my necklaces every time I bend over to help a student and have forgone them altogether. No matter what your jewelry preferences, this is a place to go all out and have fun with color and design and letting your art teacher fashion flag fly!
    26. 1 Neutral Belt. Imperative for feeling like you have your art teacher sh*t together. Doesn’t matter if you have belt loops or not, throw a belt on anything for instant “Yeah!”  points.
    27. Black or Gold Flats. Comfort is KING when it comes to your art teacher shoes. I want to give a special shout out to my Tieks. One advantage of a capsule wardrobe is that it encourages investment in pieces that are timeless classics, and that is what these ballet flats are. It took me a long time before I was willing to pony up for a pair, but they live up to the hype *Fair warning* they are made from Italian leather and require a break-in period during which they are quite uncomfortable. After breaking in, however, these are magical, amazing comfy shoes. Not only that, but they fold (yes, fold!) super small, making them ideal for throwing in your purse so you can always have your dress shoes on hand for that unexpected observation.
    28. Black Ankle Boots. Pick a pair that will stay on your heel when running late to your next class.
    29. Comfy Boots. I like wearing the tall UGGS with knit tops because I feel like they are just a slight dress-up notch above traditional UGGS, but are just as comfy. I also like that they can be folded down for a lower boot look, or when you need extra insulation around your ankles during those bus duty snowstorm events.
    30. Black Leather Jacket. To remind both you and your students what an art teacher bada$$ you are.
    31. Neutral Wool Coat. For keeping you and your broken heart warm after you find student artwork in the trashcan.
    32. Neutral Book Bag. So you can carry all your art teacher things to and fro.
    33. Neutral Purse. For when you have less things to carry and don’t want to look like a student. Must be big enough to hold the magic crockpot*.* If you have not experienced the joy of a hot meal at school, I implore you to add this tiny crockpot to your must-have school kit. You can literally throw frozen food from your freezer into it in the morning, and have a cooked hot meal by lunch time. This is the modern age of art teaching people! You can have a hot meal!
    SAMPLE SCHOOL YEAR WITH YOUR NEW CAPSULE WARDROBE

    Now that you have selected all your pieces, let the magic begin. Pretty much no matter how you throw your wardrobe capsule pieces together, you will get a great look. Here are examples for fall, winter, and spring showing how you can style the pieces in your wardrobe to look completely different with each season.

    Fall

    art teacher clothes

    Winter

    art teacher clothes

    Spring

    art teacher clothes

    CONCLUSION

    Although it takes some time and effort to organize a capsule wardrobe up front, the amount of energy and brain power saved makes it worthwhile. Save your sanity for the challenges at school, and let your clothes be one less thing to worry about.

    Have you ever tried a capsule wardrobe? Tell me about your experiences below.

    Want to start atelier training? Join our Ateliyay! Painting Bootcamp today!

  • 5 Mistakes Art Teachers Make When Teaching Portraits

    5 Mistakes Art Teachers Make When Teaching Portraits

    Are your students’ portraits just so-so? Here are 5 common mistakes to avoid when teaching portraiture to help you get wow-worthy work from your students.

    how to draw portraits

    Mistake #1 Bad Student Model Setup

    Nothing will kill a student drawing session faster than a bad model setup. If your model is moving and swaying, students become very discouraged very easily. Luckily, there are some easy tips and tricks for helping your model hold a pose well, even if it is their first time ever modeling.

    Manageable Pose

    First-time models will swear up and down they can hold a pose with arms over their heads, or weight all on one leg, or any number of other poses that are bad ideas. It is your job to dissuade them.

    For holdable poses, put your student models in a chair. With arms. With pillows or folded cloth on the arms, and a pillow behind the back. Tape these cushions in place so they don’t move. Have your model keep both feet on the floor (no crossed legs or ankles!), or even place feet slightly elevated on a stool for comfort.

    Point of Focus

    To keep the head from looking around the room, you need to provide your student model with a single point of focus. Ask them to pick out a small object in the room to look at, or place a piece of tape on the wall for them to focus on. Make sure that the point of focus does not require them to turn their head more than 15-20 degrees from center in either direction. Exaggerated head turns may feel easy to begin with, but will strain the neck of inexperienced models.

    Mark the Pose

    Once your model is positioned in a comfortable chair that is well-padded, mark the pose. You can do this by placing electrical tape where the arm meets the chair, the feet meet the floor, etc. These tape marks should be easy for the model to see so they can place their limbs correctly after breaks. Marking the pose allows the model to sit as close as possible in the original position when there are breaks between poses.

    *Note* Often poses settle during the first 20 minutes of their duration. It’s best to mark the pose at the END of this first 20 minutes, once it has settled. Which brings us to our final important tip about posing student models…

    Enjoying this post? Join our popular art teacher newsletter for more great teaching tips delivered directly to you inbox!

    Time the Pose

    Inexperienced models should not pose for more than 20 minutes. This is both for safety (new models often do not have the experience to know whether or not one of their extremities is falling asleep) and for the most movement-free modeling for your drawing students.

    Of course there is always movement when drawing a living, breathing creature. However regular breaks are ideal for helping your models sit still.

    A good rule of thumb is to have a model take a 5 minute break for every 20 minutes of posing. If you have block scheduling with 90-minute periods or longer, allow for at least one longer break half way through the sitting.

    By following these suggestions, you will be setting your model (and your drawing students) up for a successful portrait drawing session, and avoid one of the biggest mistakes art teachers make when they start their portraiture unit.

    Do you want help teaching portraits? Get our Yay! Portraits Worksheets today!

    Mistake #2 Dependent on Photographs

    Another common mistake I see art teachers make is depending on photographs for their students to copy. Even if the photographs are originals, using photography prevents students from developing the basic portraiture skills they need to build their drawing confidence.

    Cameras do a lot of the work for students, without them even realizing it. A photograph has already translated massive amounts of visual information from the three-dimensional world into two dimensions. This makes working from photos extra digestible for students, but simultaneously deprives them of the opportunity to choose which information to include in their portraits for themselves.

    There is a huge difference between drawing from life and drawing from photographs. This is such an important (and controversial!) topic that I’ve devoted an entire post to the question, “Why not just use a camera?”.

    If you have never had your students work from a live model before, I encourage you to give it a try. It has different challenges and different learning outcomes. When students are able to achieve solid results without a camera, it bolsters their belief in their abilities.

    If you are concerned about teaching how to draw portraits from life because you personally prefer photographs, fear not. We have lots of great lesson plans available to help you teach portrait drawing from a living model to your students.

    Accelerate your students’ learning with our Yay! Portraits Worksheets.

    Mistake #3 Too Many Light Sources

    This is a big one. It’s so satisfying to see beautiful, shaded and modeled portrait heads done by students. But if you are going to have students shade their portraits, it is important for ease of student learning that only one light source is hitting the model.

    When there is only one light source on the model, shadow shapes are the most obvious, and the ability to identify values becomes easier. It helps students rack up easy wins by correctly identifying and drawing accurate shadow shapes.

    Contrarily, many light sources often create the illusion of flattened forms and makes it much more difficult for students to identify shadows. Confusion for students nearly always leads to greyed-out portraits and frustration for all.

    How to Control the Light in an Art Classroom

    Lighting is a constant source of struggle for single artists, let alone a group of 30 novice artists. Art teachers have to be able to manage light for an entire classroom of students, which is no easy feat.

    Additionally, classrooms are often designed with multiple, competing and unwieldy light sources that can be challenging for art teachers to control. This often means coming up with creative ways to control the lighting.

    Some art teachers manage multiple light sources in their classrooms by blocking out all of their windows except for one. Others set up a spotlight in their room to focus on the model, and turn off most of the other lights, leaving one far-away light on to act as ambient light to help students see their papers.

    Every classroom is unique with its own lighting challenges, and it will likely take a few different attempts at controlling light before you narrow in on the strategy that works best for you. But it is absolutely worth applying a few light-controlling strategies to help make sure only one light source hits your model, as lighting makes a huge difference in the quality of work you can get from students.

    Ready to take your students’ artwork to the next level? Get our Yay! Portraits worksheets NOW.

    Mistake #4 No Drawing Boards

    Drawing boards are so important. In fact, they are so important I wrote this entire article on why drawing boards are essential art classroom materials.

    When students have their drawing flat on a table, it creates distortion. The bottom part of their drawing is closer to them and therefore appears larger, and the top is farther away and therefore appears smaller. Visually, this tricks students into making the top part of their drawing much too big and the bottom part of their drawing much too small.

    Drawing boards reduce the distortion be allowing the drawing to be worked on more upright. Even if you do not have easels in your classroom, drawing boards are easy to implement. Simply have students rest the bottom of the boards on their laps and lean again a table.

    Drawing boards do not have to be heavy and expensive either. You can learn more about best drawing boards for the art classroom here.

    Mistake #5 No Clear Drawing Method

    In order to teach portraiture successfully, you need to have an easy-to-understand method that breaks down complex drawing skills for your students.

    So often I see art teachers set up a model and tell students “Ok, draw!” This is unlikely to yield the results students want for themselves.

    Remember, it is your job as an art educator to teach art. This means providing knowledge and insight to help students achieve their objective. If you are teaching realistic portraiture, you need to have a method that helps students achieve this aim.

    There are many, many methods for teaching portraiture. The important thing is to stick to ONE METHOD to teach at a time. You can always teach additional approaches at another time, but avoid confusion in the classroom by focusing on just one series of steps students can take to achieve their portrait goals. You can get a free portrait teaching guide here.

    To help your students accelerate their learning you can purchase our extensive worksheets that teach portrait drawing.

    By avoiding these 5 common portraiture lesson mistakes, you can up the level of your students’ work, garner more attention for your amazing art program, and bolster the confidence of your students.

    Teaching Portraits

    Ateliyay! Curriculum

    Art Class Lesson Plan

    What mistakes do you think art teachers should avoid when teaching portraiture?  Let me know in the comments below.

  • The Portrait Drawing Secret that Every Art Teacher Should Know

    The Portrait Drawing Secret that Every Art Teacher Should Know

    Capturing a likeness when drawing portraits is one of the most difficult challenges students face in the art classroom. This one secret will make you a hero for teaching students how to make accurate portraits. Every. Single. Time.

    Please note that this article contains affiliate links.

    Learning from Forensic Illustration

    First off, I would like to give credit to the incredible work of the forensic illustrator, Karen T. Taylor, for being the first art instructor to introduce me to the significance of the concept I am about to share with you. Although I had glossed over it in my atelier training, in her book Forensic Art and Illustration she proved beyond a doubt that this one overlooked concept is THE KEY to accurate portraits.

    I strongly encourage you to read her fascinating (but somewhat morbid) book on forensic illustration. She is a world expert on creating likenesses of people when it matters most for catching heinous criminals, and identifying missing persons.

    Want to accelerate your portrait drawing skills? Get our Yay! Portraits Worksheets today!

    The Portrait Drawing Secret

    So, are you ready for the portrait drawing secret that will change your drawing life forever?

    It’s simple, really. The one portrait drawing secret you simply must know is this:

    Likenesses come from accurately representing the relationship of the features to each other.

    What does this mean, exactly?

    The key word here is relationship.

    When people draw portraits, they tend to obsess on what color the eyes are or what shape the mouth is. And while these things have some importance, they are insignificant compared to the relationship of the features to each other.

    Let’s say you draw a mouth that is EXACTLY the accurate shape of your subject, and eyes that are EXACTLY the right color. Both of these things can be perfect, but the drawing won’t have a likeness unless the distance between your mouth and eyes is accurate. Getting the correct relationship between the mouth and eyes is far more important for capturing a likeness than the shapes or colors of those features.

    Consider this simple illustration that uses the exact same shapes for eyes, nose, and mouth but changes the relationship of these features to each other. Notice how the likeness completely changes?

    Teach portrait drawing

    (Enjoying this article? Download our Yay! Portraits Teaching Guide for even MORE tips and tricks for drawing portraits.)

    Want to accelerate your portrait drawing skills? Get our Yay! Portraits Worksheets today!

    How does this help me teach portrait drawing?

    Have you ever spotted a friend really, really far away, and immediately knew it was them? You couldn’t possibly see the color of their eyes, so how did you know it was them?

    The answer might surprise you.

    It turns out that humans rely heavily on contrast for intaking visual information. When your very-far-away friend is first spotted, what you are seeing is a light and shadow pattern on their face created by their facial features.

    When the sun is overhead, the eye sockets cast a shadow on the face. The nose casts a shadow on the face. The upper and lower lips cast a shadow on the face. It is the relationship of these dark shadows to each other that create a pattern. This pattern in turn tells your human brain “That’s my friend!”

    The reason the relationship of features to each other matters so much is because humans simplify visual intake and rely heavily on patterns. It is simply too much information to take in the color of someone’s eyes, when the only information we really need to identify someone is the pattern of lights and darks created by shadows of the features onto the face.

    Want to accelerate your portrait drawing skills? Get our Yay! Portraits Worksheets today!

    Teach Portrait Drawing Like a Champ

    Getting a true likeness in portraiture is a challenging task. By spending time correctly considering the relationship of the features to each other, and recreating these relationships in their drawings, students will makes portraits with better likenesses.

    Did you find this article helpful? Download our Yay! Portraits Teaching Guide for even MORE tips and tricks for drawing portraits.

    What is your portrait drawing secret? Let me know in the comments below.

    Want to accelerate your portrait drawing skills? Get our Yay! Portraits Worksheets today!

  • 15 Minute Marketing for Art Teachers

    15 Minute Marketing for Art Teachers

    Get more of what you want for your art program, and less of what you don’t. All with the magic of art teacher marketing in just 15 minutes per week.

    Marketing? Really? Ugh. It might feel like just one more thing for art teachers to do. But you are leaving a lot on the table by NOT marketing your art program.

    Did you know we create extensive lesson plans and worksheets to help students learn realistic drawing and painting skills? Check our our Ateliyay! Curriculum here.

    Benefits of Marketing

    When you market your art program well, you are always top of mind when new money rolls in or opportunities come up.Who doesn’t want to be the first one the principal asks if they want to use up a new pocket of money or go to a special conference?

    Marketing helps people understand the importance of what you do. No one will be able to help and support you in the art classroom if they don’t know what you are about. Marketing is communicating with your adoring public, and keeping them in the loop about how awesome your art class is.

    Marketing gives you a stronger political position within the school to get what you want. When your art newsletter reaches parents, and they tell the principal how happy they are that their students are learning about Rembrandt this week, that looks good for you. Take the opportunity to ask for that special art supply you need to REALLY make the Rembrandt project special.

    Good marketing also gives you a legitimized excuse for getting out of unwanted work. “Oh, I would love to help out with [insert dumb thing someone wants you to do], but I promised parents in my newsletter that students would do Part II of the Rembrandt project and they will be so disappointed if I can’t set it up today.”

    If you give enough legitimate excuses, people will stop asking you to do busywork. Every school has *that* teacher who inexplicably gets away with things. You can be *that* teacher with good marketing.

    Ok, you are ready to give marketing your art program a go. Now what?

    Join our popular art newsletter for tips and tricks delivered right to your in box.

    Art Teacher’s Guide to Marketing Your Art Program

    Pick ONE Goal. Also known as an Ask. You may want a specific art supply, go on a field trip, want to get off a cart and into a classroom, etc. But the key here is to pick one. ONE.
    You need a targeted, precise, and consistent message for best results. You cannot scatter your focus or the focus of the people whose minds you are trying to change by bombarding them with a bajillion requests. If every time admin sees you they know that you need a bus for the art museum field trip, you are more likely to get it.

    Persistence. Once you decide on your goal, consistently ask for it every opportunity you get. You can’t expect to communicate with a power broker one time and for them to remember what it is you want. You have to make your goal known again. And again. And again. The more consistently you are able to put your Ask in front of the powers that be, the more likely you are to achieve it.

    Communicate. Social media, newsletters, billboards, art shows etc. are all great ways to communicate with your community. However, it can be way overwhelming to run a full marketing spread, and many art teachers fear the potential professional ramifications of social media.

    If you are overwhelmed by all the choices, stick to e-mail newsletters. They are so powerful. And effective. You can use services like MailChimp to make it super easy for people to sign up for your newsletter. It helps make pretty newsletters, and it is free if you have less than 2000 contacts, which most of us do.

    Target Audience. Make sure as the art teacher that you are communicating and marketing to all the right people. School board members, parents, students, principals, local journalists, local art supply stores, etc. Make sure to invite all of these people to subscribe to your mailing list. Post a link to join your mailing list on your school’s website and in your e-mail signature.

    It may be unnerving to send a newsletter to a school board member, for example. But remember, you are communicating to power brokers to show them how important art is. And get this: THESE PEOPLE WANT TO HEAR FROM YOU. That’s why they subscribed to your newsletter in the first place!

    Want to start atelier training? Join our Ateliyay! Painting Bootcamp today!

    Consistency. You can’t communicate just once. You must communicate again and again and again. How were conspiracy theories so successful at infiltrating the public mindset? Repetition. Use repetition for good by getting it into your community’s head how important art is and how cool the things students are doing in art class are. Send out a weekly newsletter and watch your power to get supplies donated and get prioritized for school funding grow.

    Before, During & After

    Not sure what an art teacher should write or post about when you are marketing your art program? This is a very simple guideline to follow. In your marketing, tell your community what you are about to do. Tell them about it while you are doing it. Tell them that you did it. That’s it, it’s actually quite simple.

    Help your students learn how to draw and paint realistically with our Ateliyay! Curriculum

    Exactly How to Market Your Art Program Step-by-Step

    Sign up for newsletter service. I recommend Mailchimp because it is free if you have less than 2000 contacts. There is a slight learning curve for using a mail service, but once it is set up you will be amazed at how easy it is. Basically you need to congregate your contacts into a list, start a new email campaign with one of their templates, upload some photos and insert a few lines of writing, and then send it out. It really is that simple.

    Still overwhelmed? I made it even easier for you. Here is a sample newsletter outline. Just follow the steps, and then send out your newsletter.

    Sample Newsletter Outline:

    1. Classroom anecdote. Ex. This week, a student accidentally spilled some paint in 3rd grade, and the whole class helped to clean it up. I’m so proud of their helping mindset.
    2. Your ask. This is where whatever it is you need help with or want funding for goes. Ex. “The art classes are so excited about our kiln fundraiser. Last week, the PTA gave us $100 towards a kiln. We now have $400 towards our $2000 goal raised! If you would like to donate money towards a kiln for the school, please send a Venmo or Zelle to the PTA account ptaaccount@yourschool.com. You can do it right now!
    3. Shout Out. Highlight a student who made exceptional art this week and why it was good. ex. “Susie’s Rembrandt project has the most skillfully drawn nose I’ve ever seen. Congratulations to Susie!”
    4. A few sentences about what you did last week. Ex. “Last week we made thumbnail sketches for our Rembrandt project. And good thing, too, as some of the students used that exercise to change their mind about how to approach the main project.”
    5. Pictures. Ex. Here are the progress pics of our Rembrandt project.
    6. A few sentences about what you are doing right now. Ex. “Today was our 3rd day working on our final Rembrandt projects. Most students finished working on their noses this week.”
    7. A few sentences about what you are going to do. “Next week, we will be writing 2 reflection paragraphs about what students learned during the Rembrandt project.”

    That’s it. Just follow this formula. Once you have your mailing system set up, it should take you about 15 minutes to put together a newsletter. It doesn’t have to be very long. In fact, 1-2 sentence paragraphs are best for skimming. But it is just long enough to make sure that you, your students, your ask, and your art program are top of mind for your parents, administrators, school board members, and local journalists.

    Congratulations! You are on your way to becoming a great marketer and advocate for your amazing art program in just 15 minutes per week!

    You might also like:

    3 Things You Need to Know About Our Master’s in Studio Art Program

    Teaching Portraits

    Free Art Lesson Plans

    5 Mistakes Art Teachers Make When Teaching Portraits

    How do you market your art program? Let me know in the comments below.

  • The Ultimate Art Teacher Gifts That Will Surprise You

    The Ultimate Art Teacher Gifts That Will Surprise You

    Do you have a special art teacher in your life you would like to acknowledge with a thoughtful gift? These art teacher gift suggestions will help you give a gift the art teacher in your life will love.

    Sub Lesson Plans

    Did you know that if your favorite art teacher is sick, that they are responsible for creating lesson plans for their substitute?

    It. Is. The. Worst.

    As a teacher, you are already super unwell, and now you have to complete work in the form of creating sub lessons in order to not be at work sick.

    And this is why these worksheet bundles are the absolute best gift you can give to the art teacher in your life.

    art teacher gift

    These ready-to-go, digitized lessons allow your favorite art teacher to stay home and get better when they are sick instead of stressing about coming up with substitute art lessons. With these lesson plan worksheets, the work is already done for them.

    These worksheets come with both English and a Spanish directions so that students can have a meaningful art lesson, even if their substitute teacher knows nothing about the subject. They are digitized so the art teacher in your life can easily email them to their administrators without dragging themselves into school.

    How often are you able to give the gift of recovery and peace of mind? That’s why these worksheets make the perfect art teacher gift.

    Are you enjoying this article? Join our newsletter full of art teacher delights today!

    An Unexpected Art Teacher Gift

    There is one item in my art teacher arsenal that is indispensable for my daily happiness. If you are looking for the perfect gift for the art teacher in your life, I implore you to give this gift a try.

    Oh sure, there are the obvious gifts. The art teacher mug, a paintbrush, or a Bob Ross wig. But if you want to shower your favorite art teacher with true appreciation, there is one gift you should give them.

    (Please note that this article contains affiliate links.)

    What is the perfect art teacher gift?

    A crockpot.

    Why a Crock Pot?

    Hear me out. This isn’t just any crockpot, this is a magic crockpot.

    It’s a mini crockpot. It’s so nice and small that it can fit in the typical largish art teacher purse.

    It can be filled with frozen food in the morning, plugged in at school, and by lunchtime a nice hot meal is waiting for your art teacher. The key here: your art teacher can have zero planning about what their lunch will be, literally stuff frozen food in their mini crockpot, and still get the joy of a heart-warming meal over their 15 minute lunch break if they get to take it that day.

    A hot meal? At school? What crazy is this? Better yet, it doesn’t violate the no-microwave rule many schools now have.

    I confess, ever since another art teacher first introduced me to this amazing device I have been a bit of a mini-crockpot evangelical. But that is simply a reflection of how indispensable this one item has become to my art education life.

    If you are looking for the perfect gift for your art teacher to show your love and appreciation, look no further than the mini-crockpot.

    What is the best gift YOU have ever received as an art teacher? Let me know in the comments below!

    Did you enjoy this article? Join our newsletter full of art teacher delights today!